| View previous topic :: View next topic |
| Author |
Message |
1320wayne1
Joined: 06 Jul 2019
Posts: 79
|
 Posted: Wed Jun 03, 2020 4:51 pm Post subject: Dodge Daytona IROC Posted: Wed Jun 03, 2020 4:51 pm Post subject: Dodge Daytona IROC |
 |
|
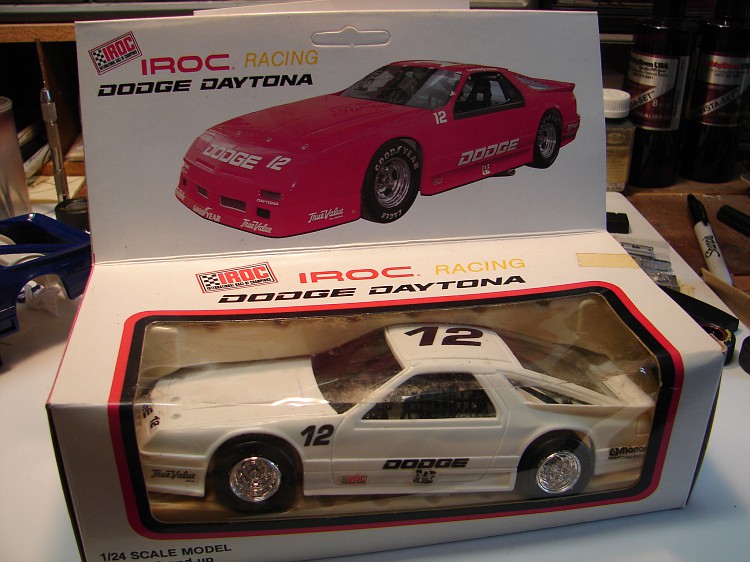
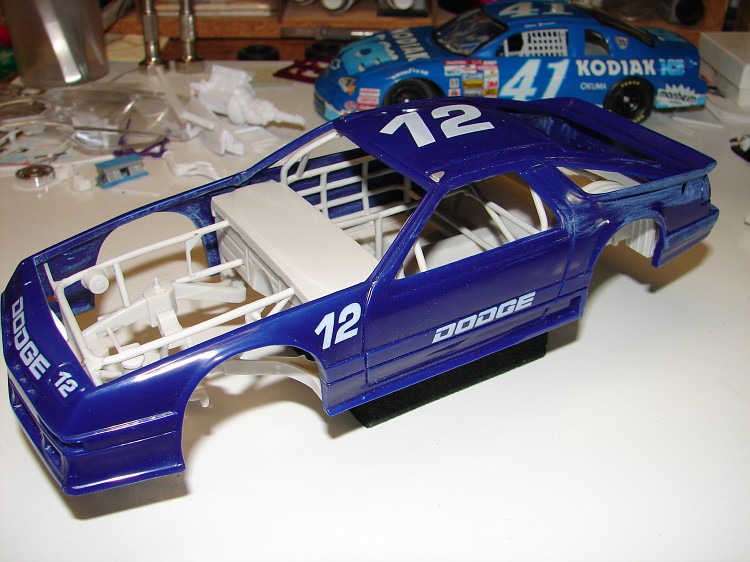
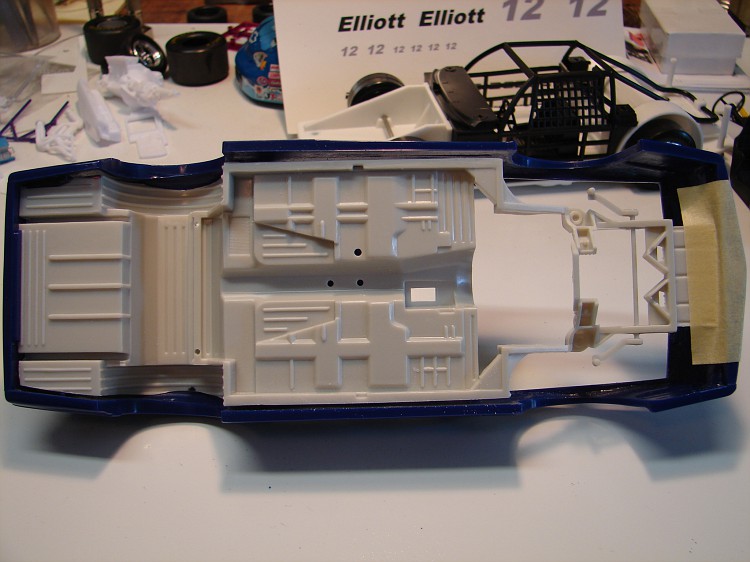
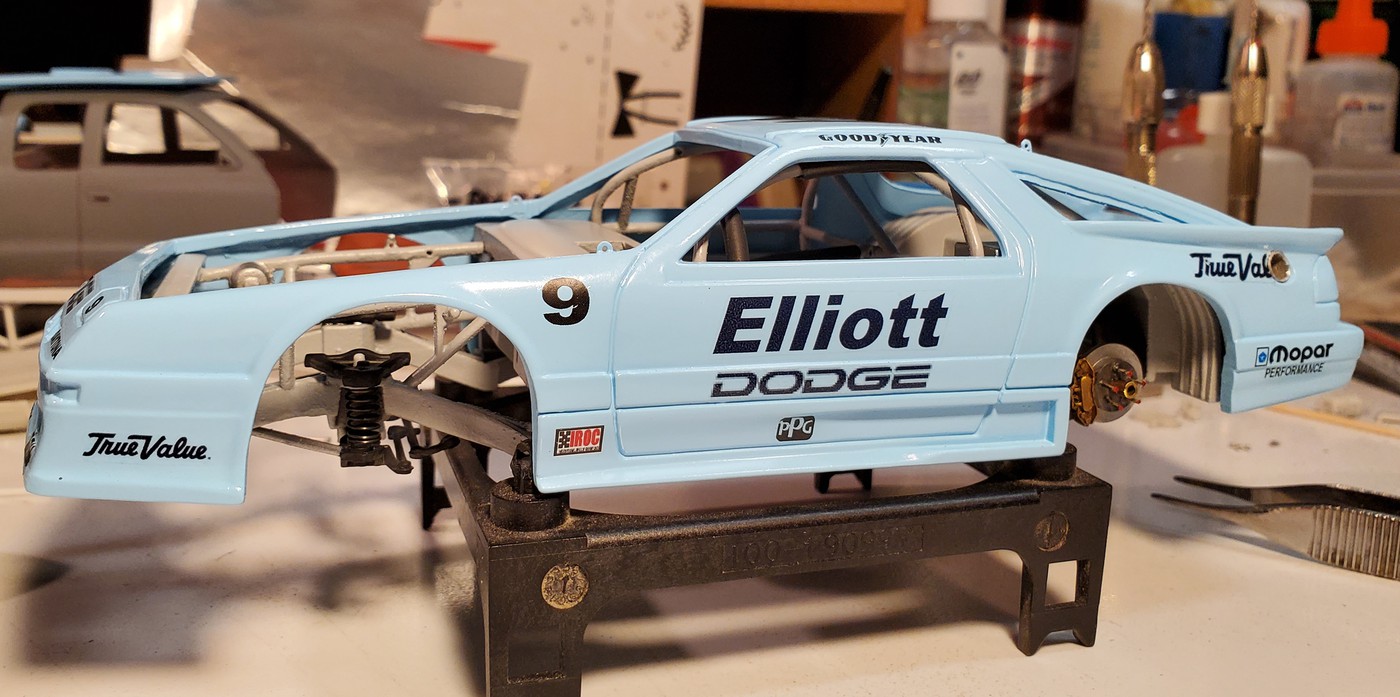
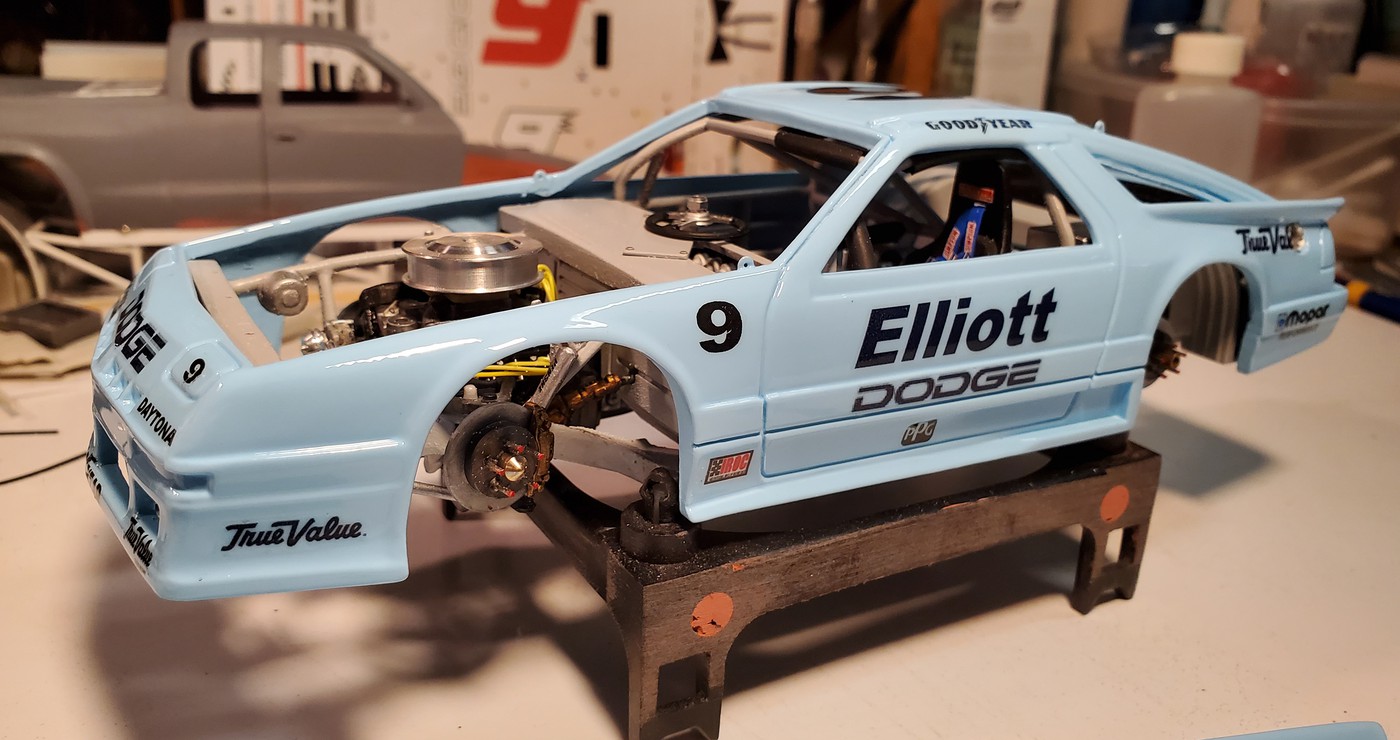
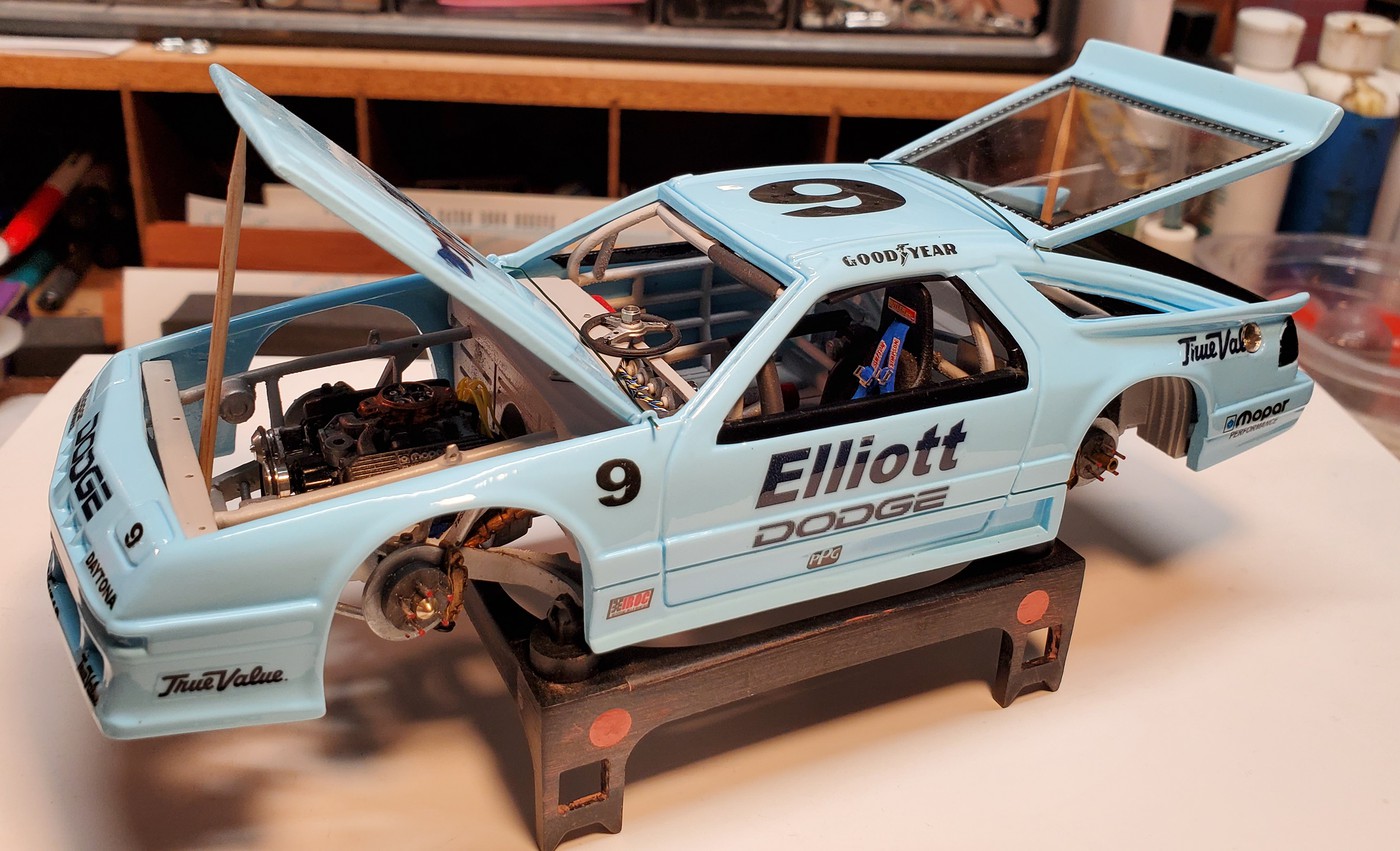
I started this build over 7 years ago and like so many other projects it stalled out. Now, I've made a mid-year resolution to dedicate myself to completing some older, started builds.
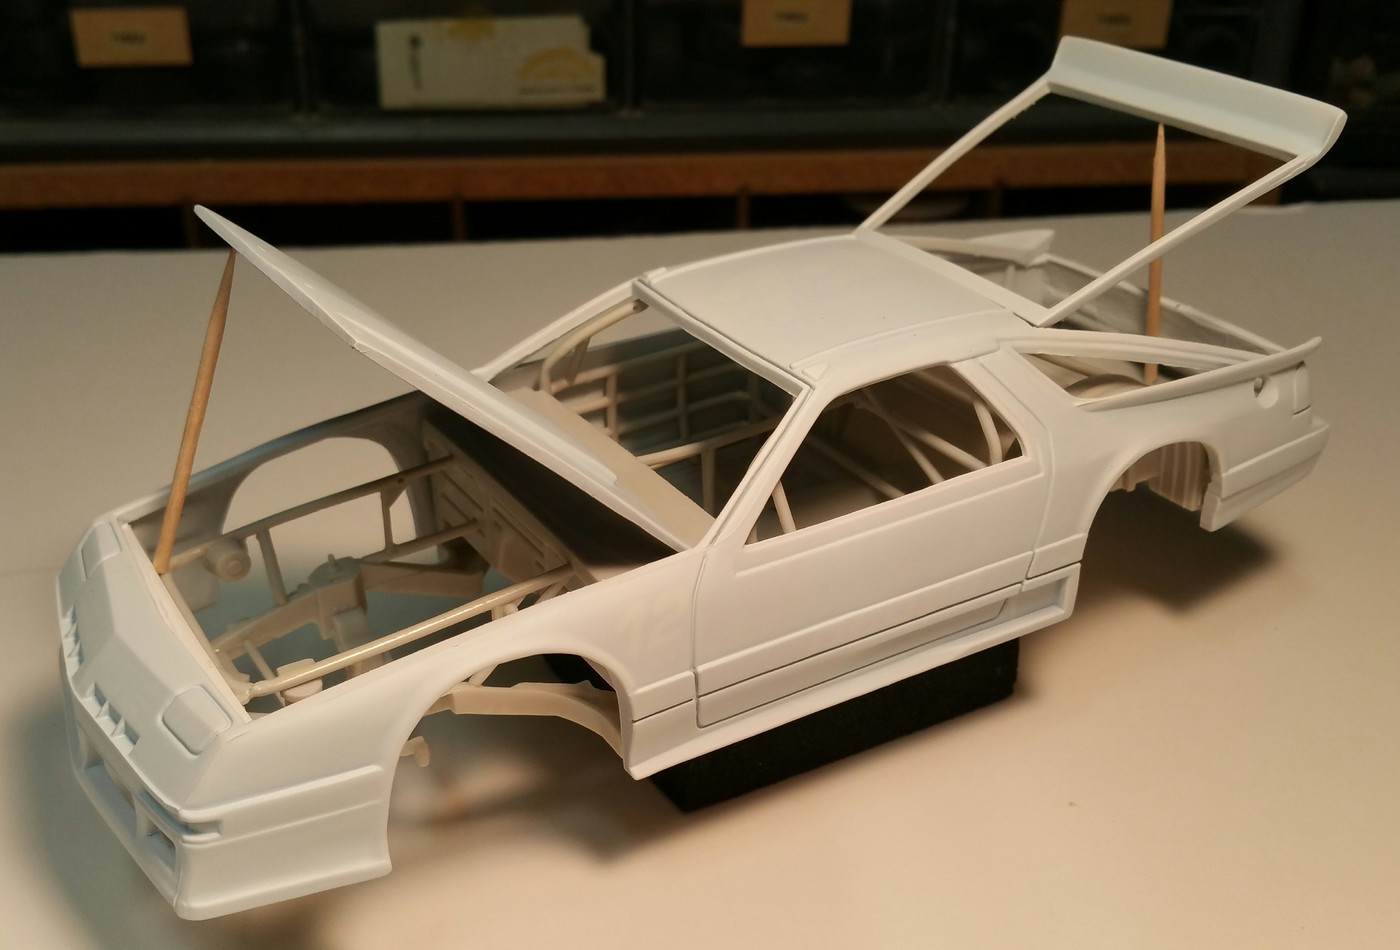
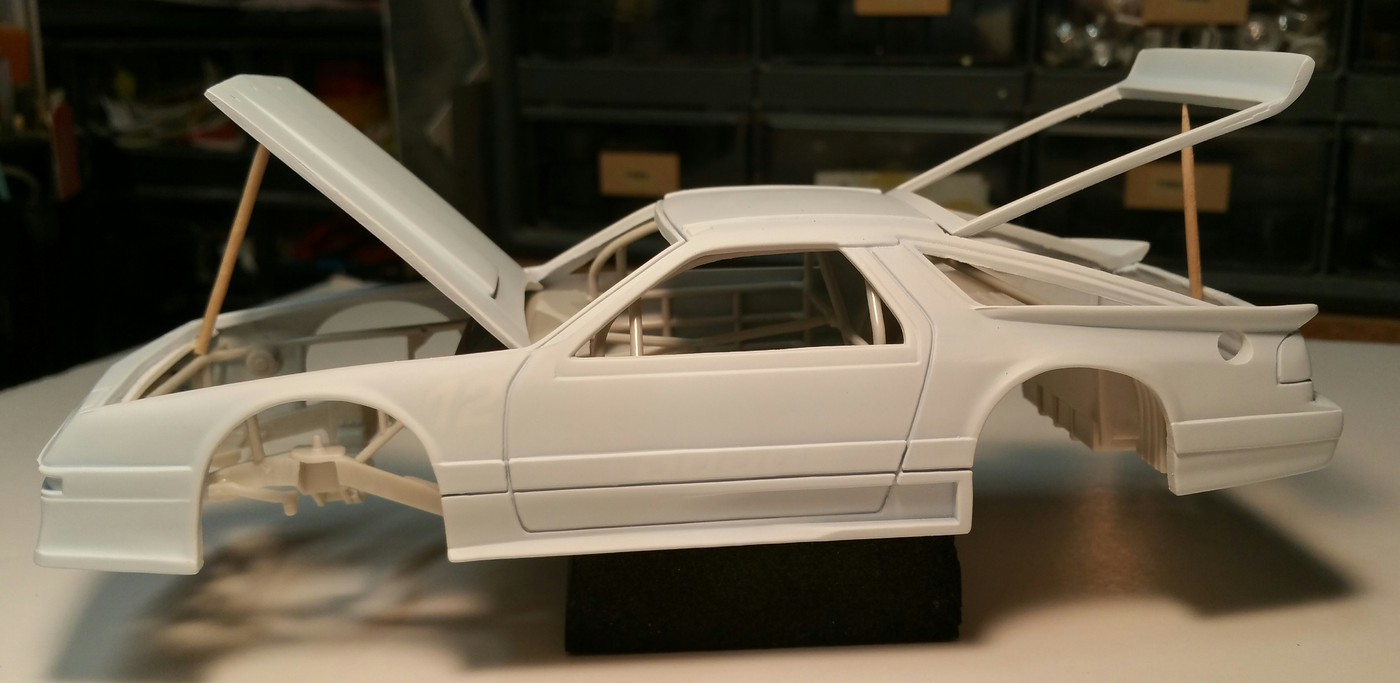
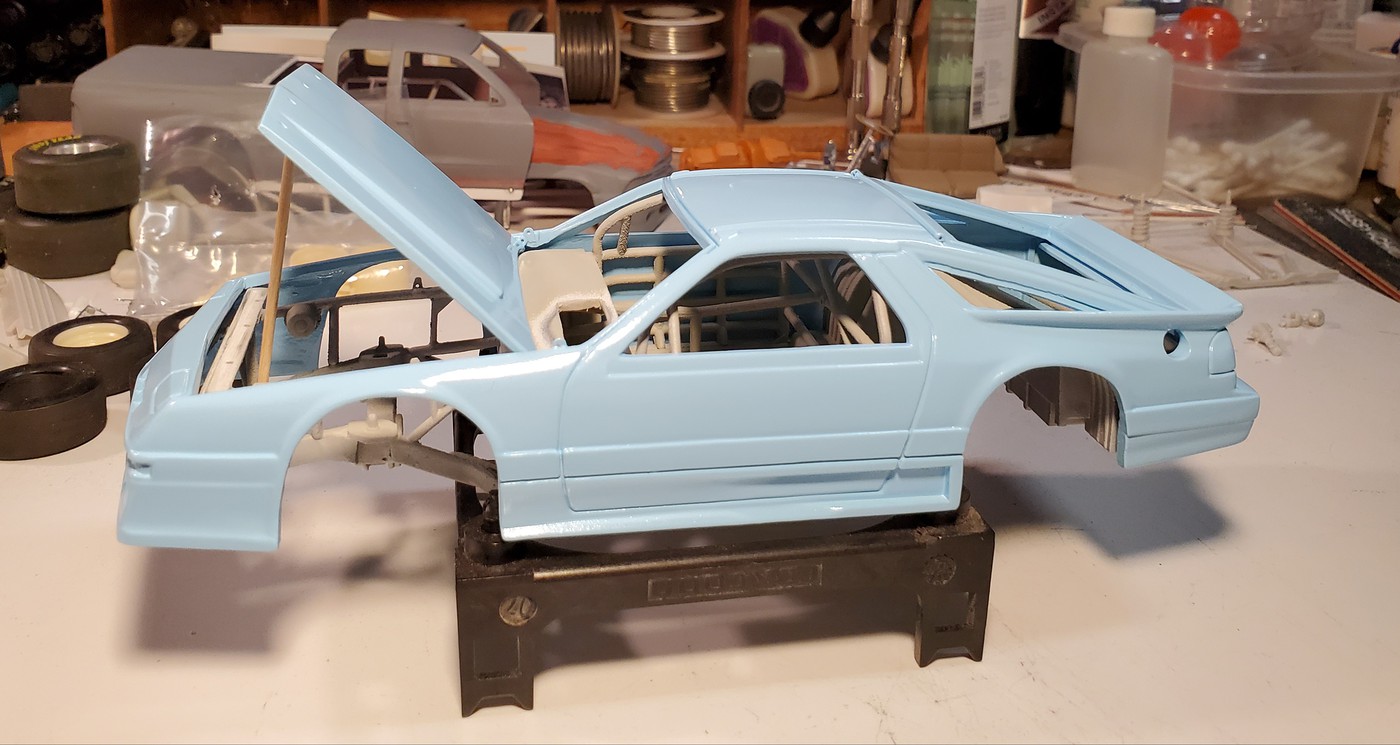
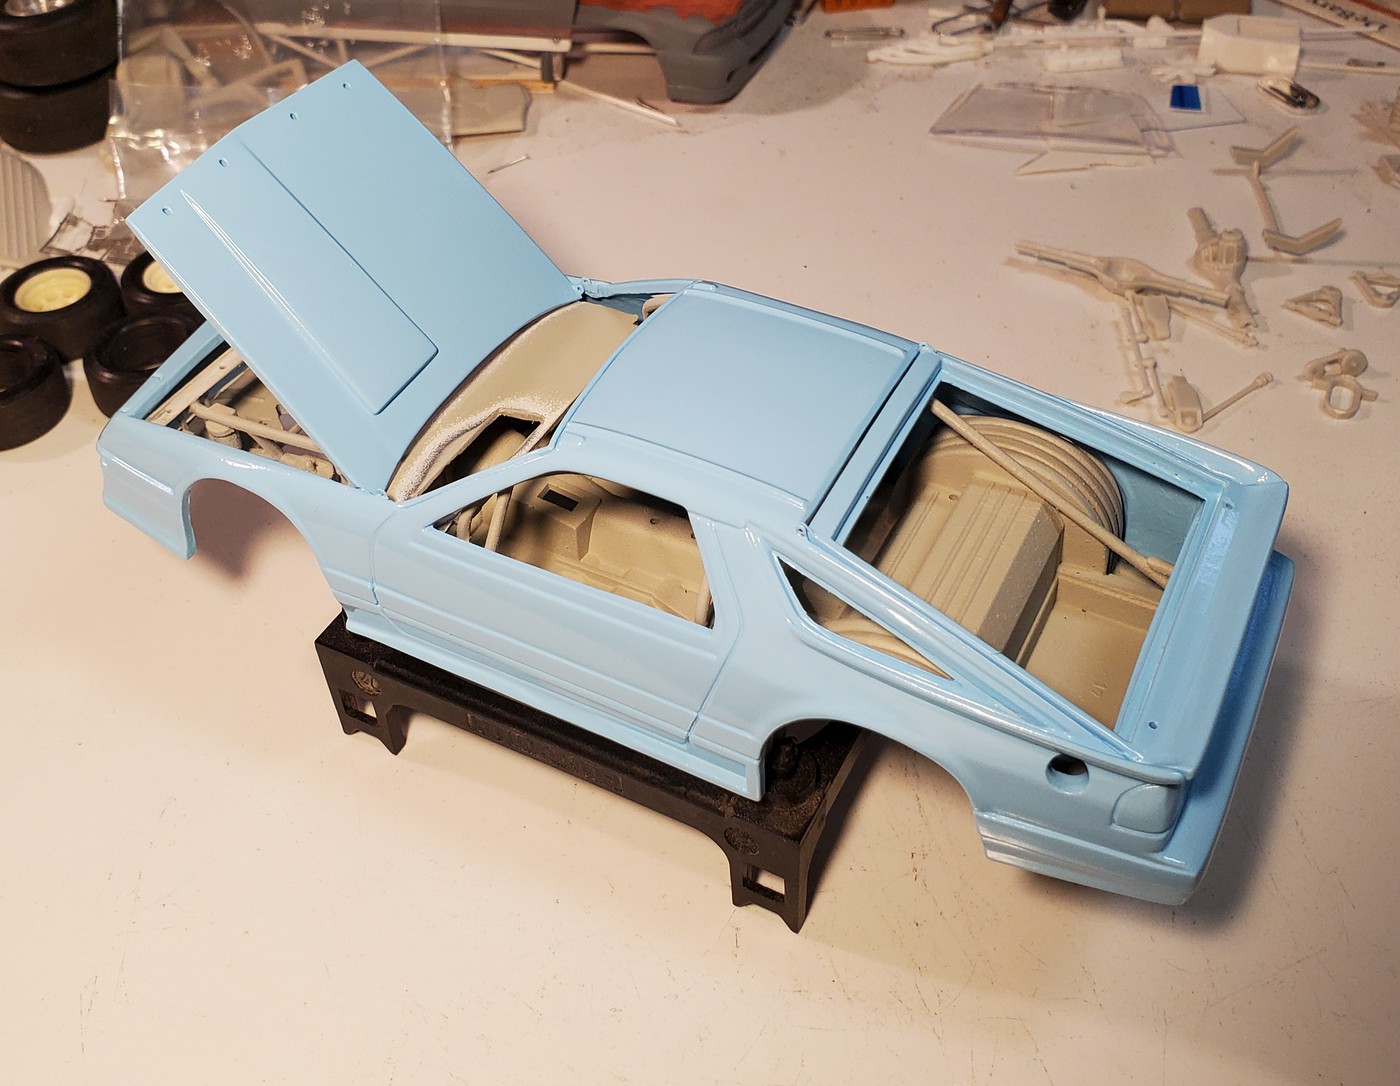
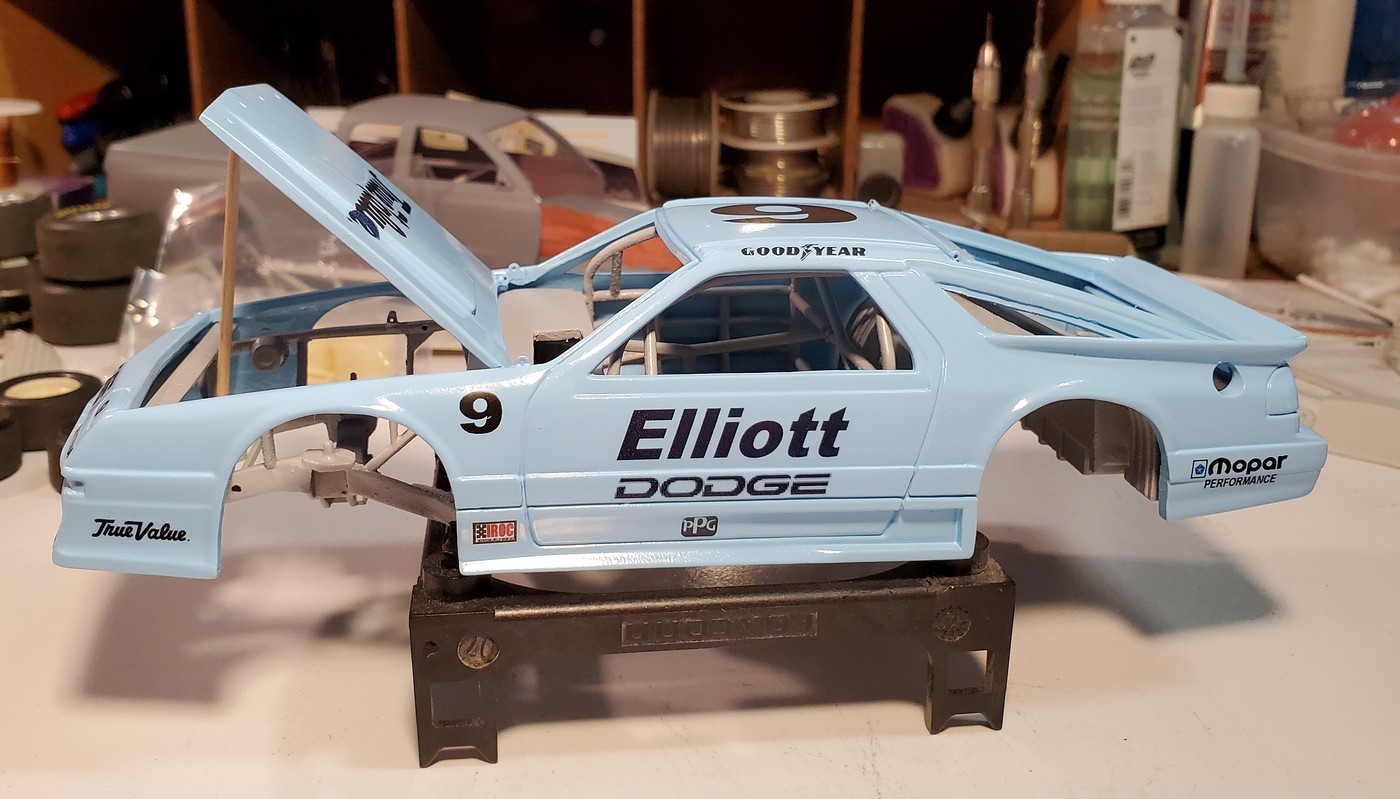
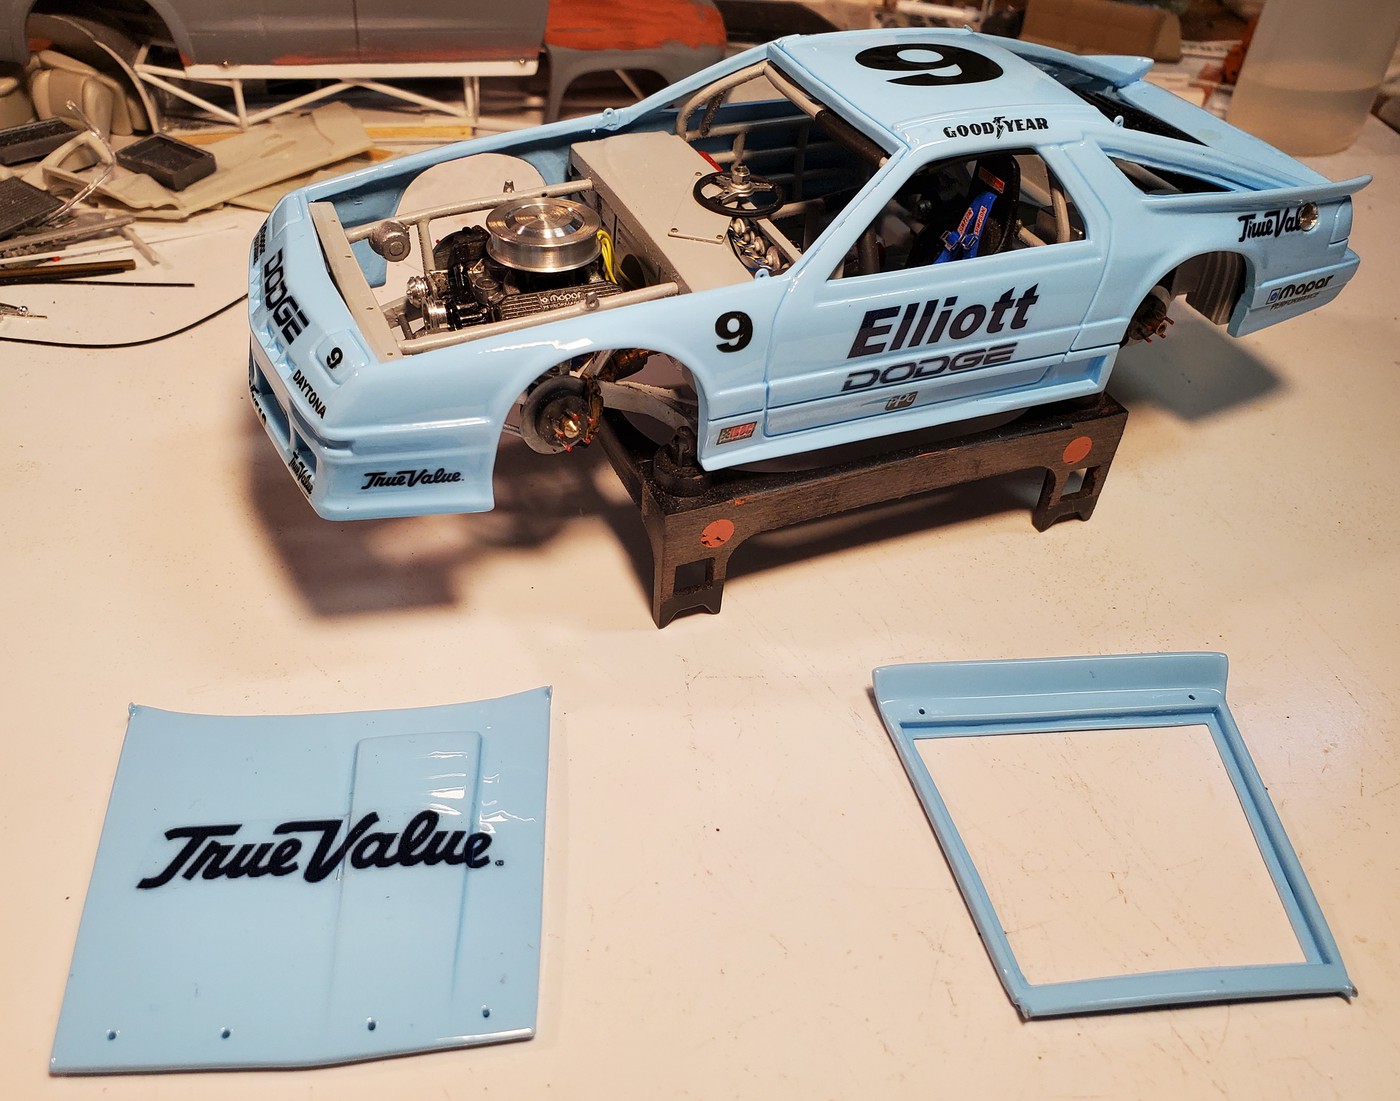
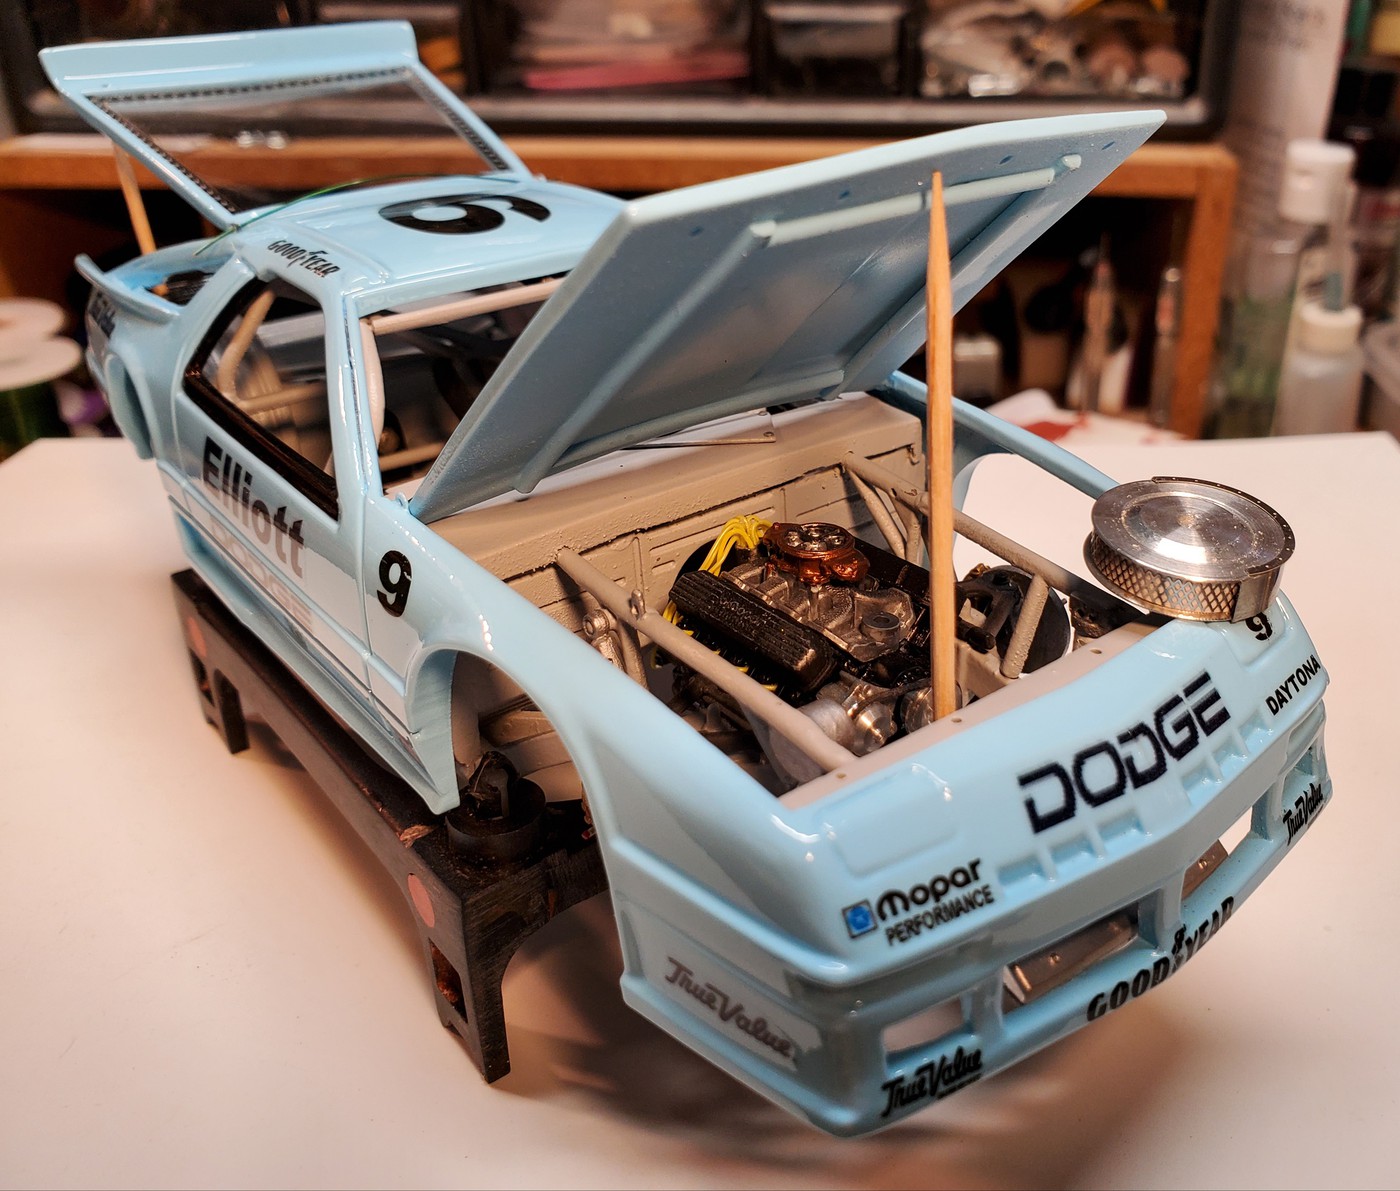
This is a 91 Dodge Daytona IROC build using a True Value promo (plastic) kitbashed with an AMT 90's era chassis/suspension and a whole bunch of scratchbuilding and added detail. I cleaned up the body and then made adjustments to the chassis to make it fit. I am hinging the hood and the rear hatch. When complete it will be a full detail build.
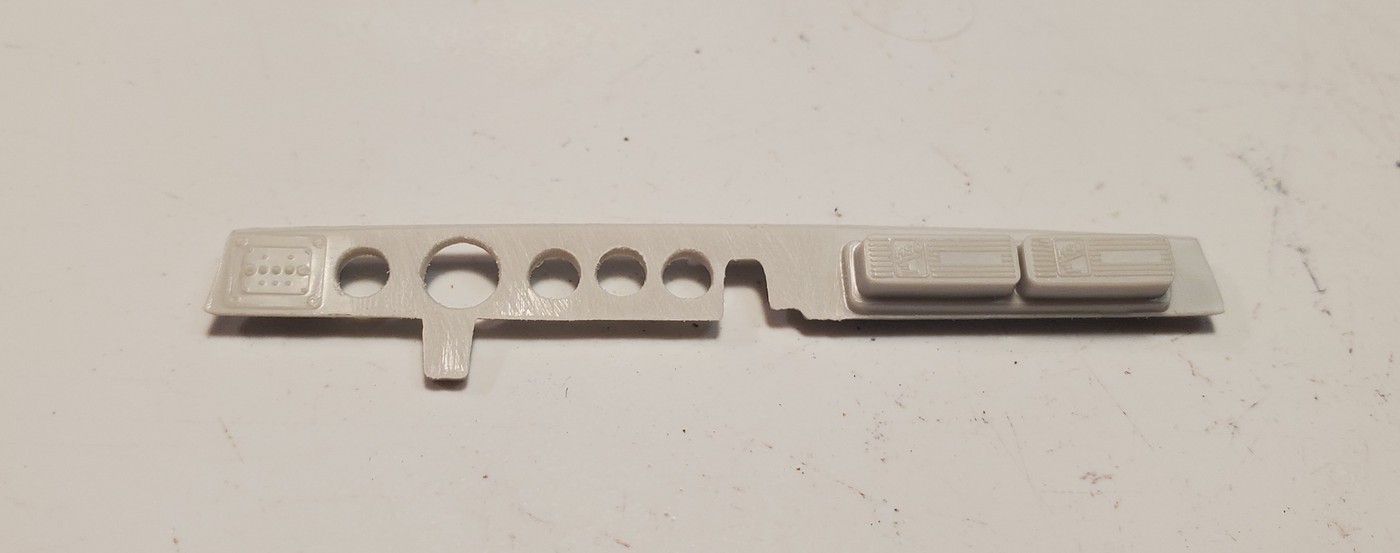
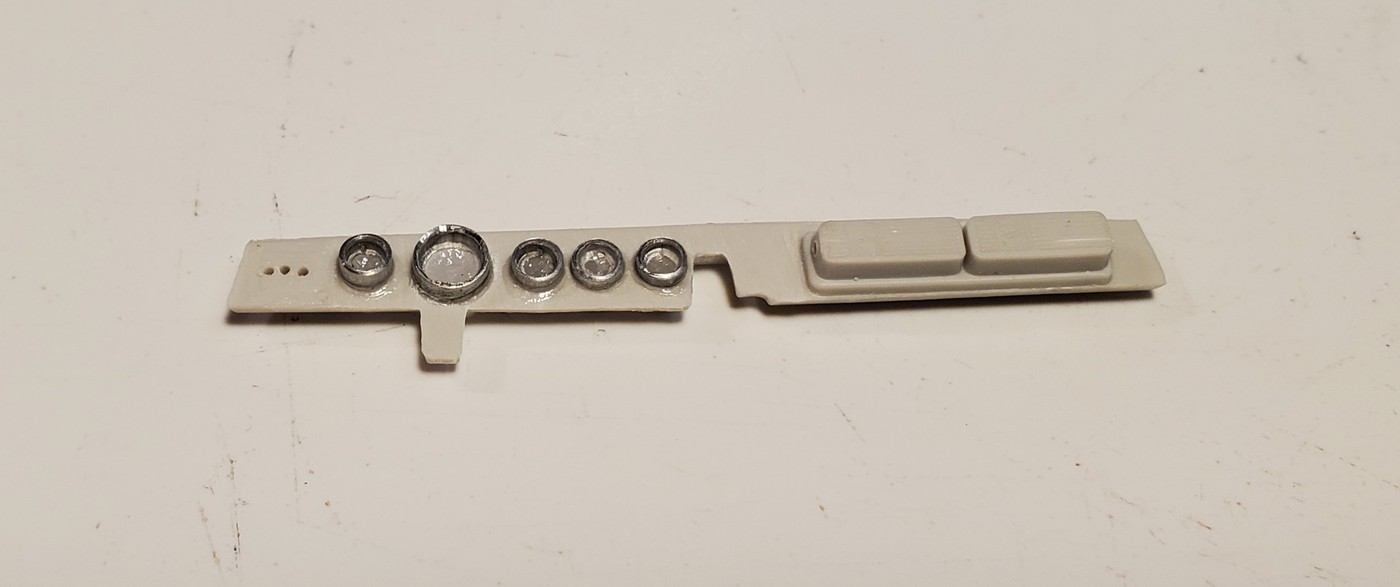
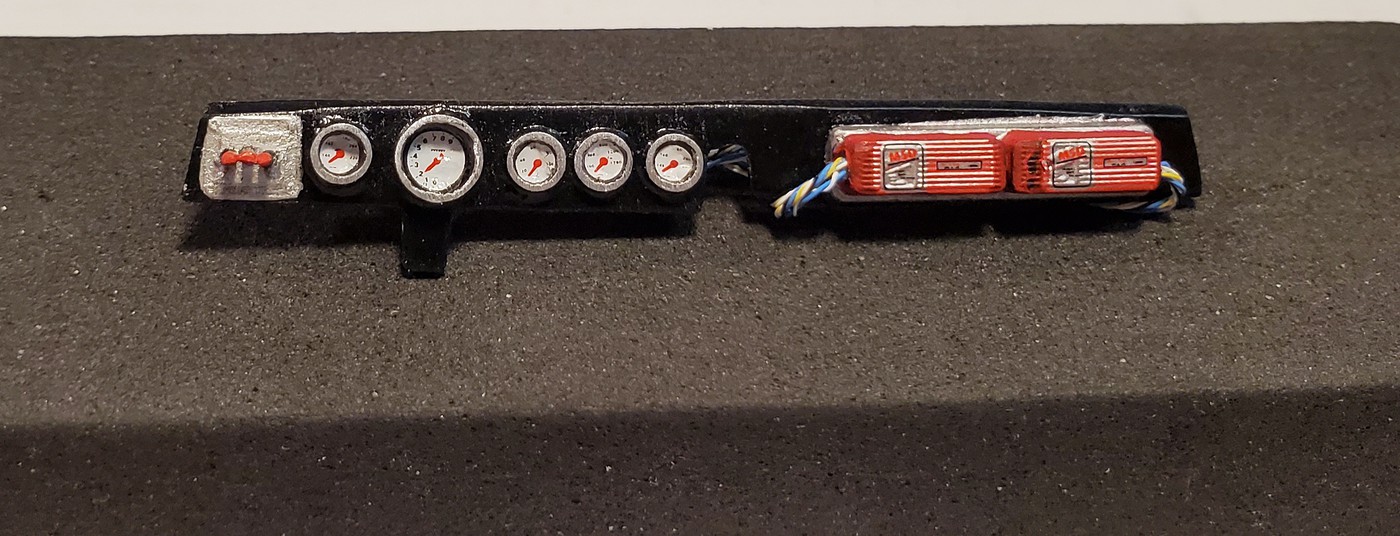
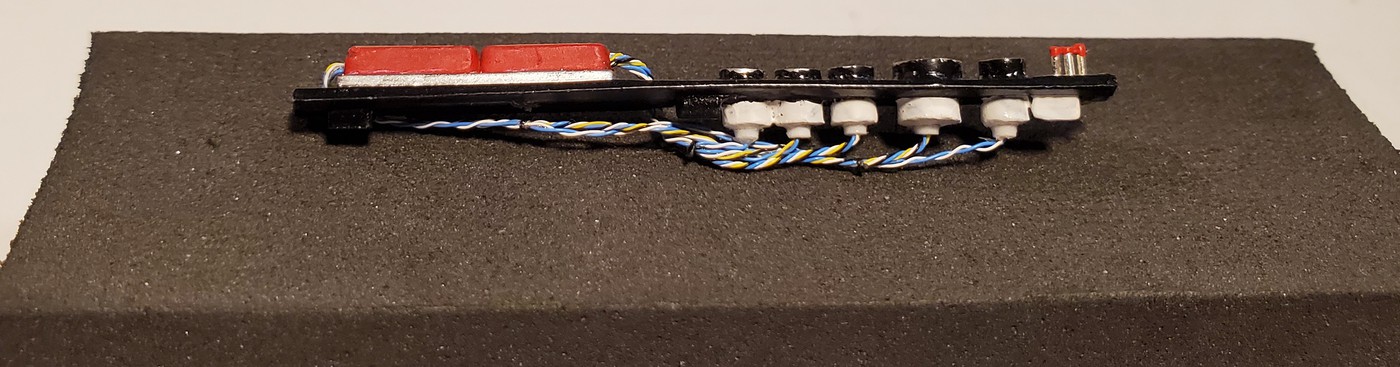
After just getting back to it I have finished the prep on the body and it now has color. I am also getting started on some of the small detail areas like creating better gauges for the dash.
More to come.
 |
|
| Back to top |
|
 |
1fozziebear
Joined: 08 Mar 2019
Posts: 234
|
| Posted: Wed Jun 03, 2020 9:24 pm Post subject: |
|
|
| thanks for posting! definitely along for the ride. |
|
| Back to top |
|
|
1320wayne1
Joined: 06 Jul 2019
Posts: 79
|
| Posted: Thu Jun 04, 2020 5:17 pm Post subject: |
|
|
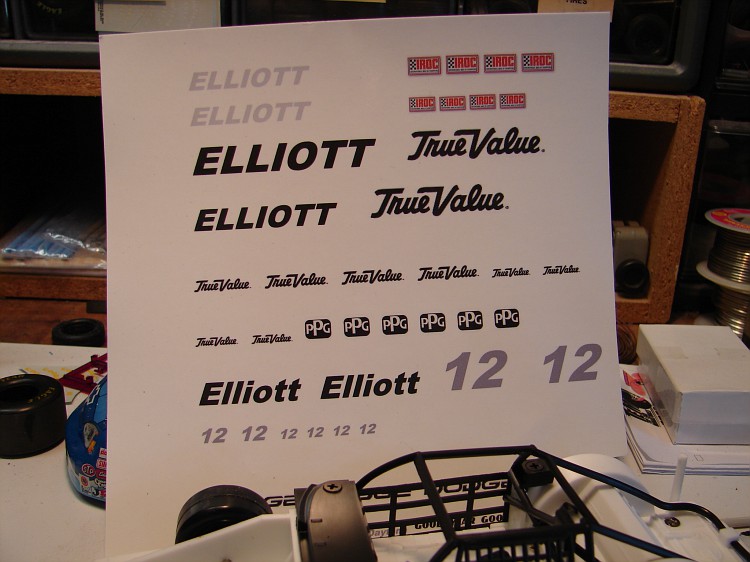
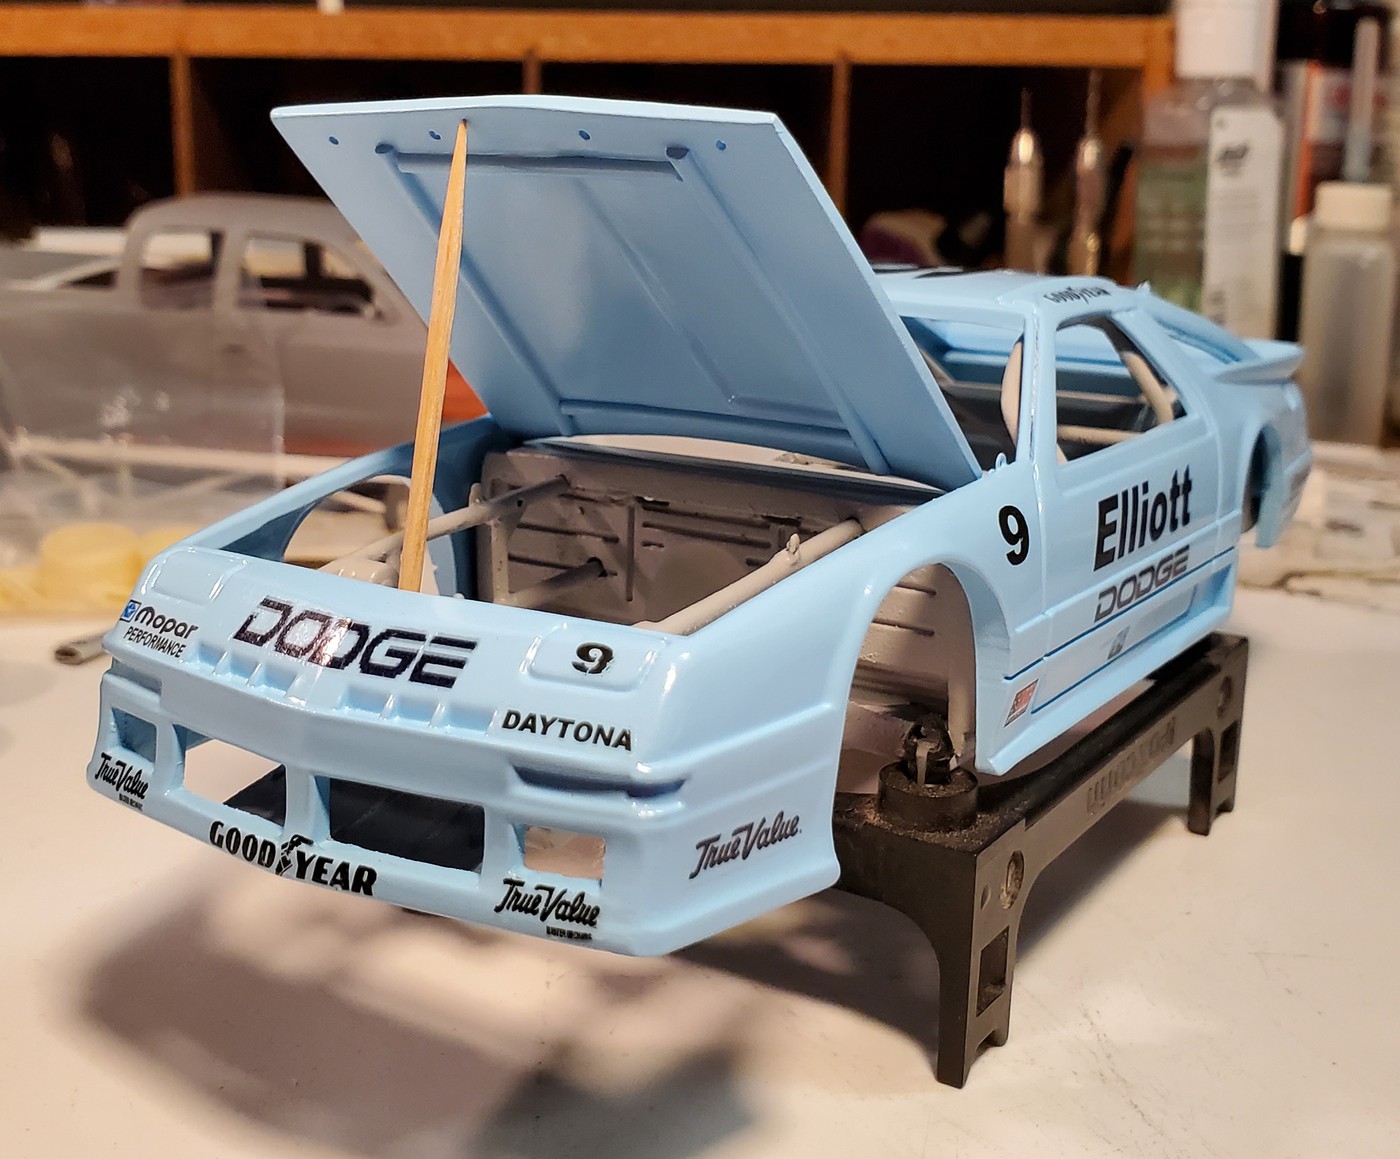
Got started on the decals. Easiest decaling process I've done in a while.
 |
|
| Back to top |
|
|
Hondo
Joined: 28 May 2020
Posts: 28
Location: MidSouth USA
|
| Posted: Thu Jun 04, 2020 7:13 pm Post subject: |
|
|
Off to a good start, Wayne.
Hope all's well over your way !
_________________
Hondo |
|
| Back to top |
|
|
1320wayne1
Joined: 06 Jul 2019
Posts: 79
|
| Posted: Tue Jun 09, 2020 7:12 am Post subject: |
|
|
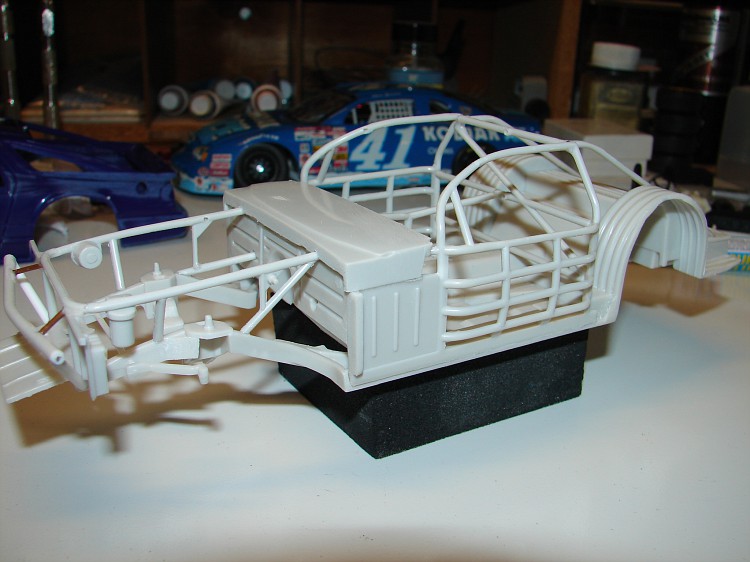
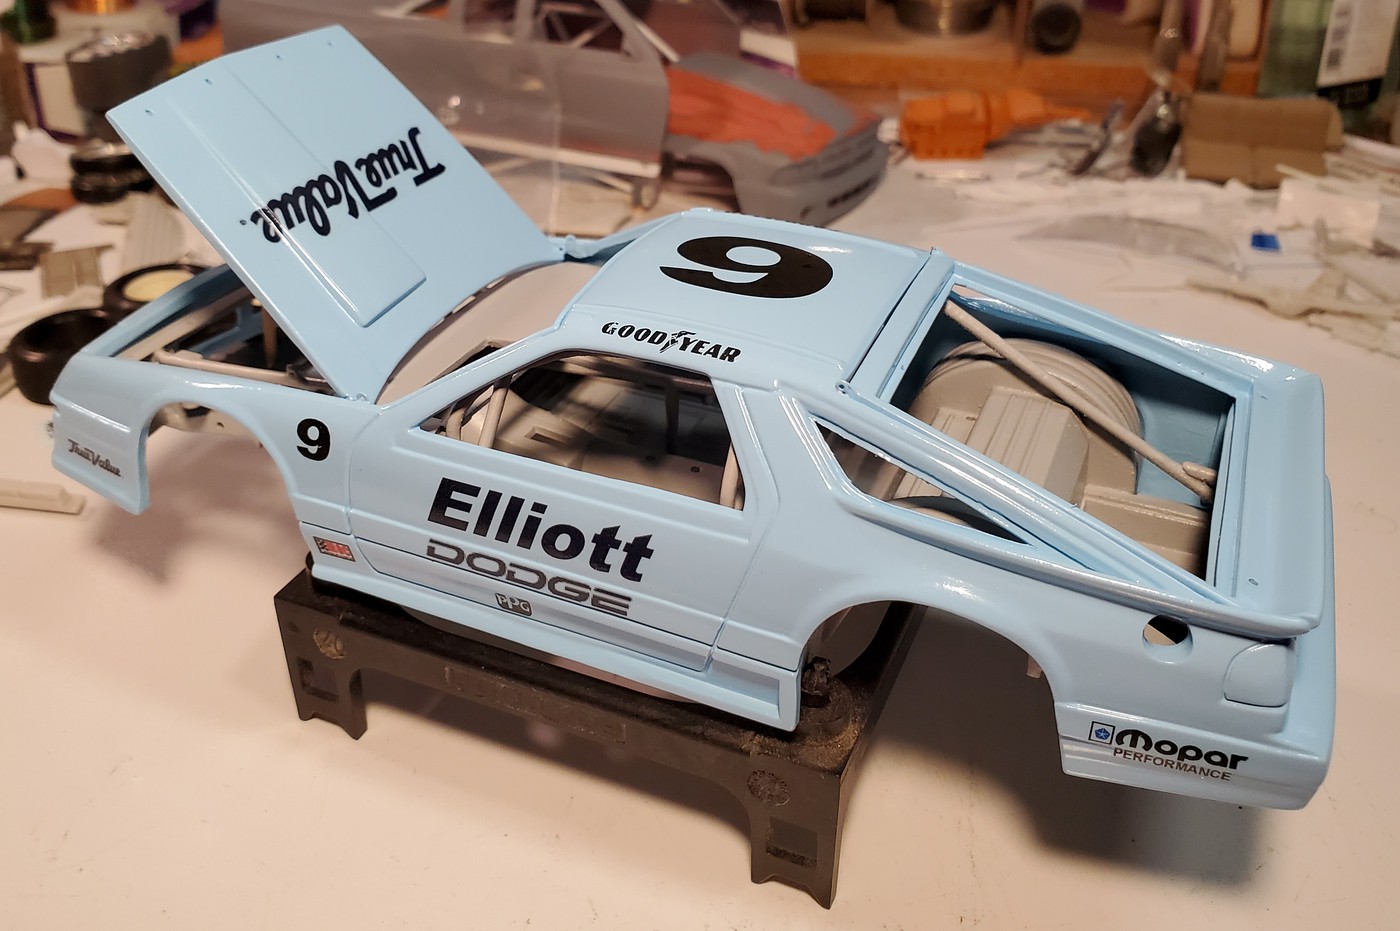
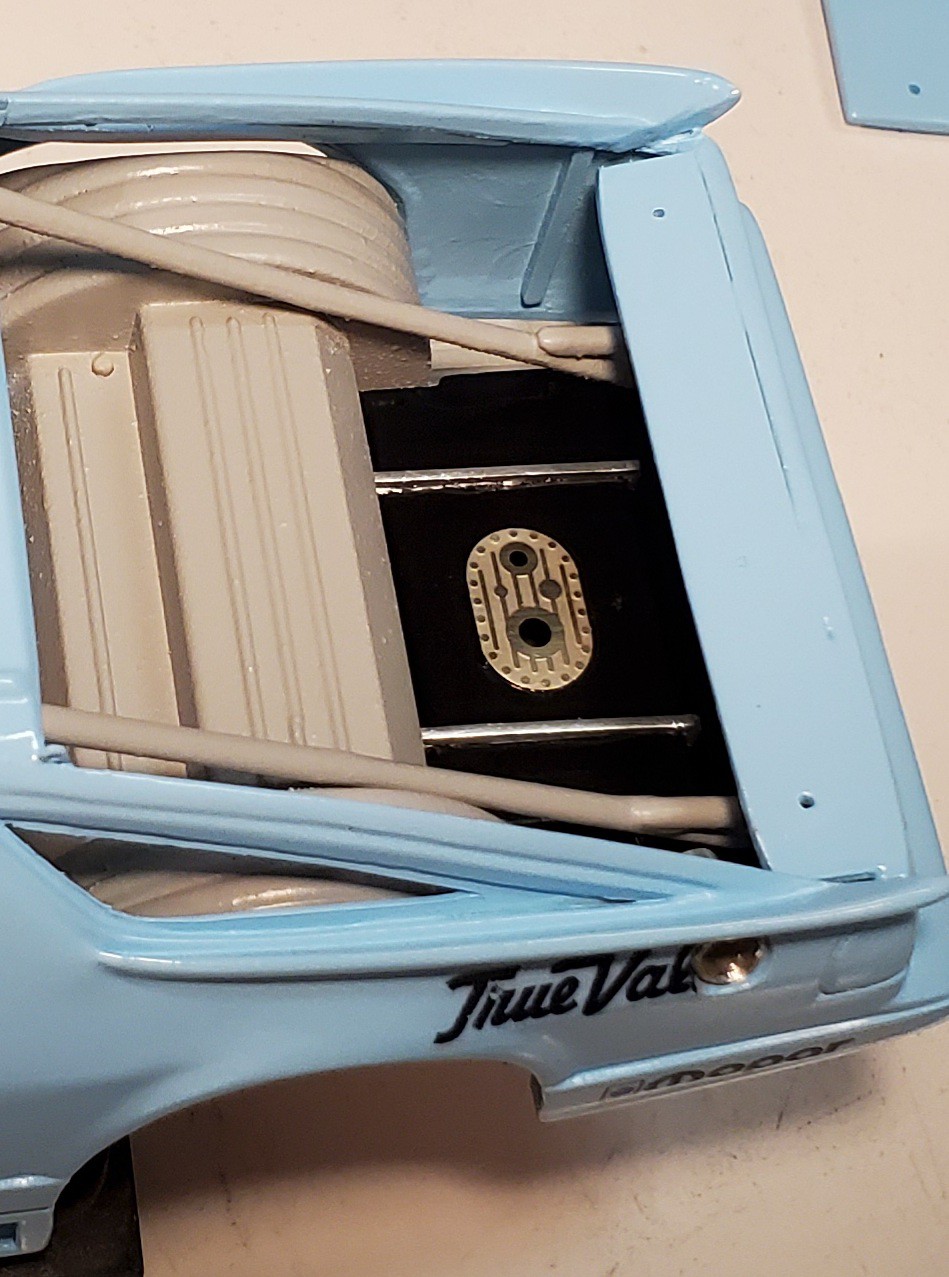
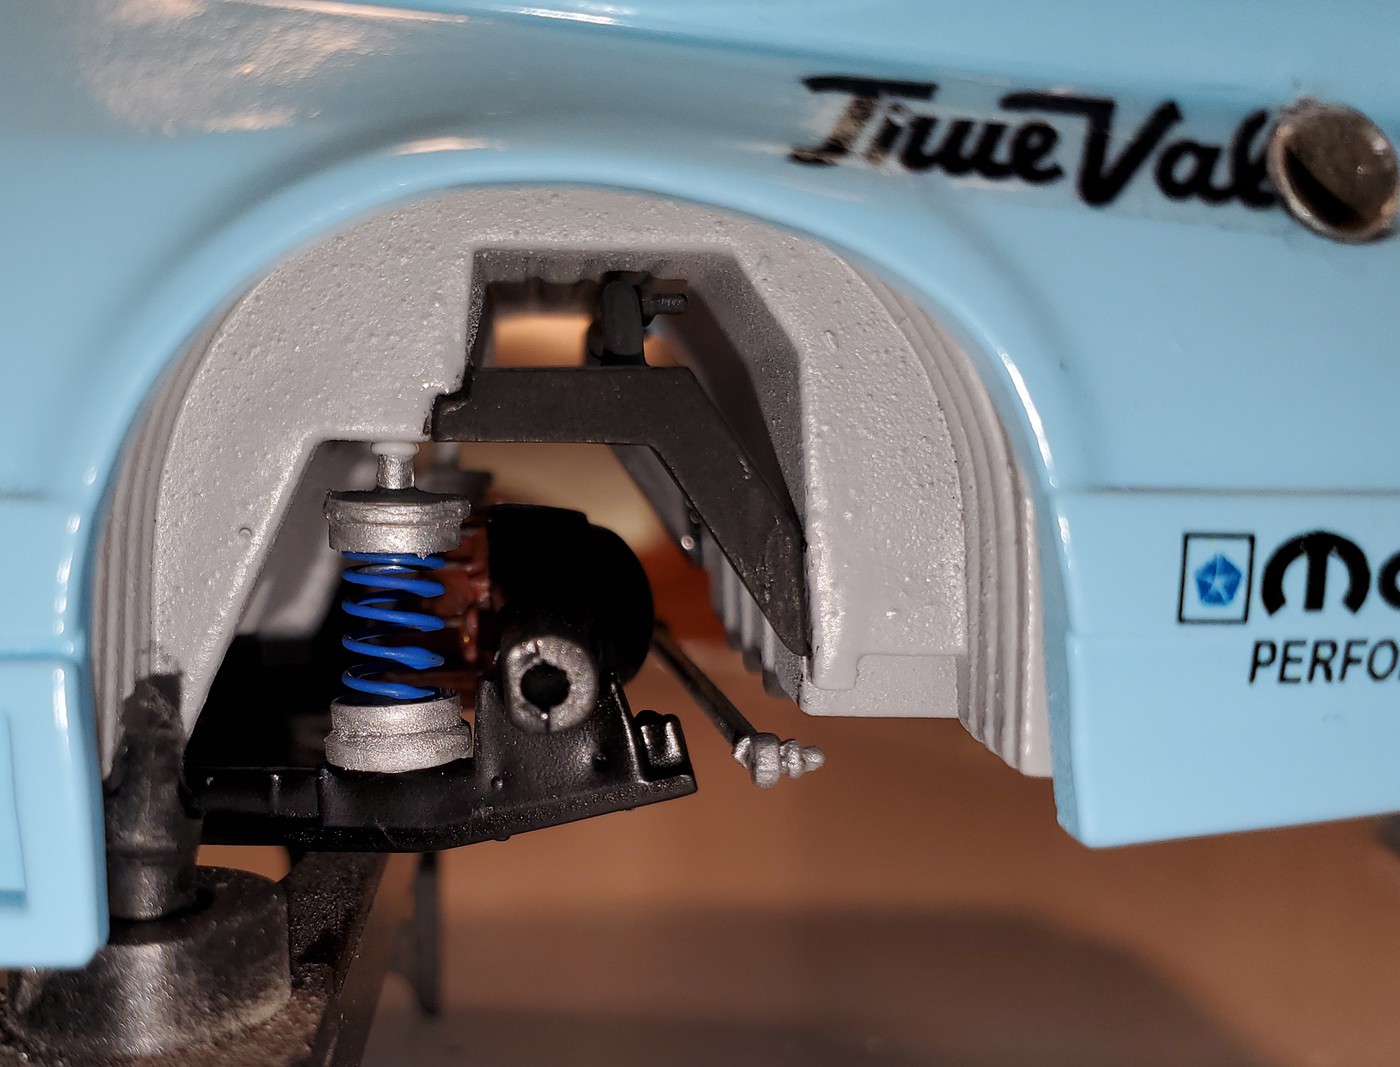
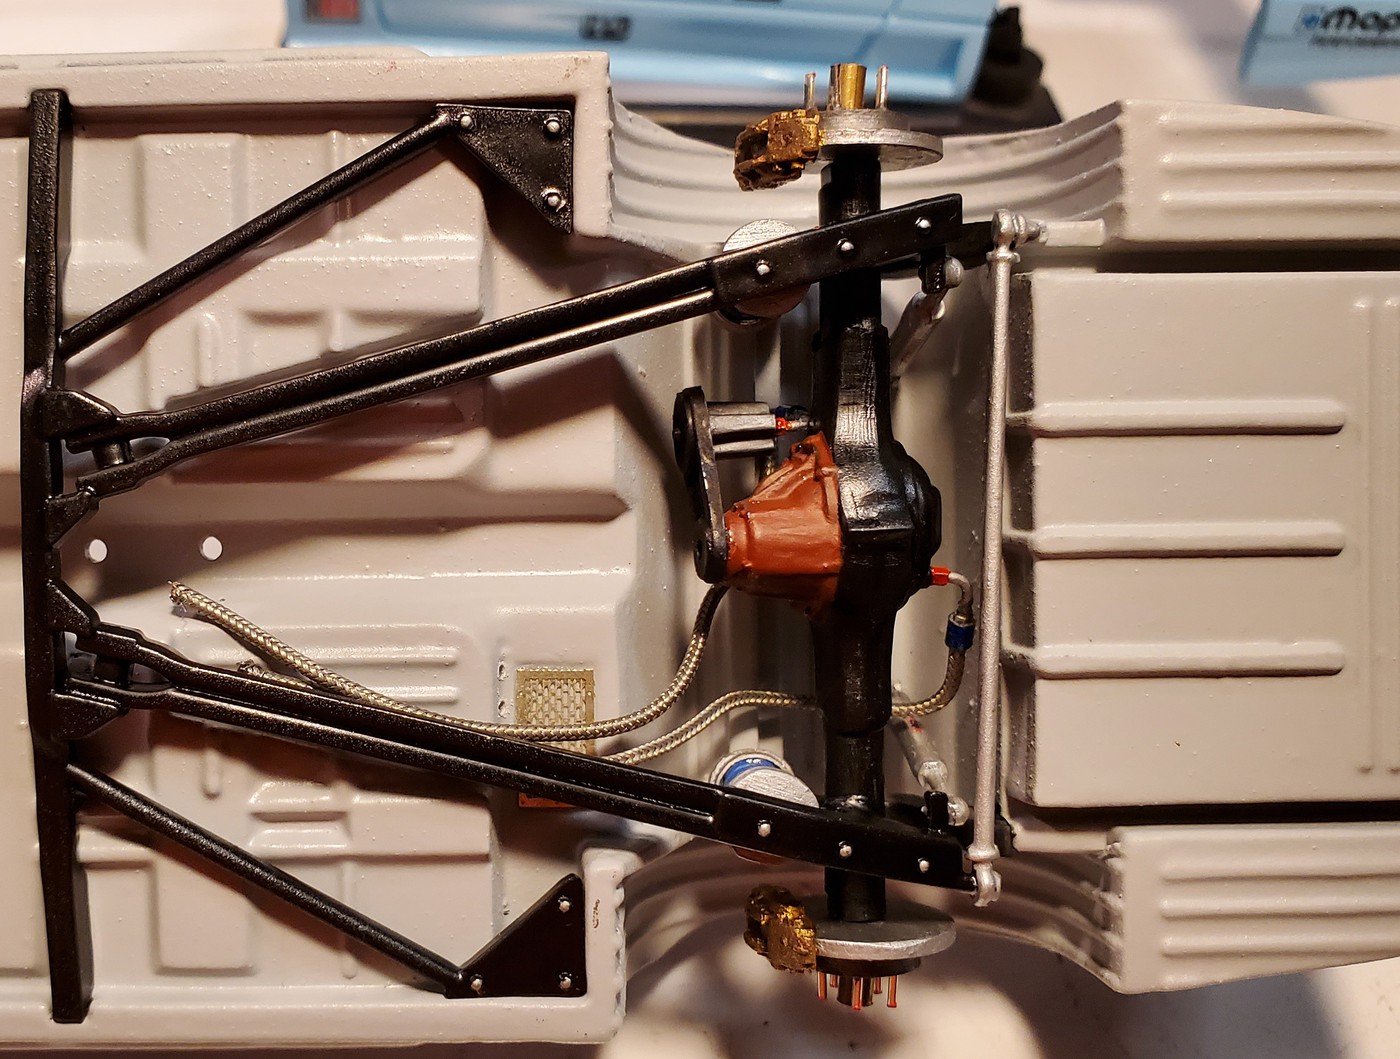
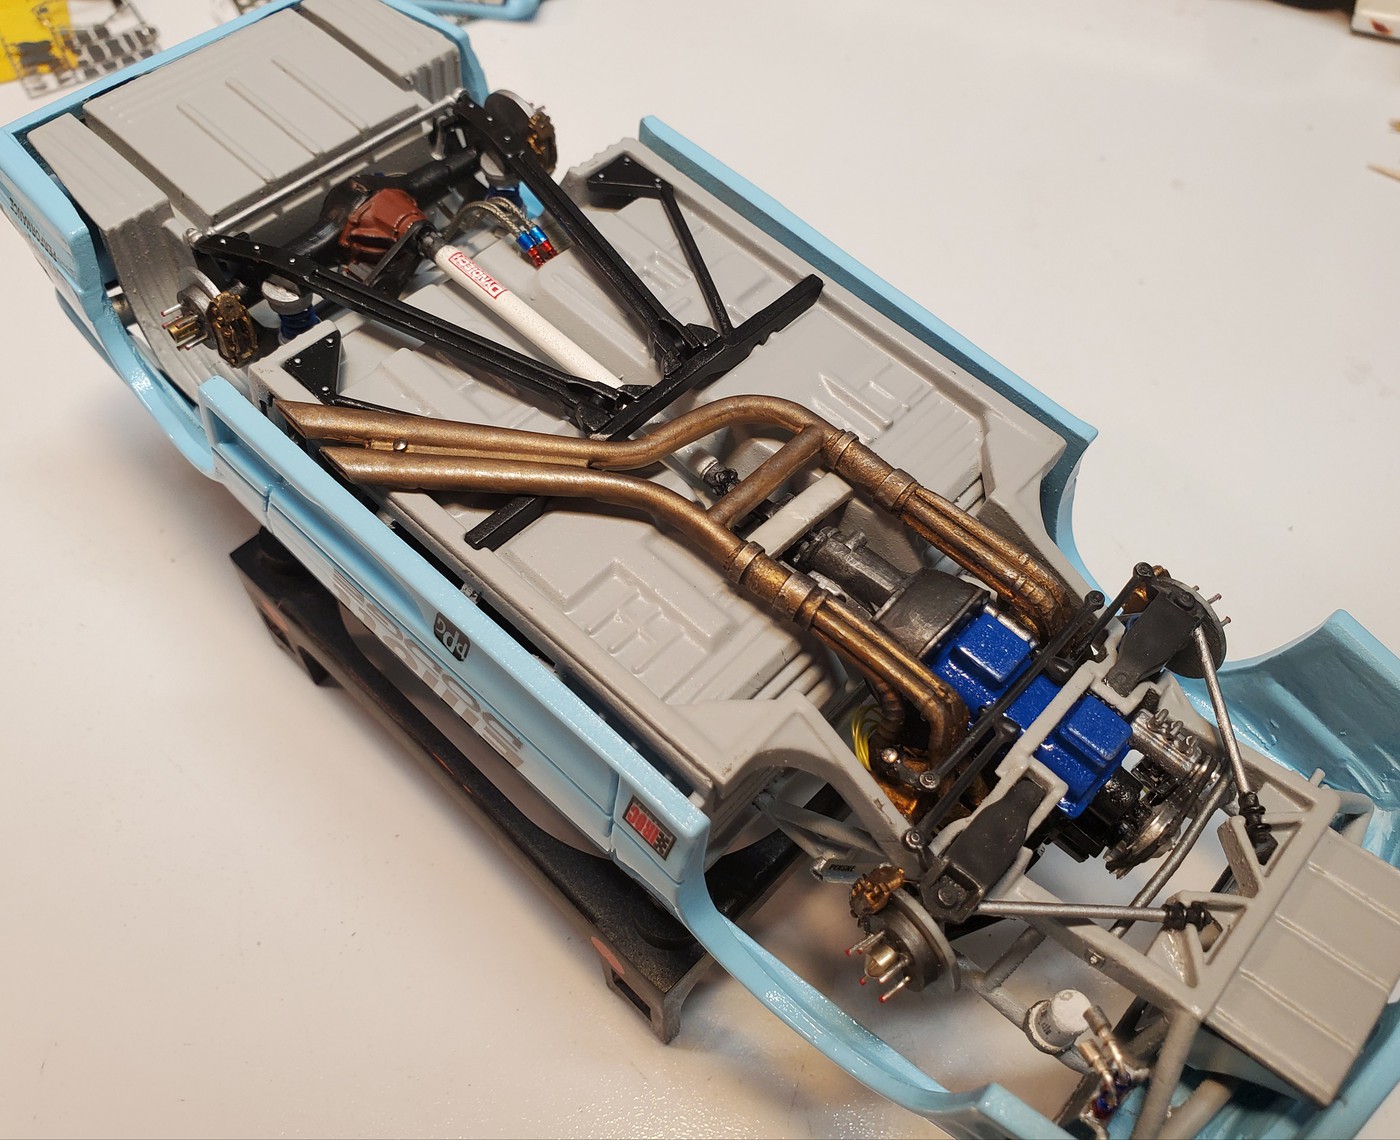
Decals are all complete. Started work on the suspension and fuel cell.

 |
|
| Back to top |
|
|
1320wayne1
Joined: 06 Jul 2019
Posts: 79
|
| Posted: Sun Jun 14, 2020 4:55 pm Post subject: |
|
|
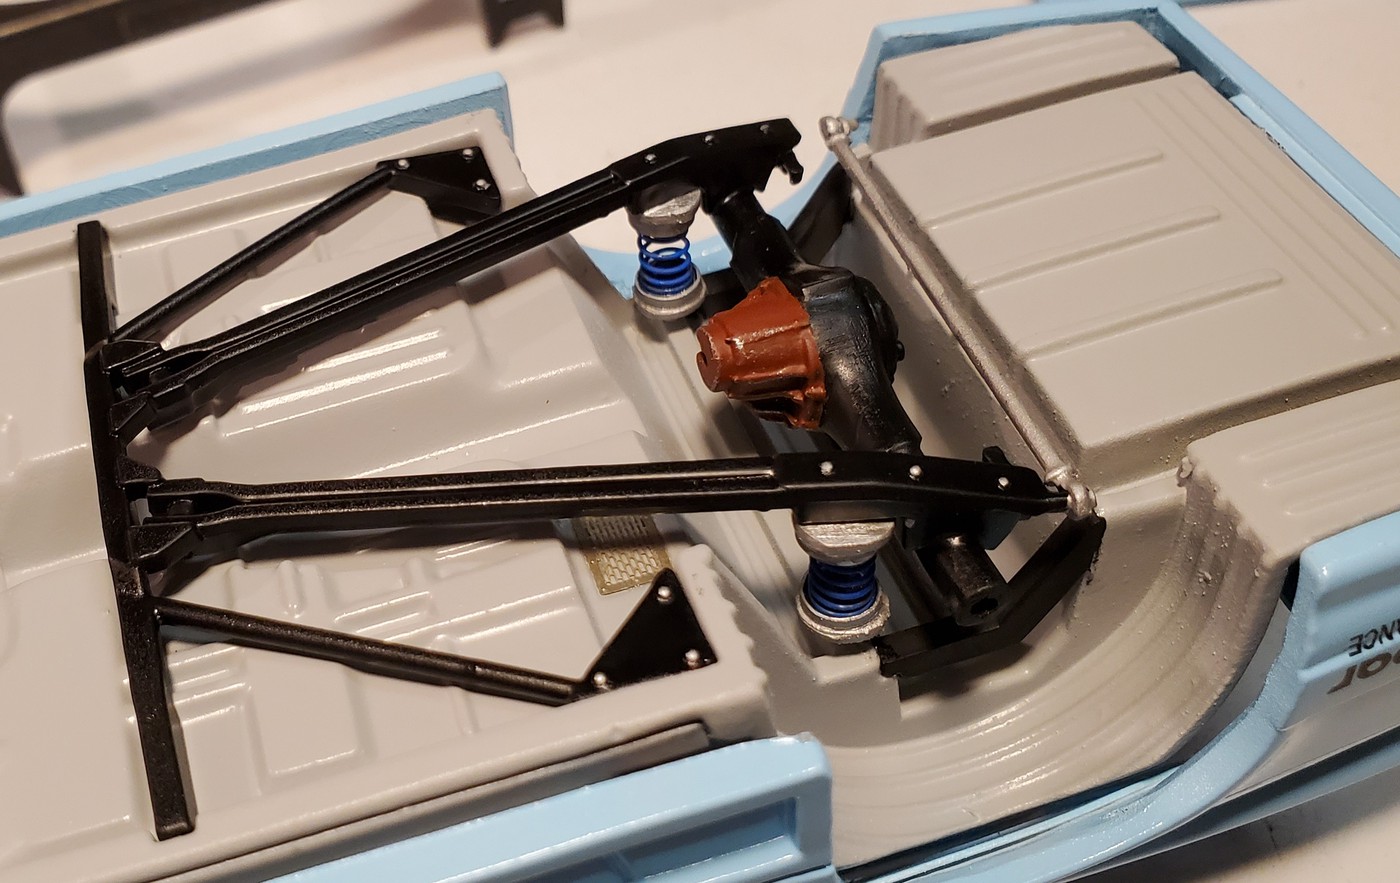
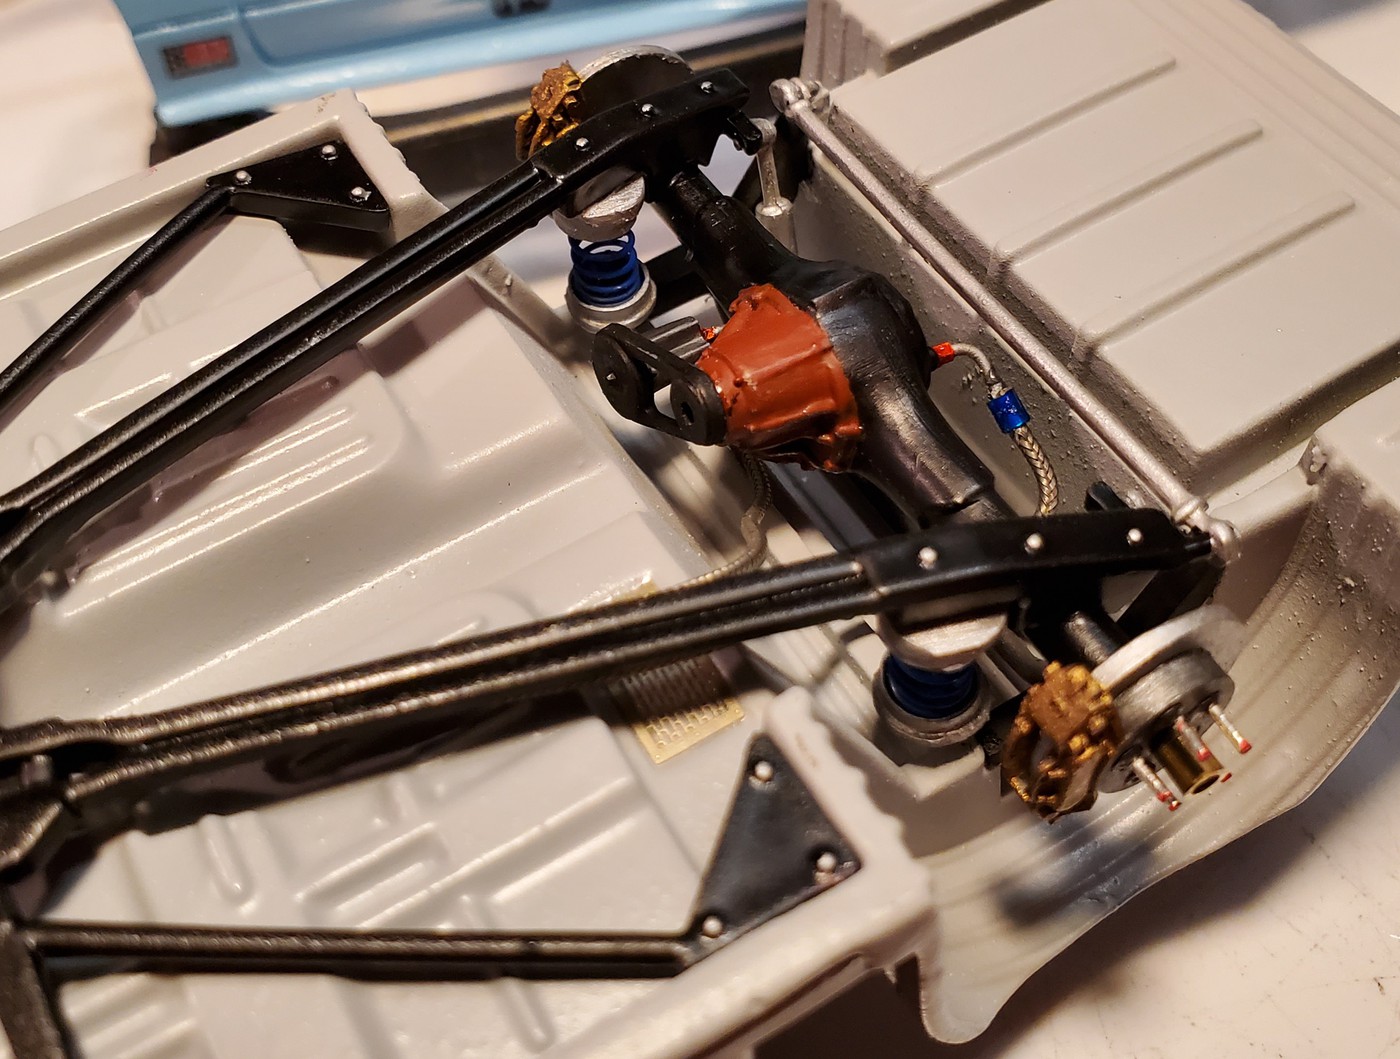
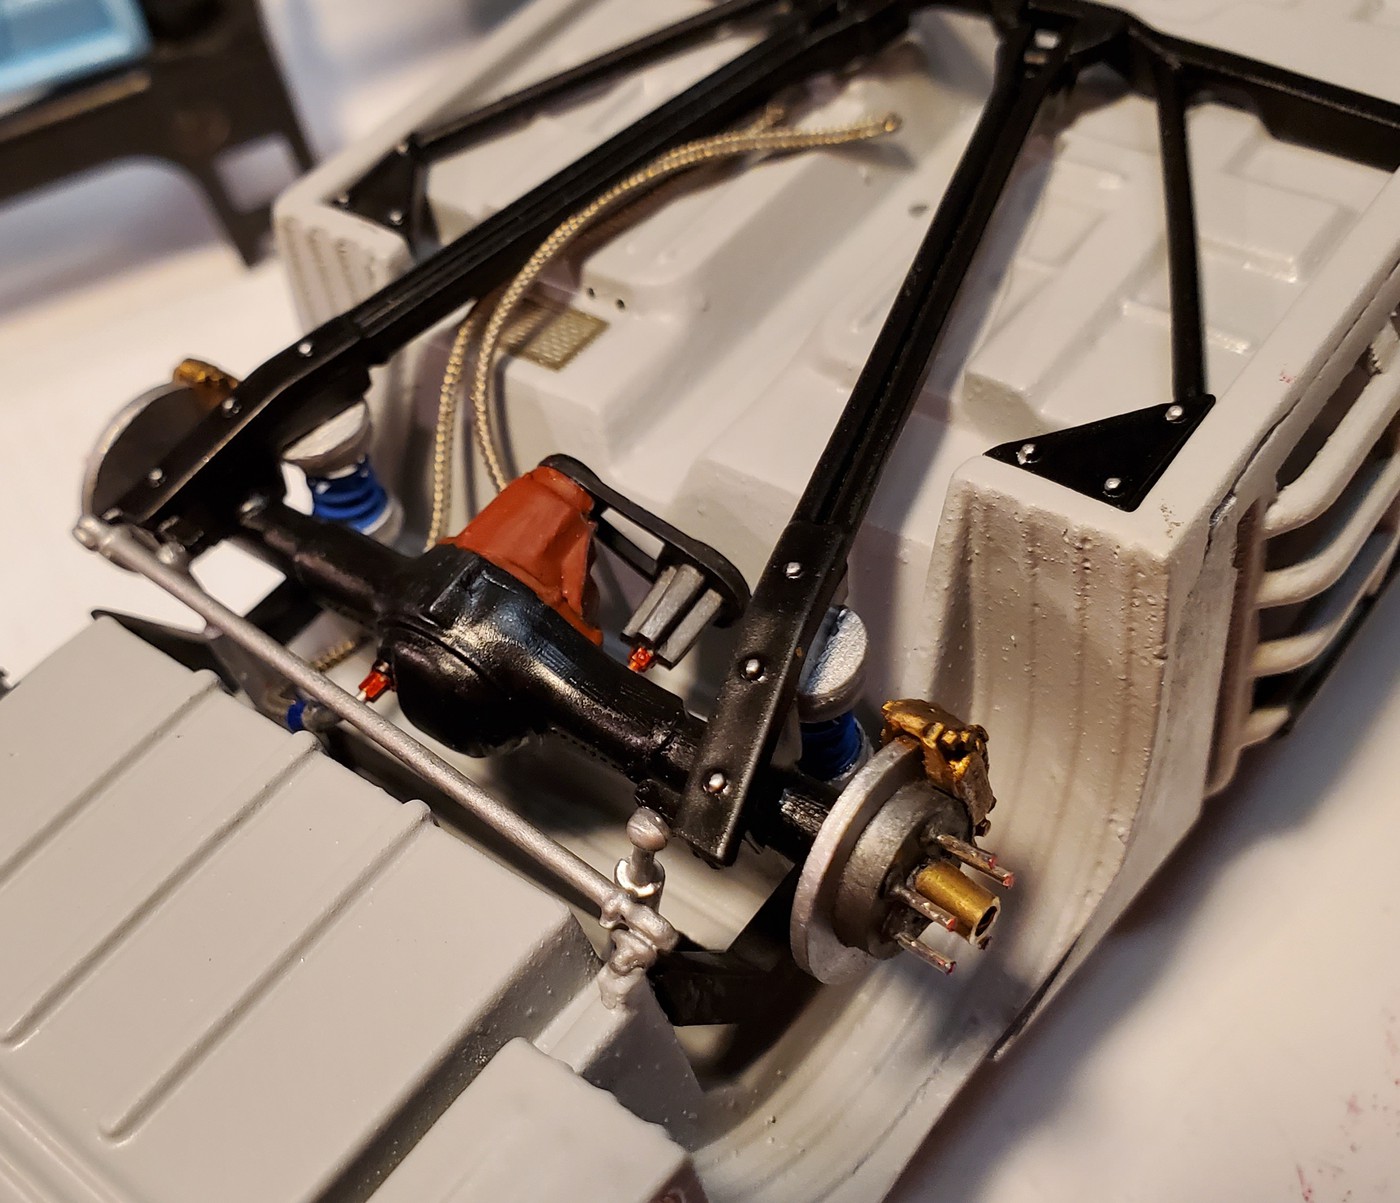
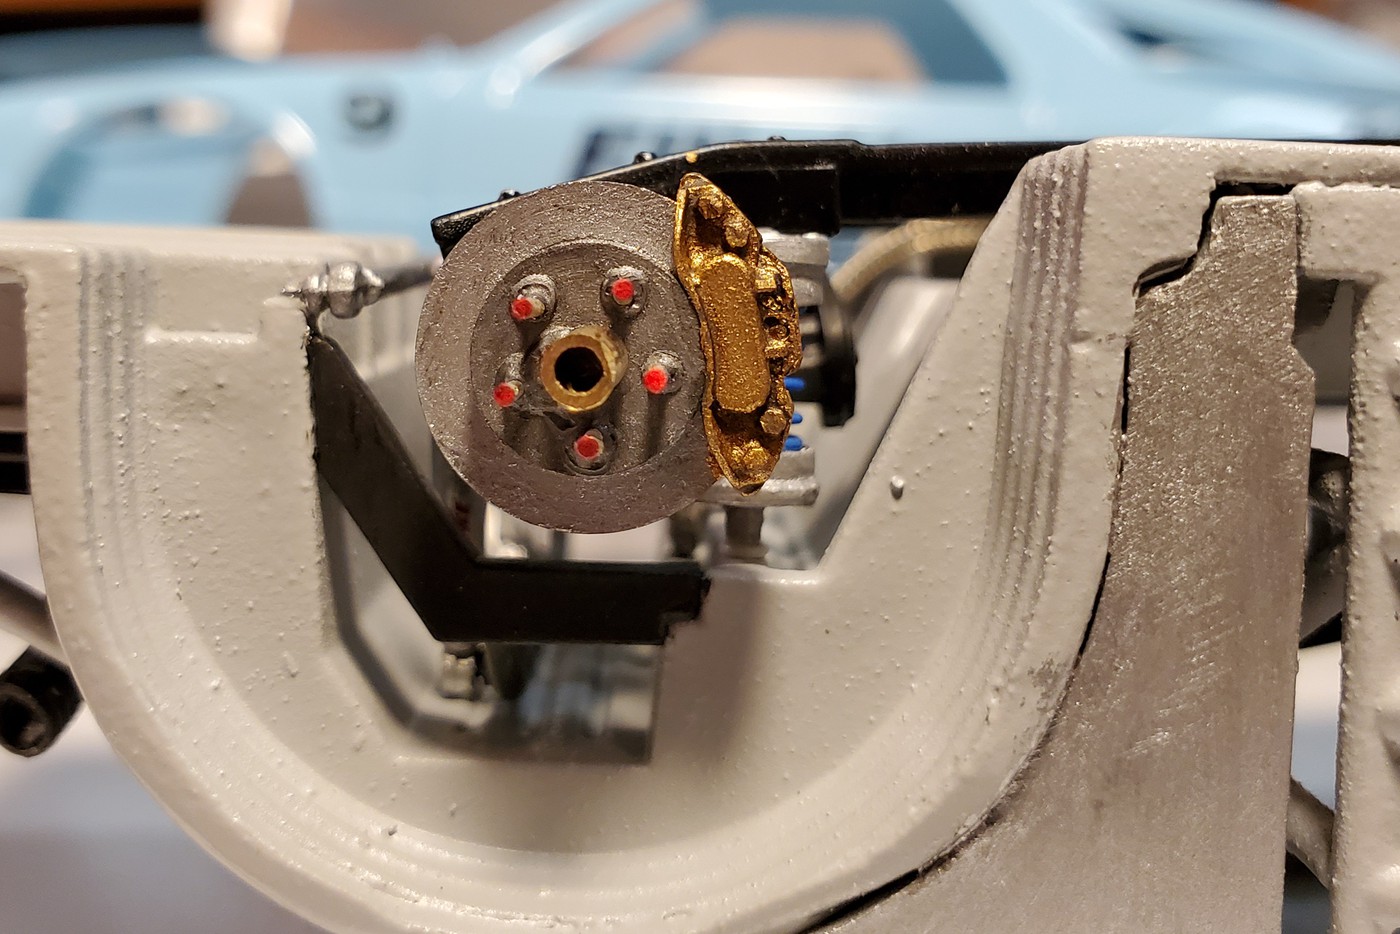
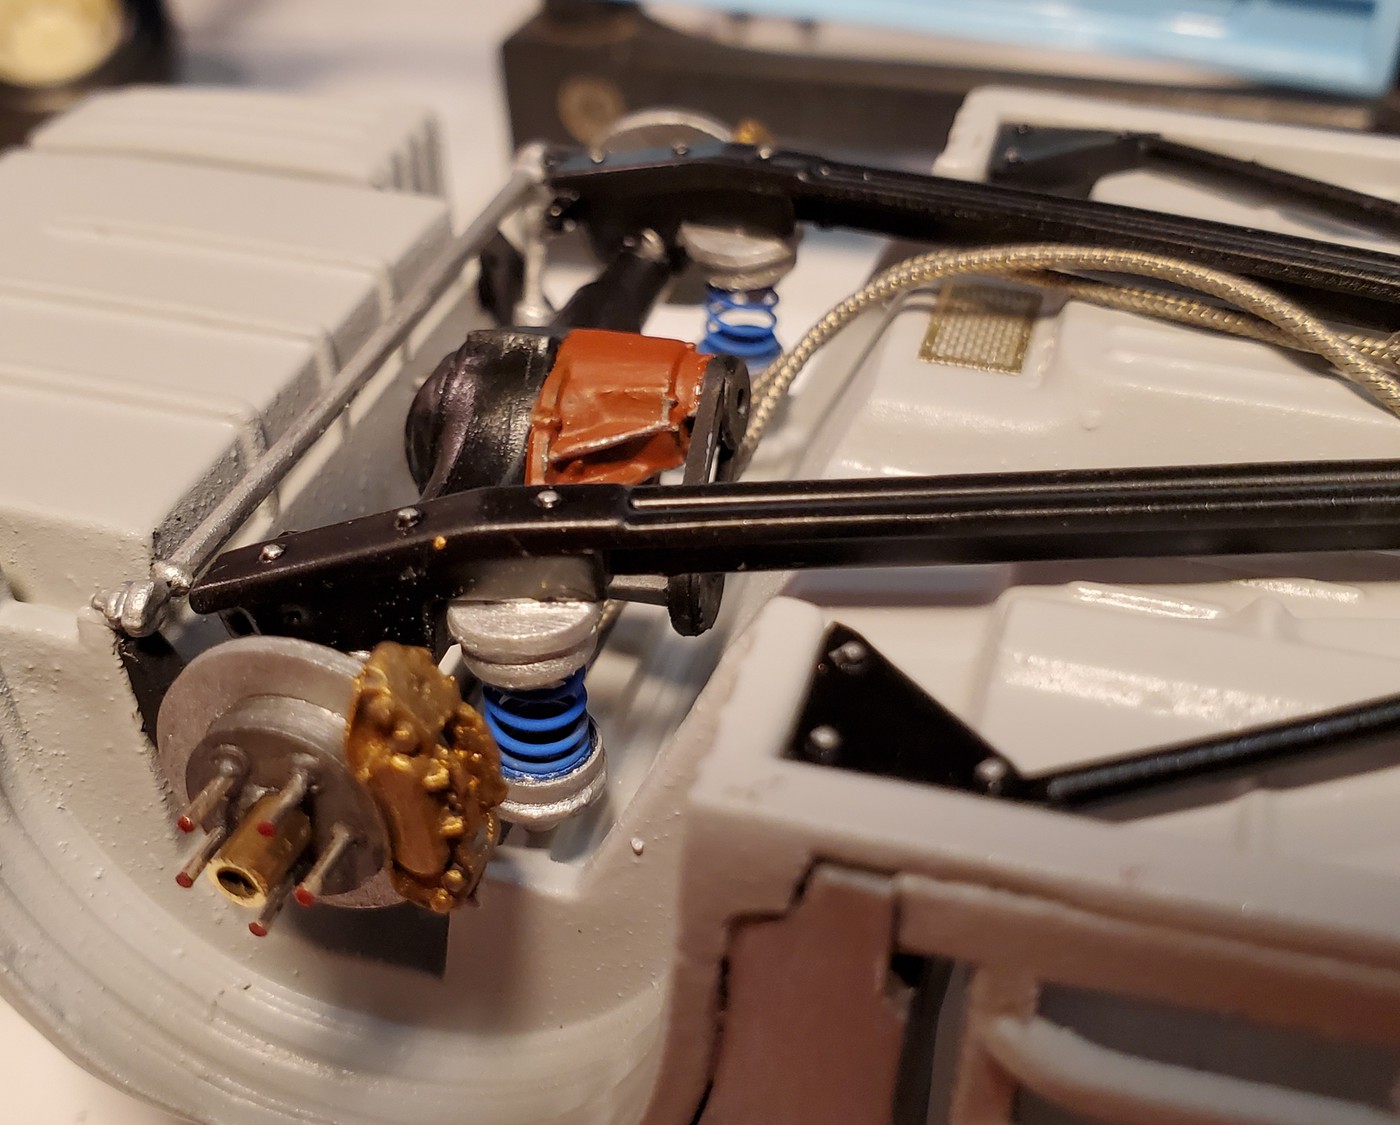
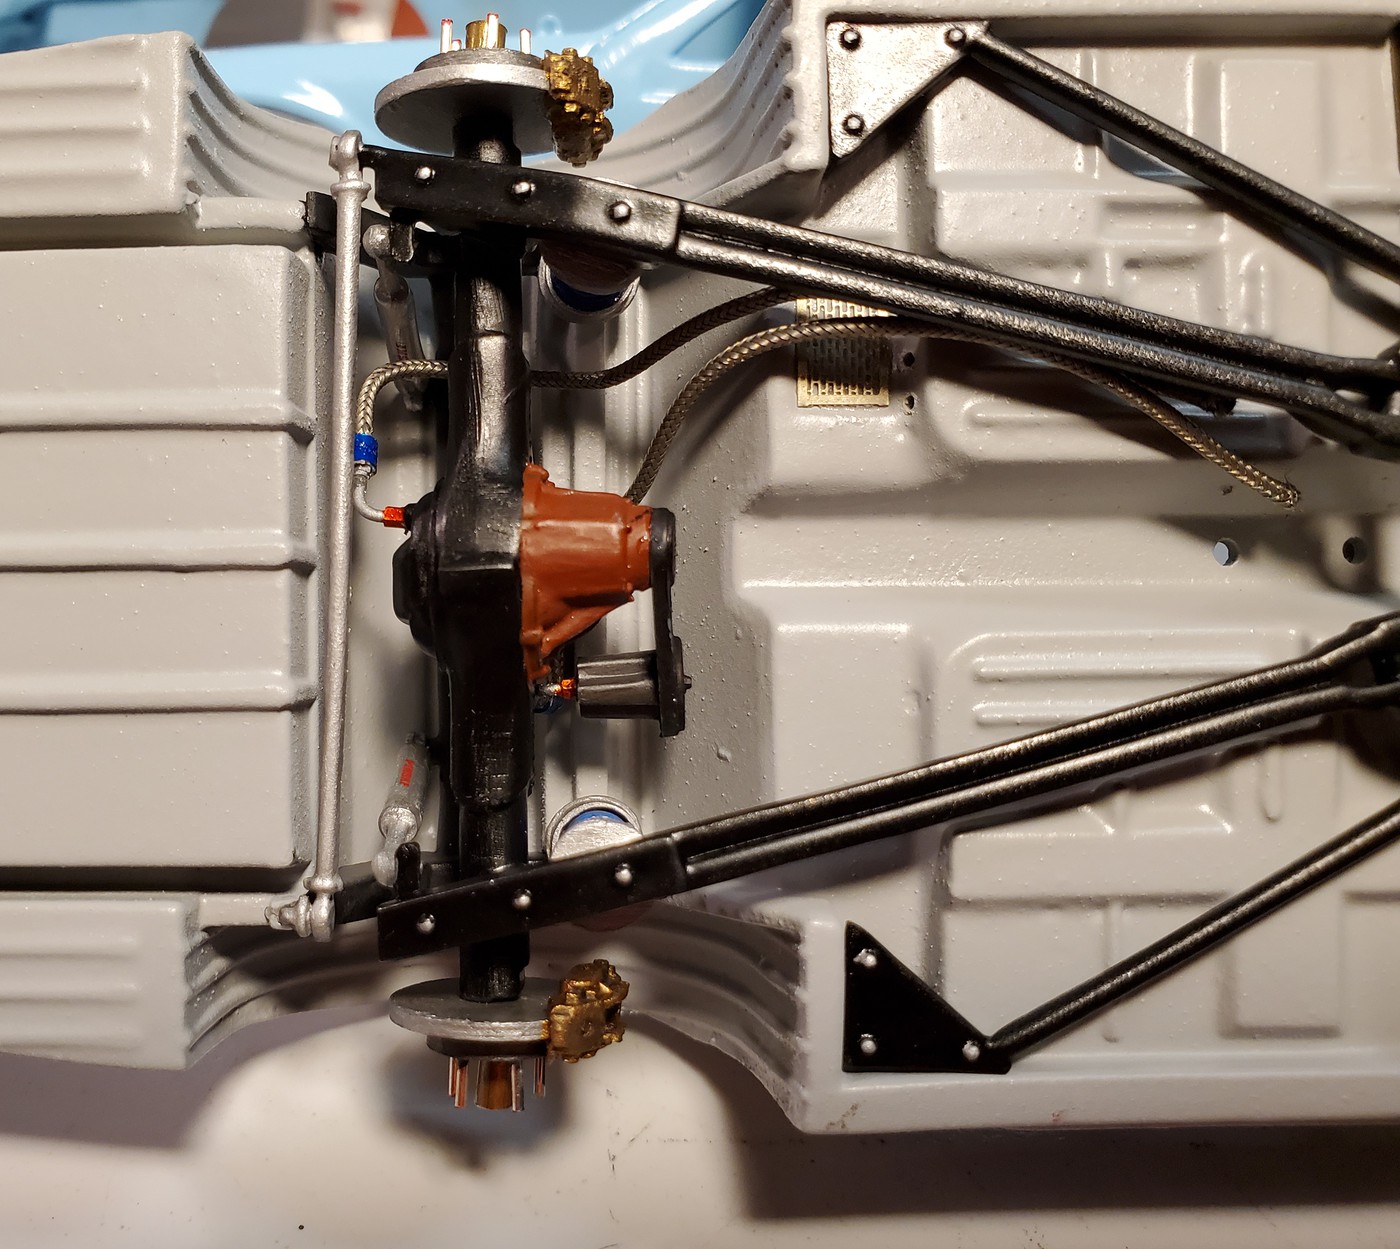
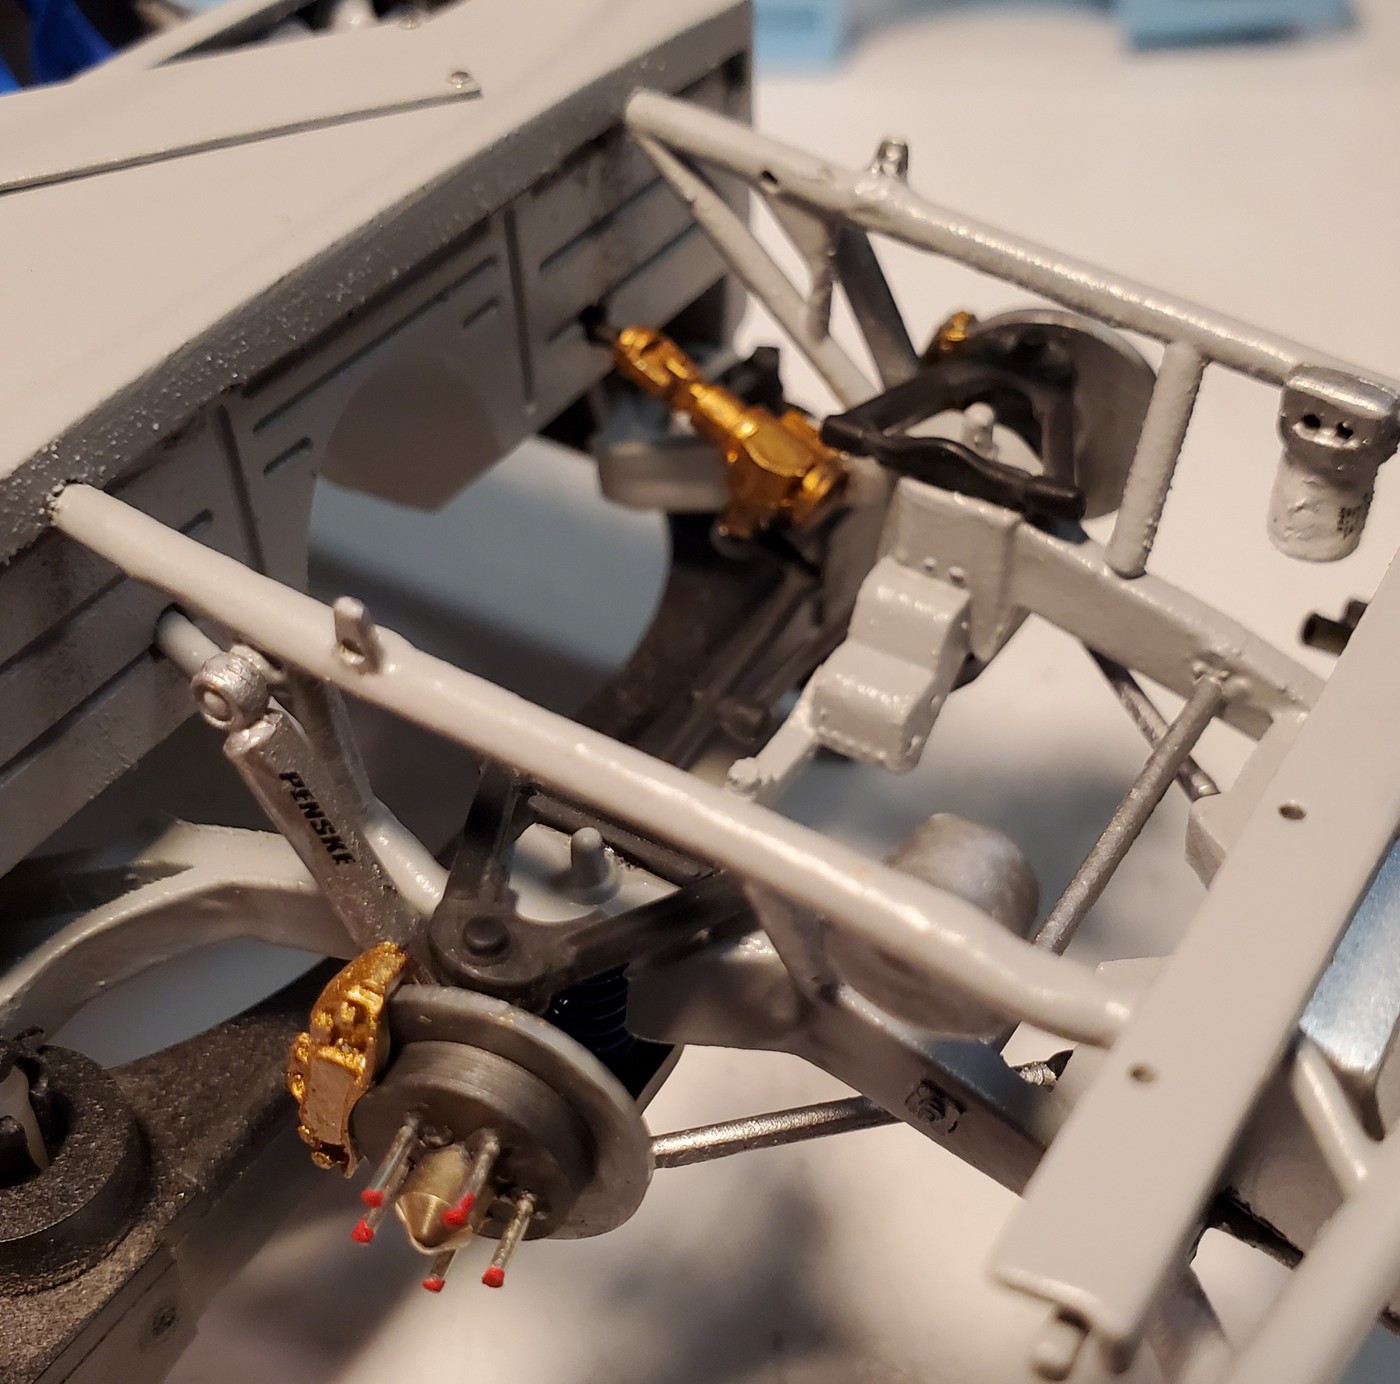
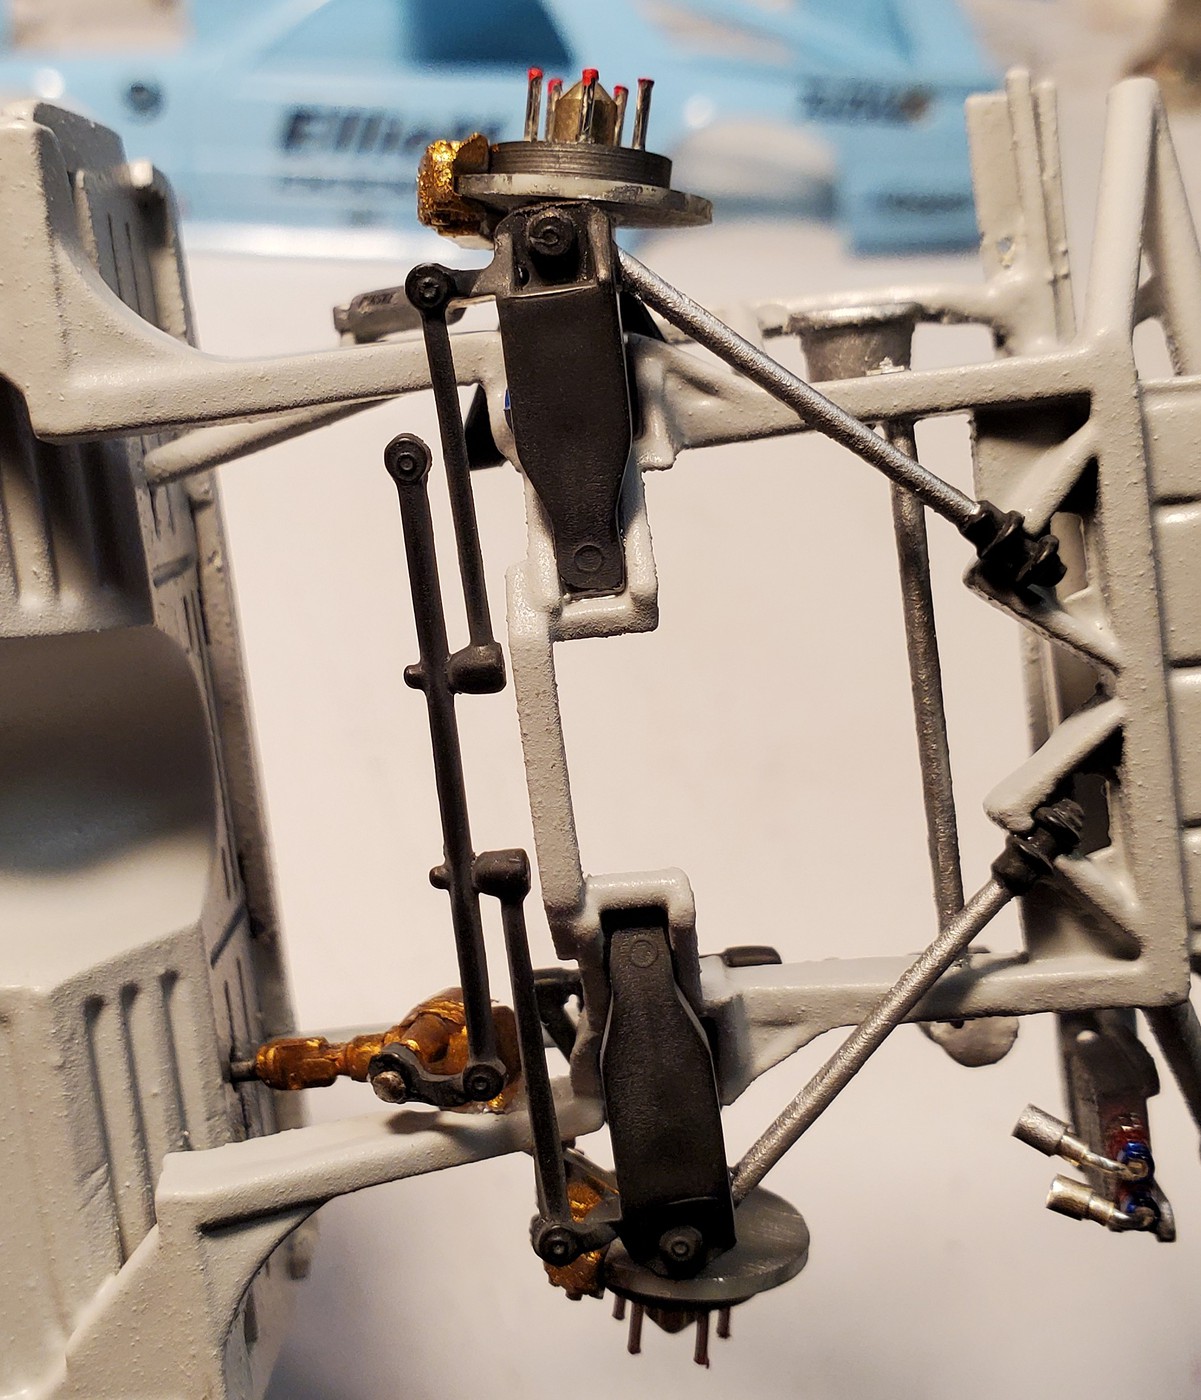
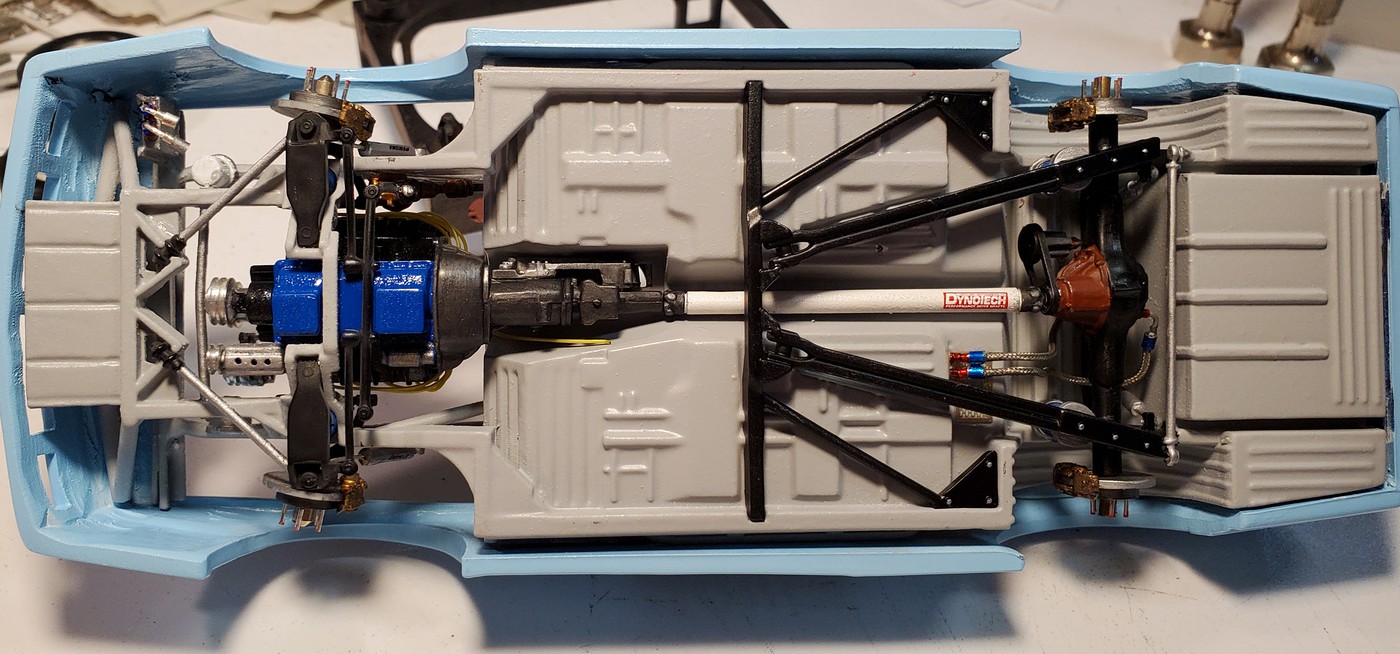
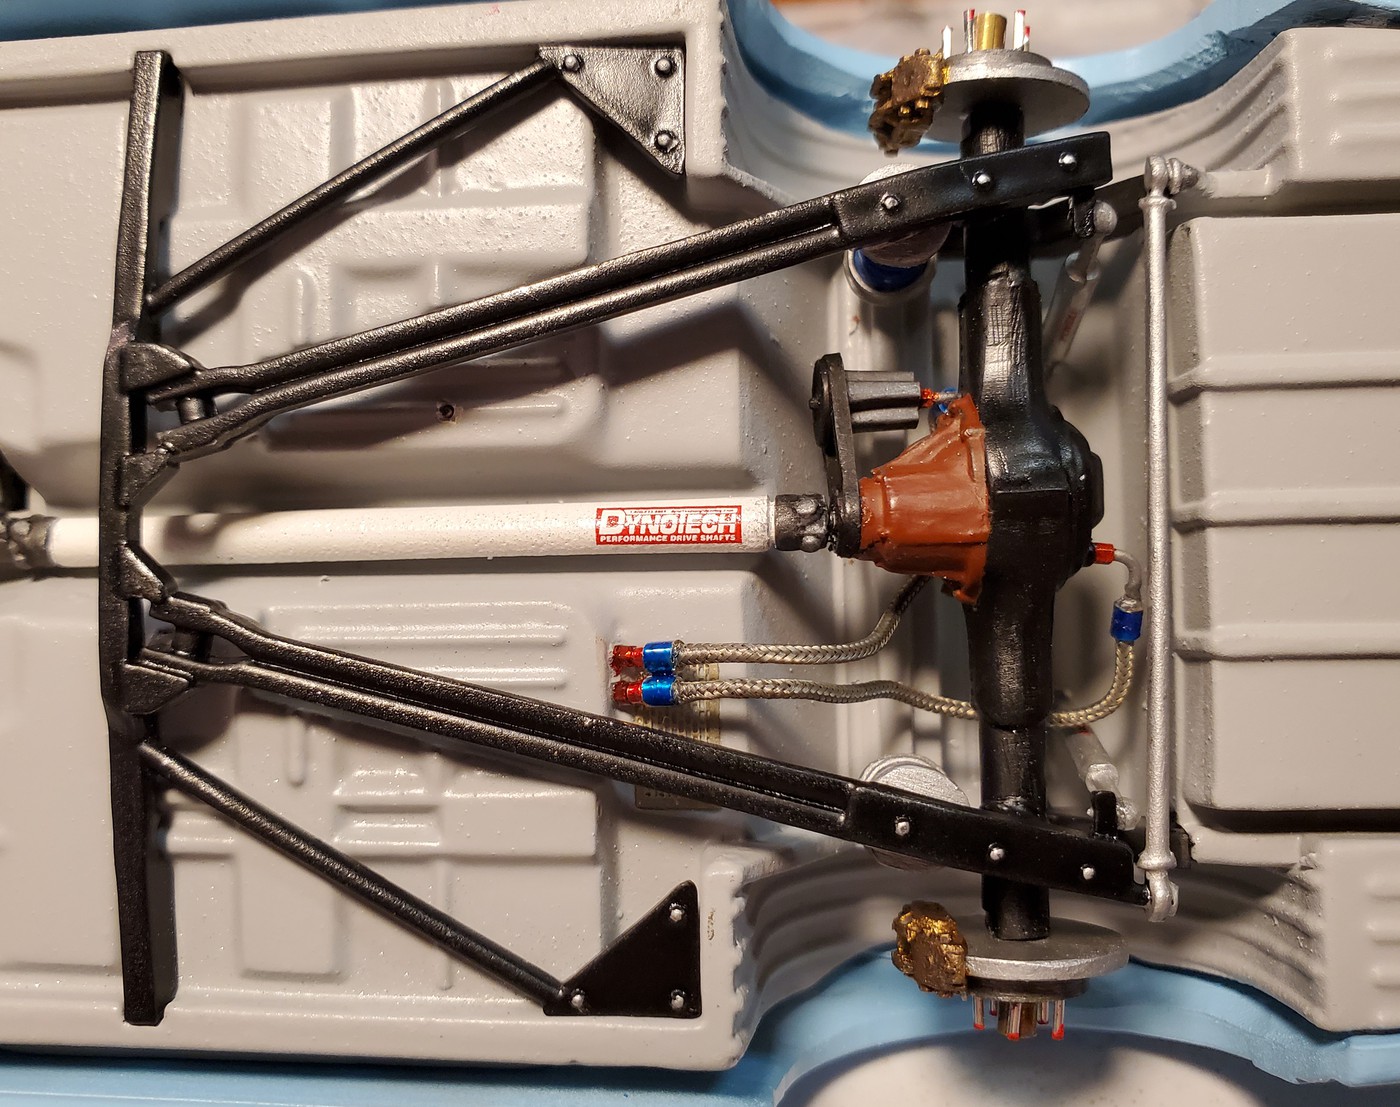
Rear suspension is close to done.
 |
|
| Back to top |
|
|
1320wayne1
Joined: 06 Jul 2019
Posts: 79
|
| Posted: Thu Jun 25, 2020 4:50 pm Post subject: |
|
|
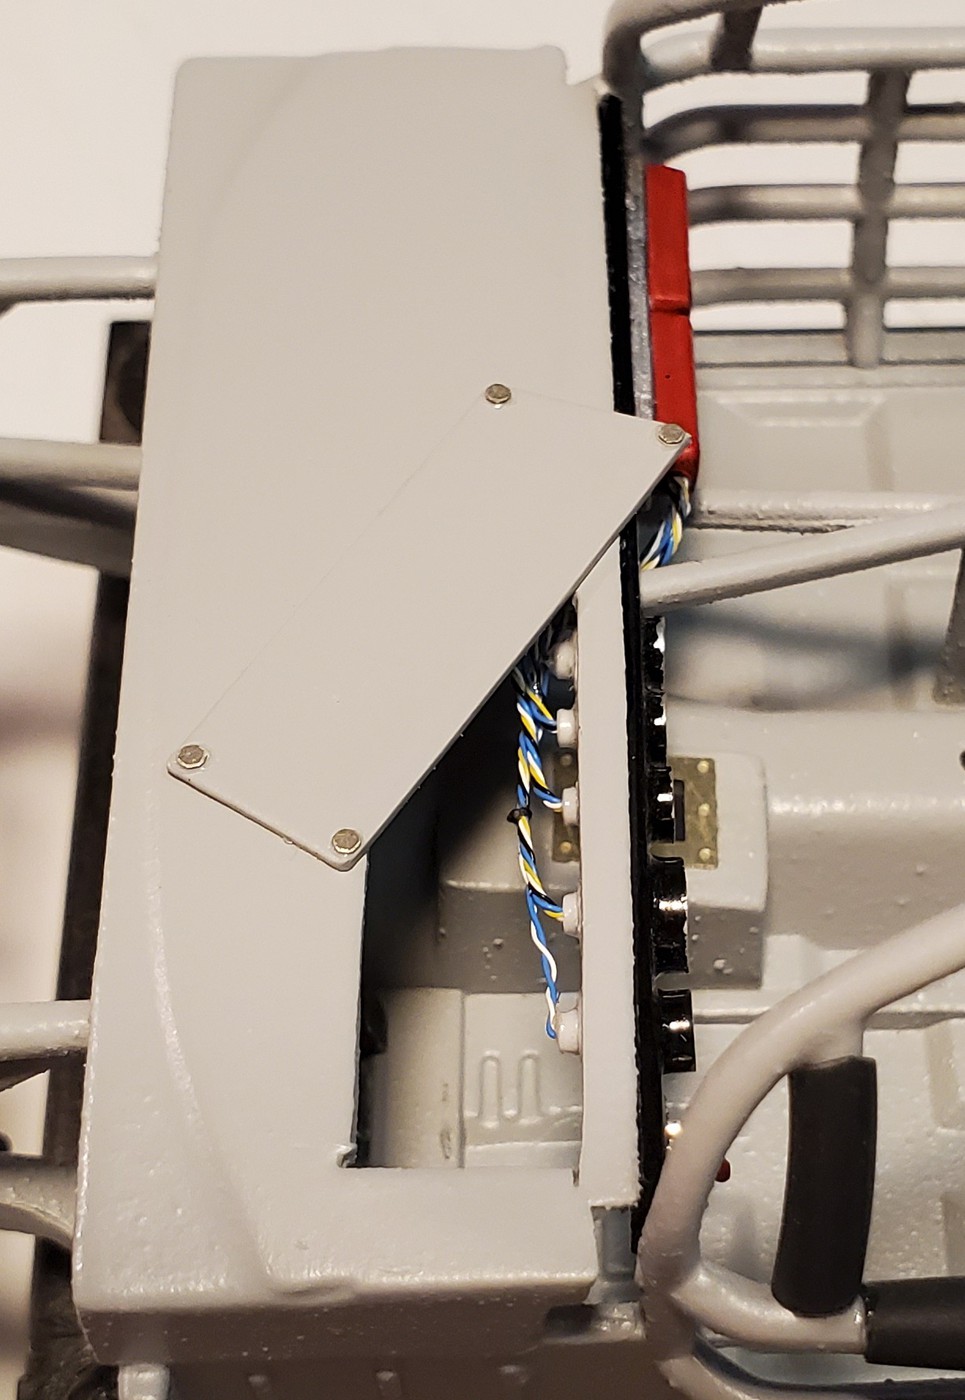
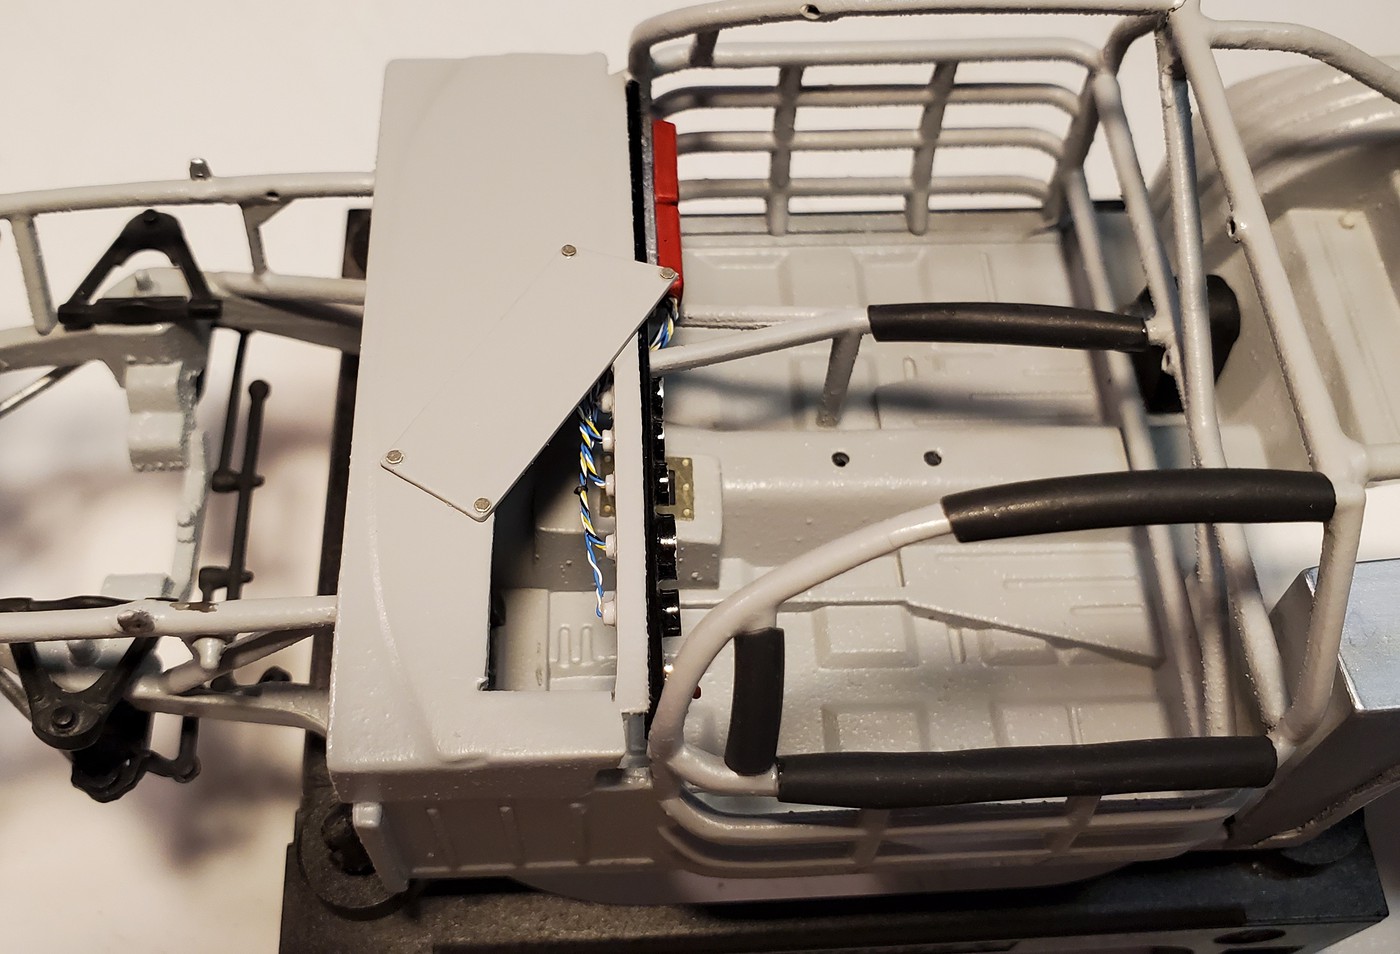
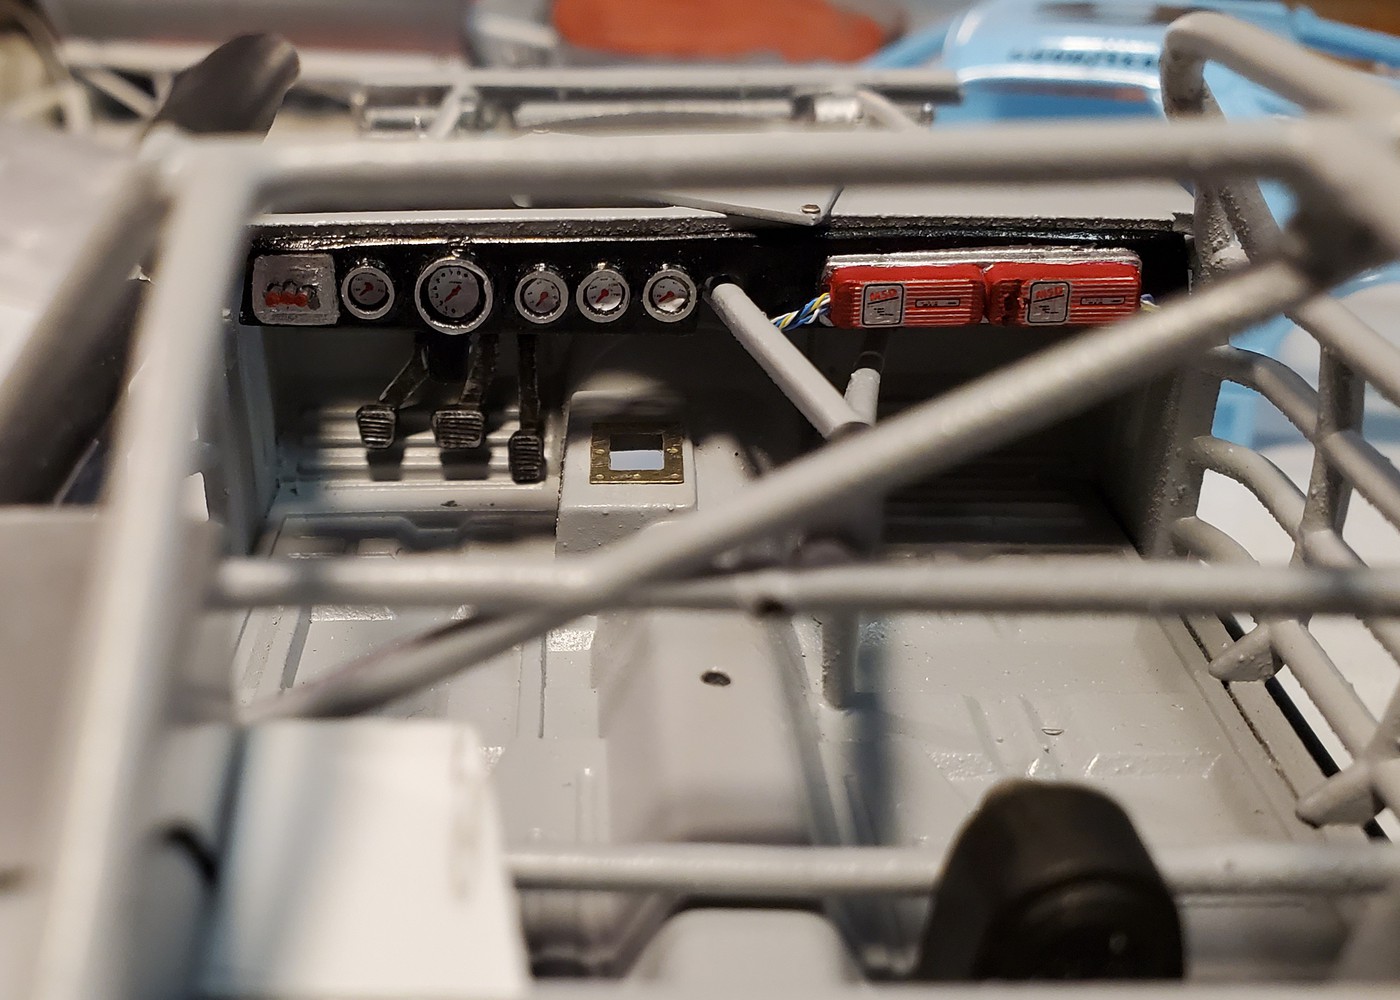
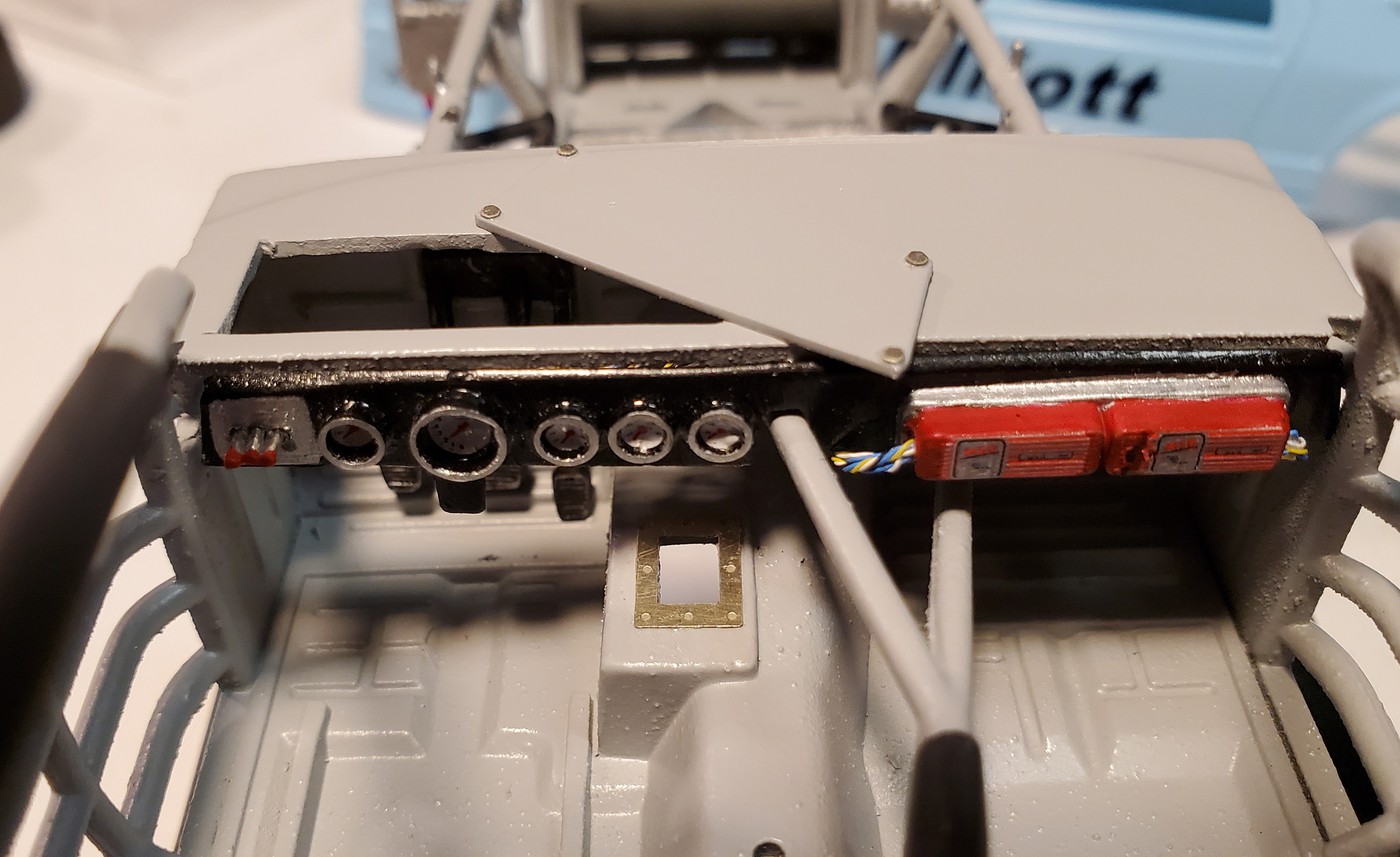
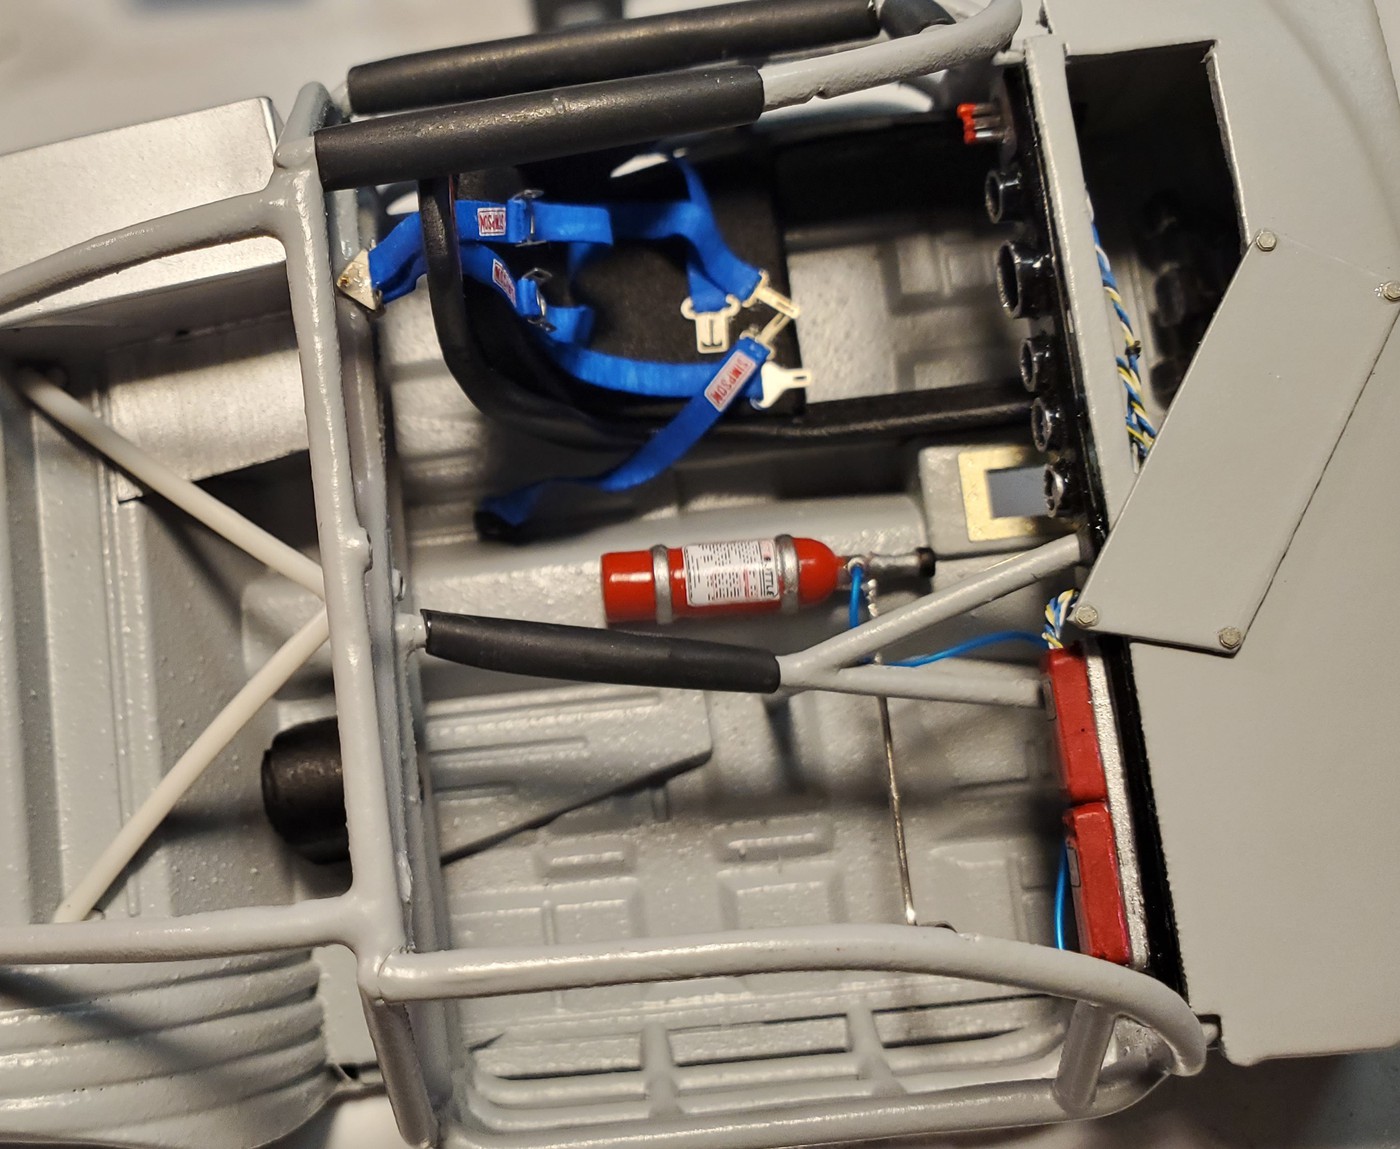
Started work on the dash and interior.
 |
|
| Back to top |
|
|
Radar43
Joined: 30 Jan 2018
Posts: 180
|
| Posted: Thu Jun 25, 2020 7:52 pm Post subject: IROC |
|
|
| Great work. Looking good. |
|
| Back to top |
|
|
1320wayne1
Joined: 06 Jul 2019
Posts: 79
|
| Posted: Sun Jun 28, 2020 9:09 pm Post subject: |
|
|
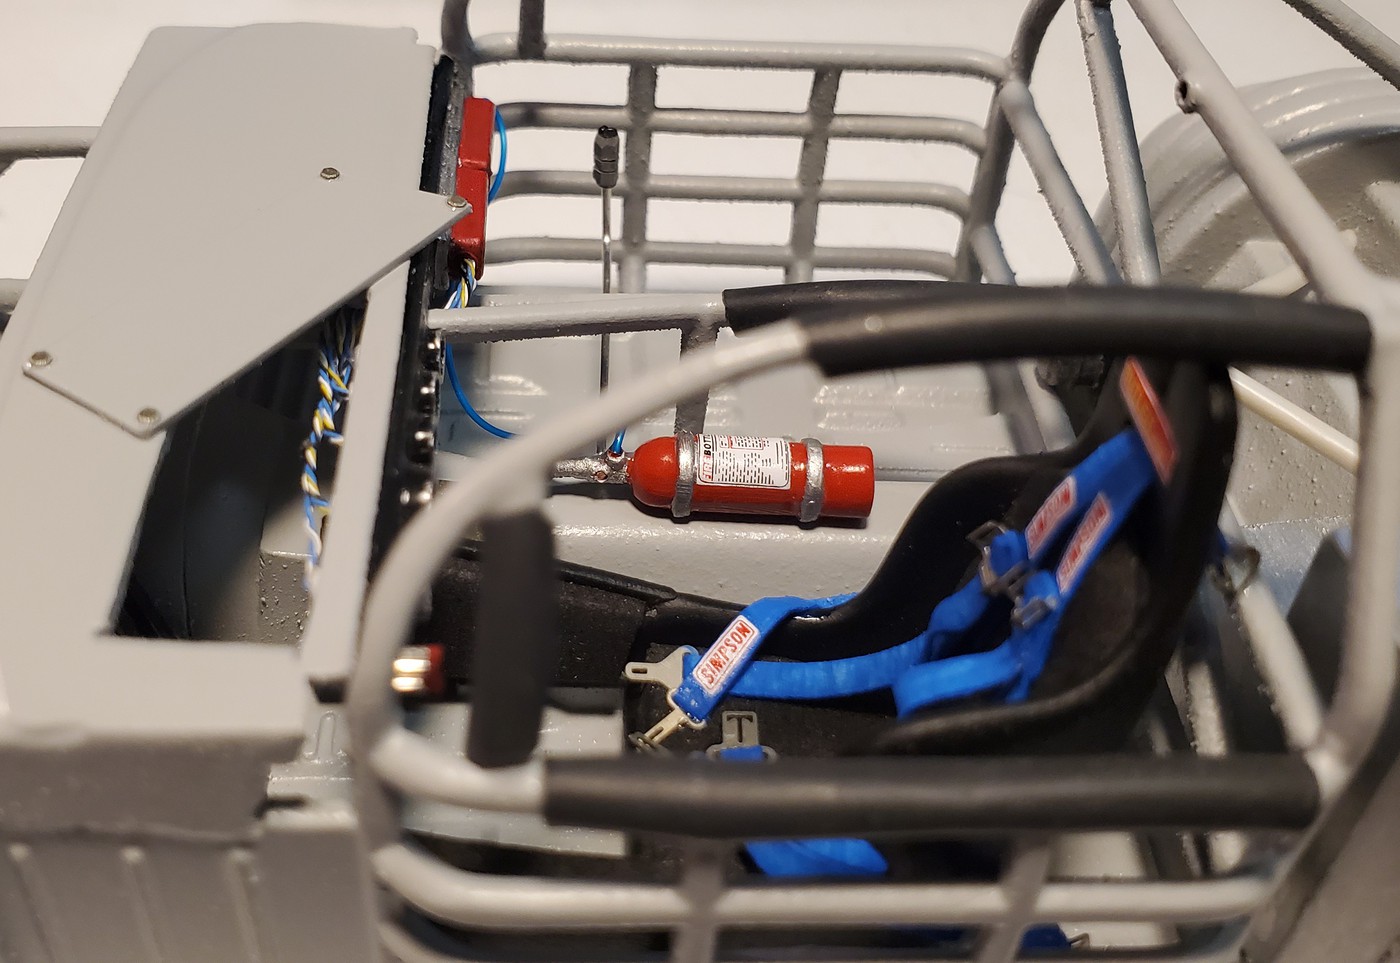
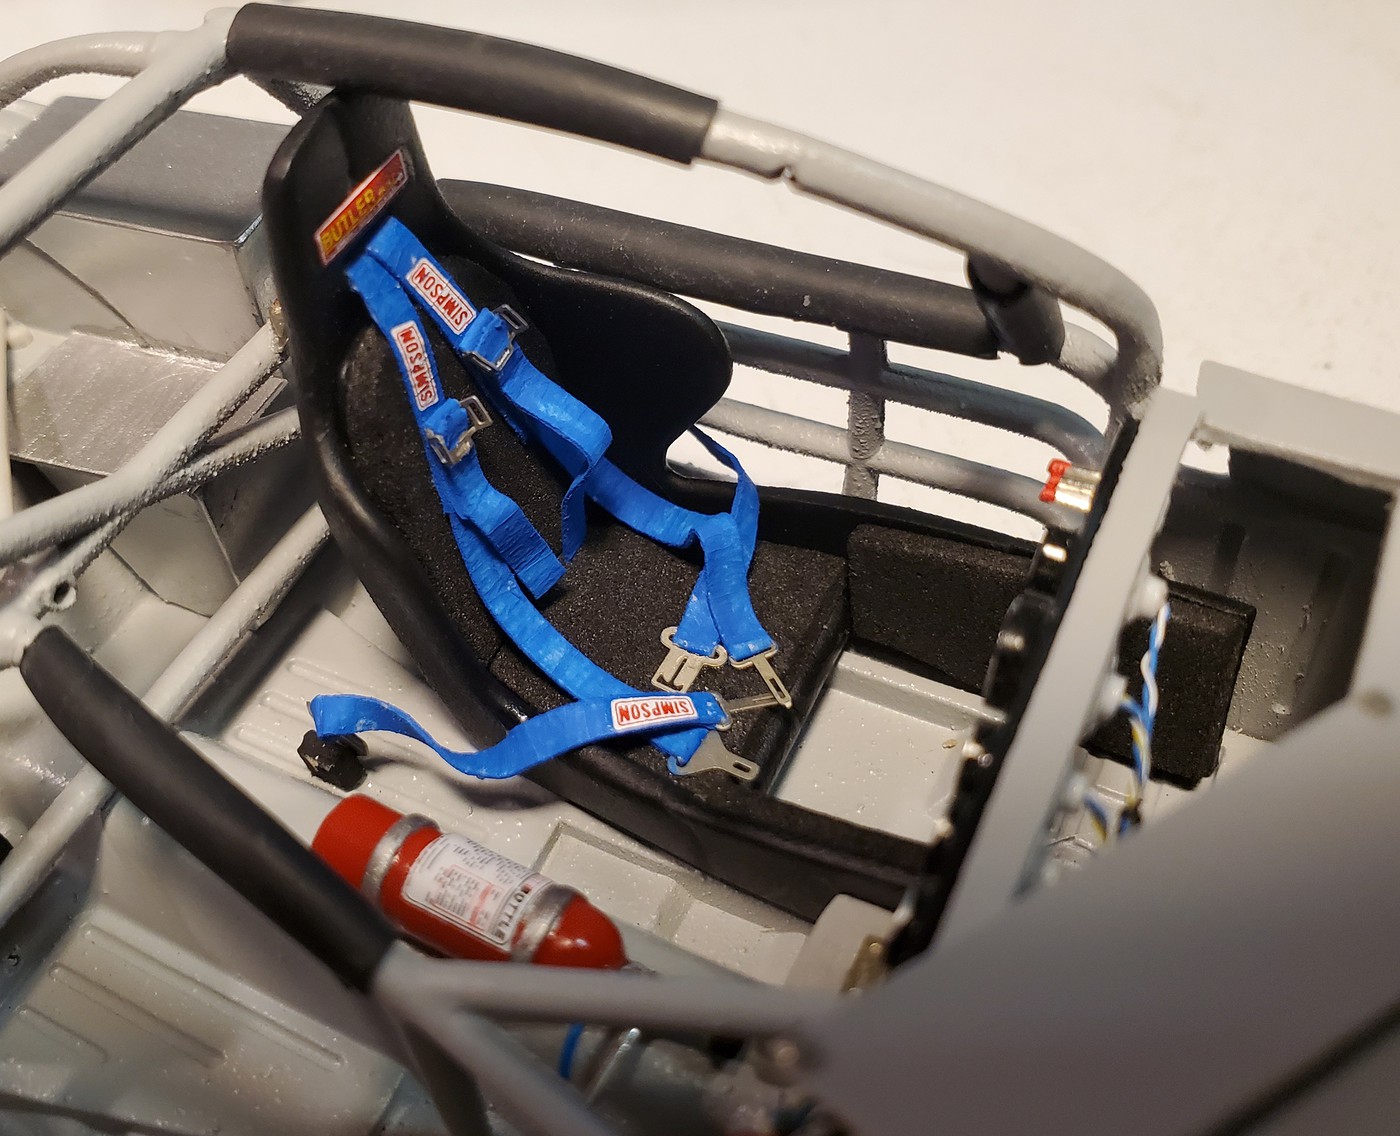
Racing harness and fire extinguisher completed. Added leg extensions and padding to the seat.
 |
|
| Back to top |
|
|
Mack
Joined: 28 Jan 2018
Posts: 732
Location: deep south
|
| Posted: Tue Jun 30, 2020 5:49 pm Post subject: |
|
|
This is one neat build. Seems like years ago I saw these cars in a local Ace Hardware store. You're doing a great job on your build.
_________________
life is hard, it's harder when you're stupid. John Wayne |
|
| Back to top |
|
|
scooter64
Joined: 27 Jan 2018
Posts: 301
|
| Posted: Tue Jun 30, 2020 7:59 pm Post subject: |
|
|
man...
that is crazy awesome.
i have the Camaro Z28 version of this "collectable"... planned on doing the Neil Bonnett yellow car.
are you going to have to make new glass? (the clear parts on the one i have are...kinda clear...and way thick.)
_________________
 |
|
| Back to top |
|
|
wildbill72
Joined: 28 Jan 2018
Posts: 112
Location: Grand Rapids, Mi
|
| Posted: Tue Jun 30, 2020 9:34 pm Post subject: |
|
|
Very nice!  |
|
| Back to top |
|
|
1320wayne1
Joined: 06 Jul 2019
Posts: 79
|
| Posted: Wed Jul 01, 2020 11:16 am Post subject: |
|
|
| scooter64 wrote: | man...
that is crazy awesome.
i have the Camaro Z28 version of this "collectable"... planned on doing the Neil Bonnett yellow car.
are you going to have to make new glass? (the clear parts on the one i have are...kinda clear...and way thick.) |
Yes, must make new glass. |
|
| Back to top |
|
|
1320wayne1
Joined: 06 Jul 2019
Posts: 79
|
| Posted: Wed Jul 01, 2020 11:16 am Post subject: |
|
|
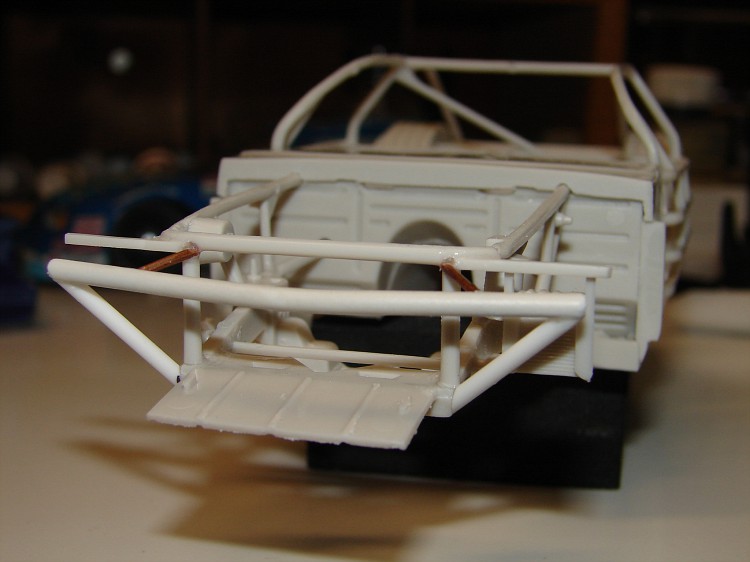
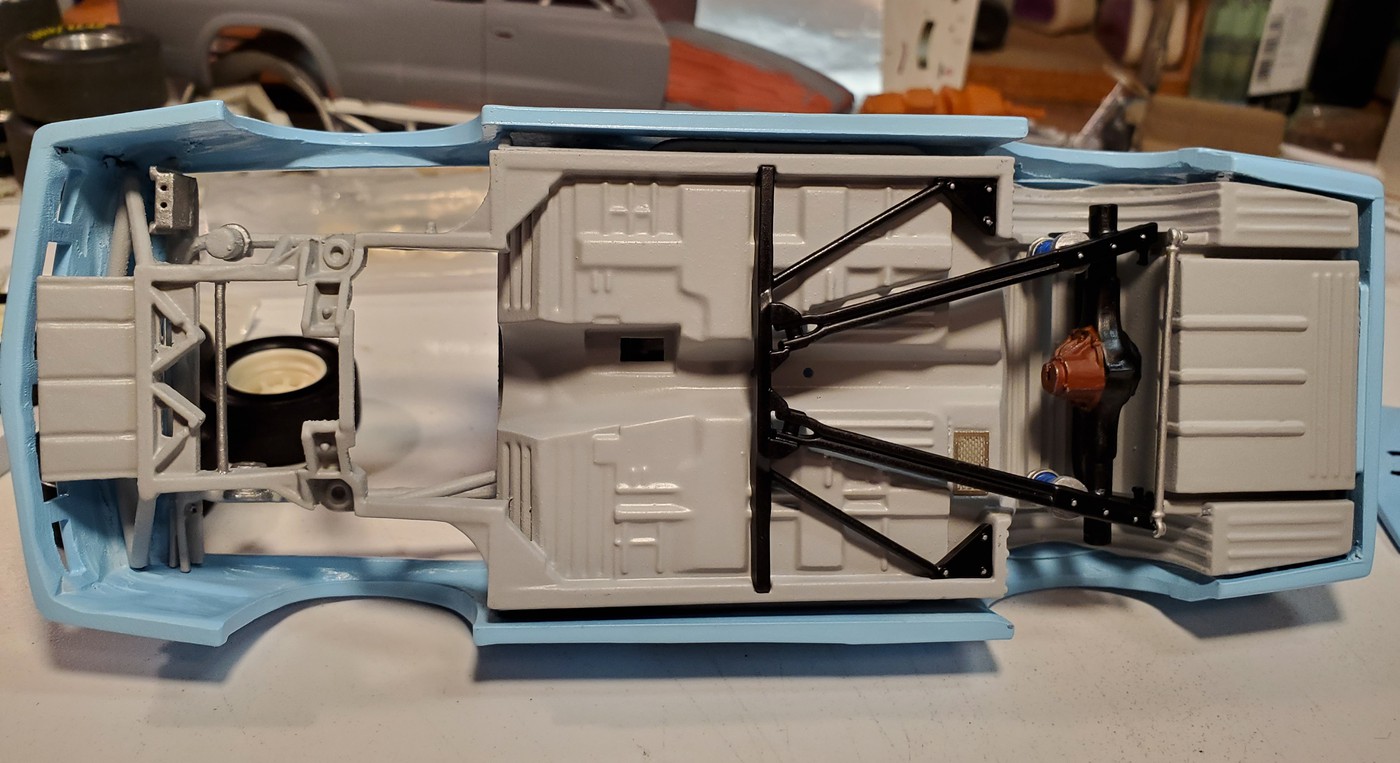
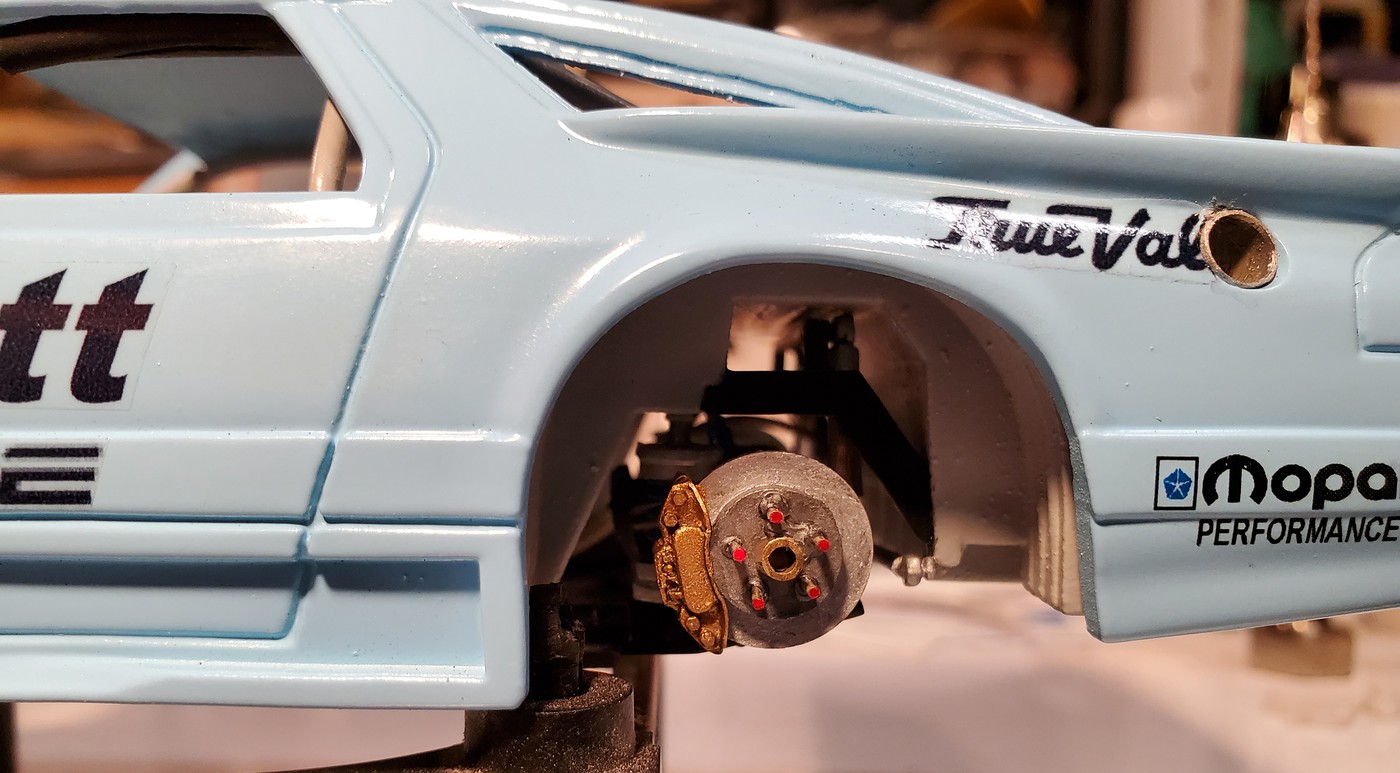
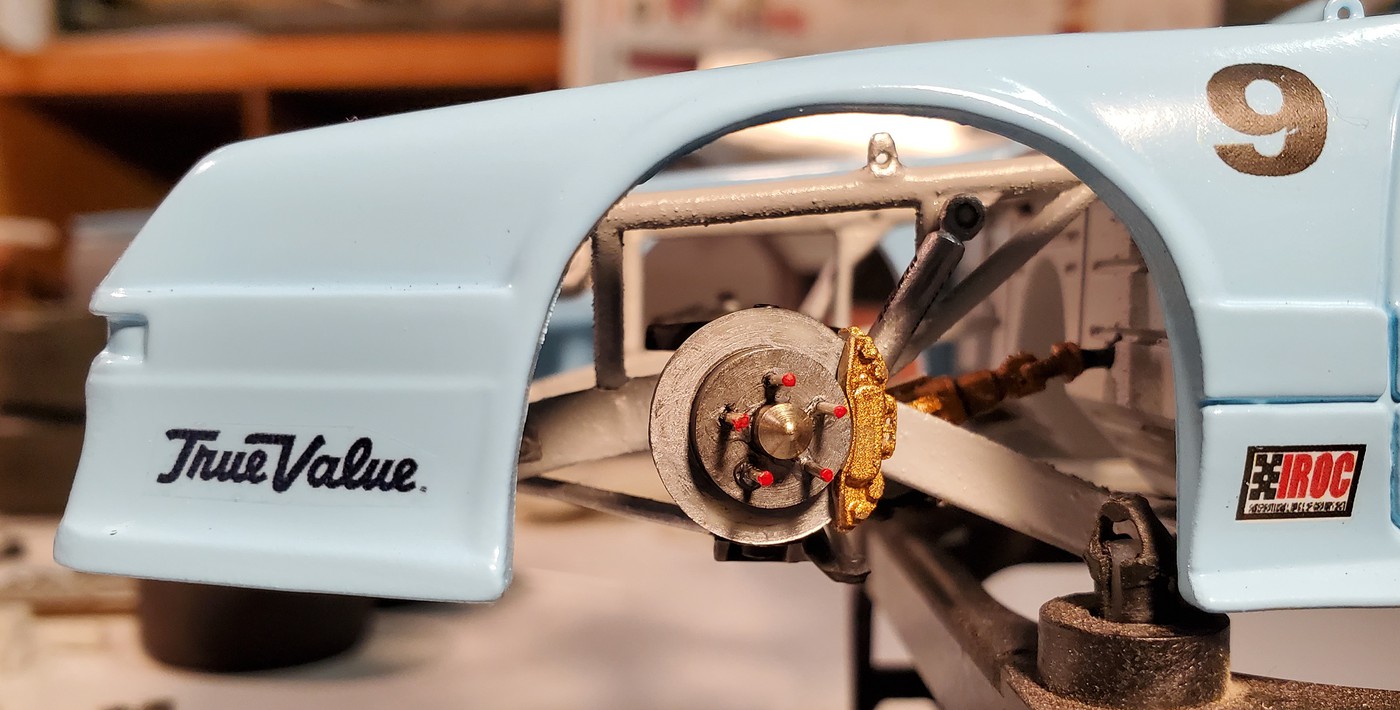
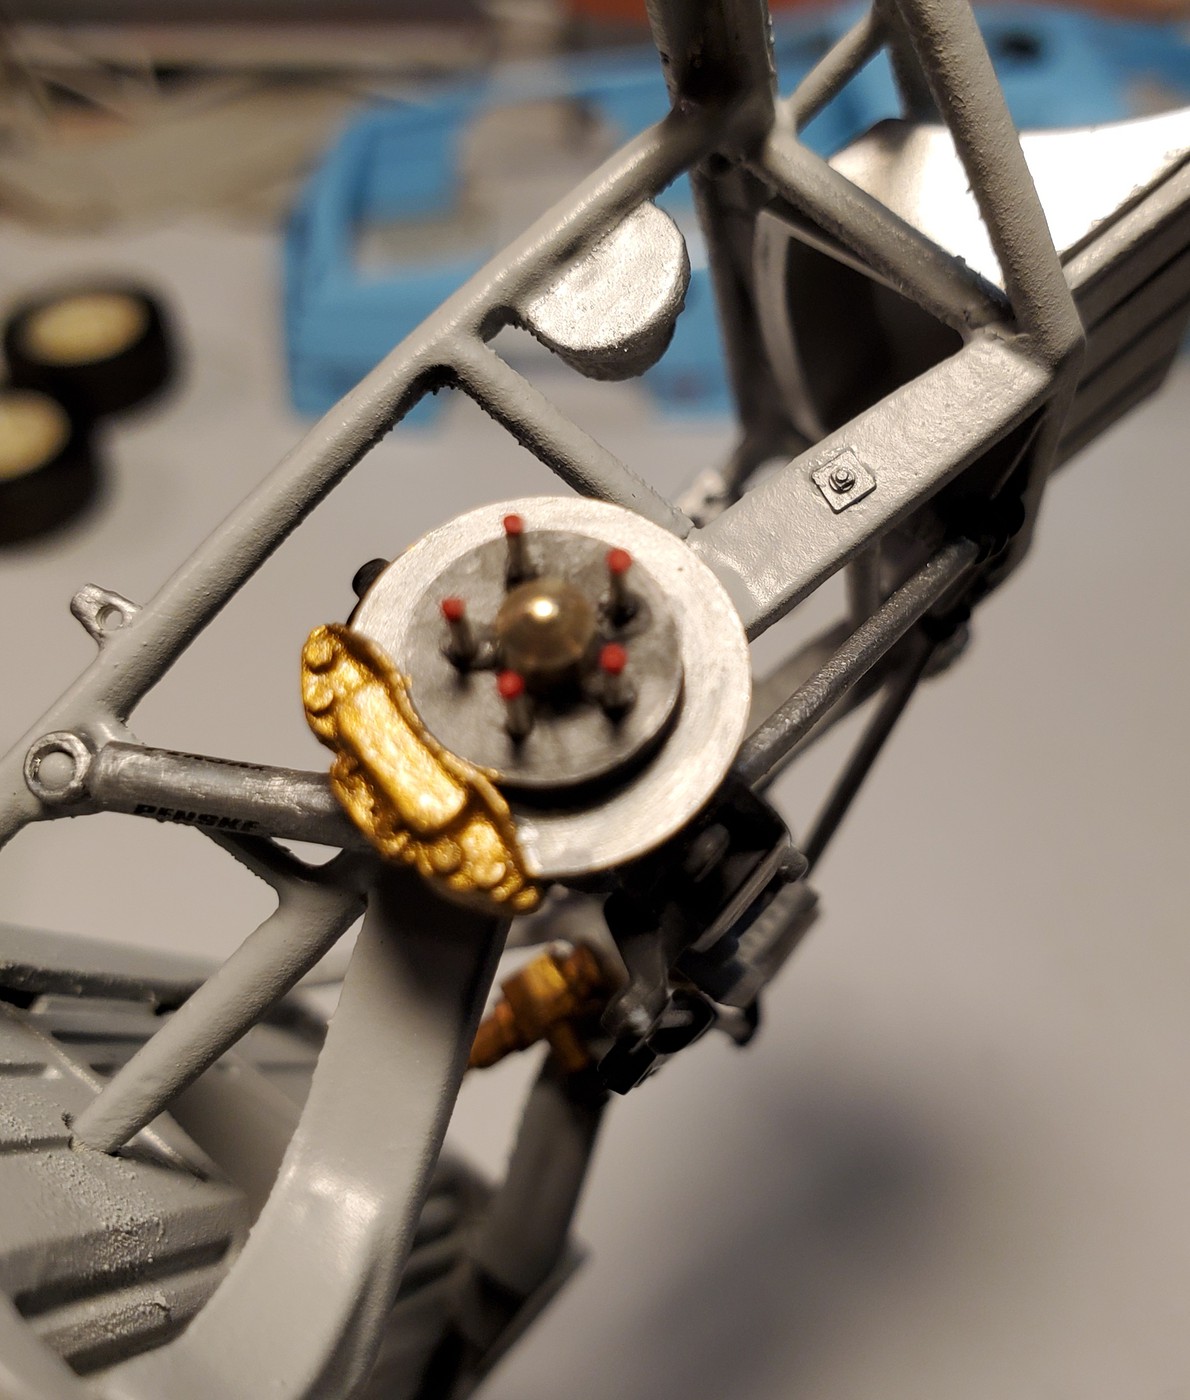
Front suspension close to done.

 |
|
| Back to top |
|
|
1320wayne1
Joined: 06 Jul 2019
Posts: 79
|
| Posted: Fri Jul 03, 2020 9:46 pm Post subject: |
|
|
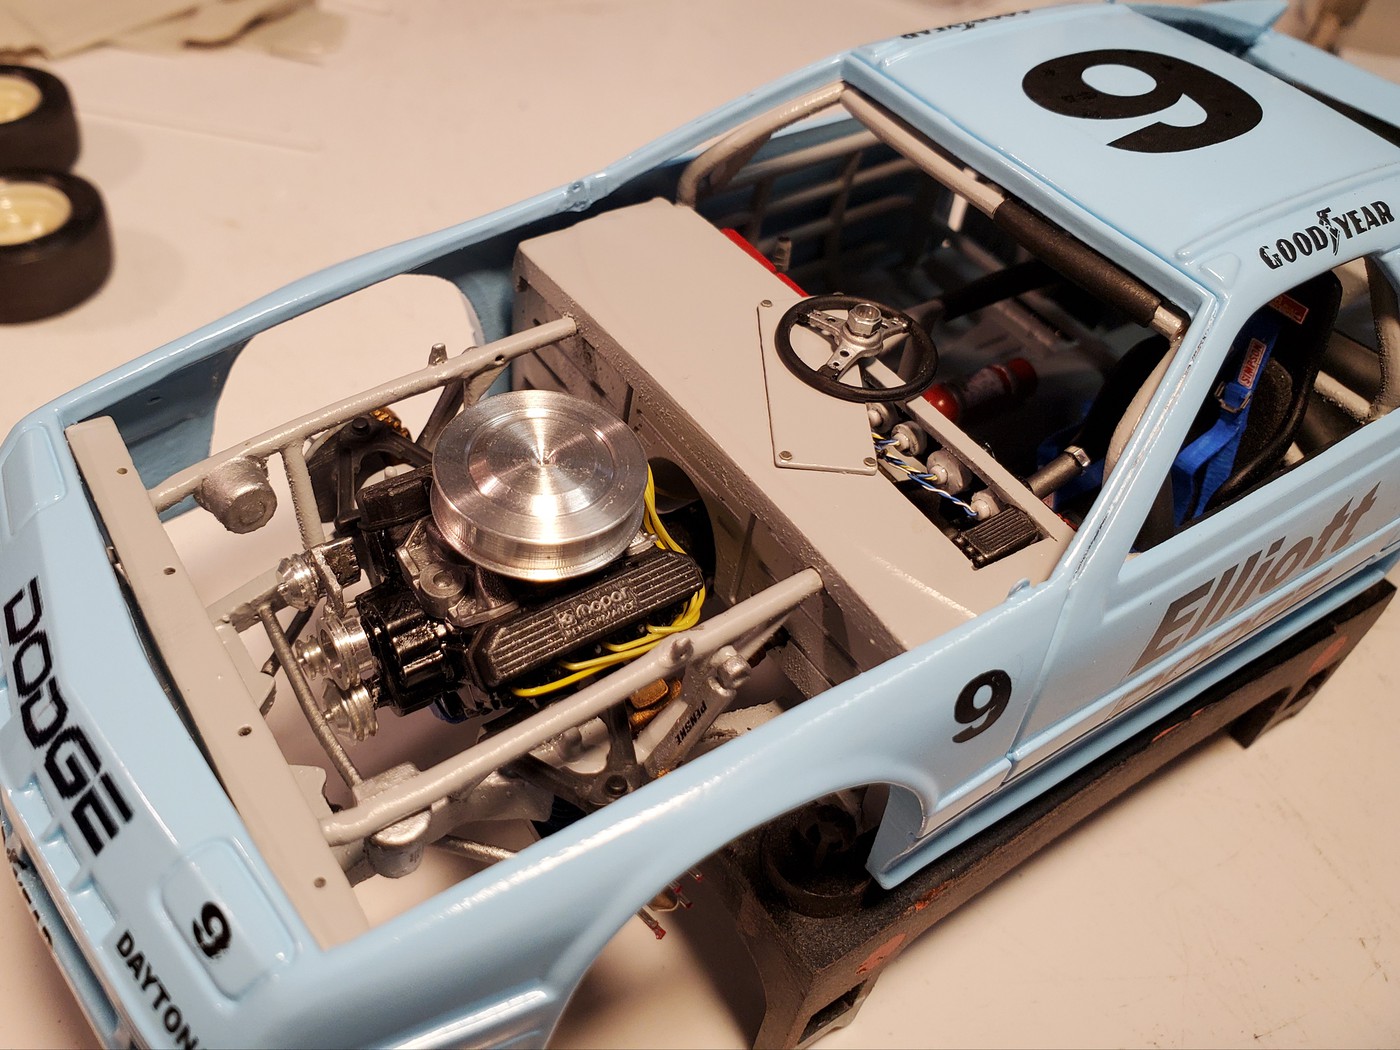
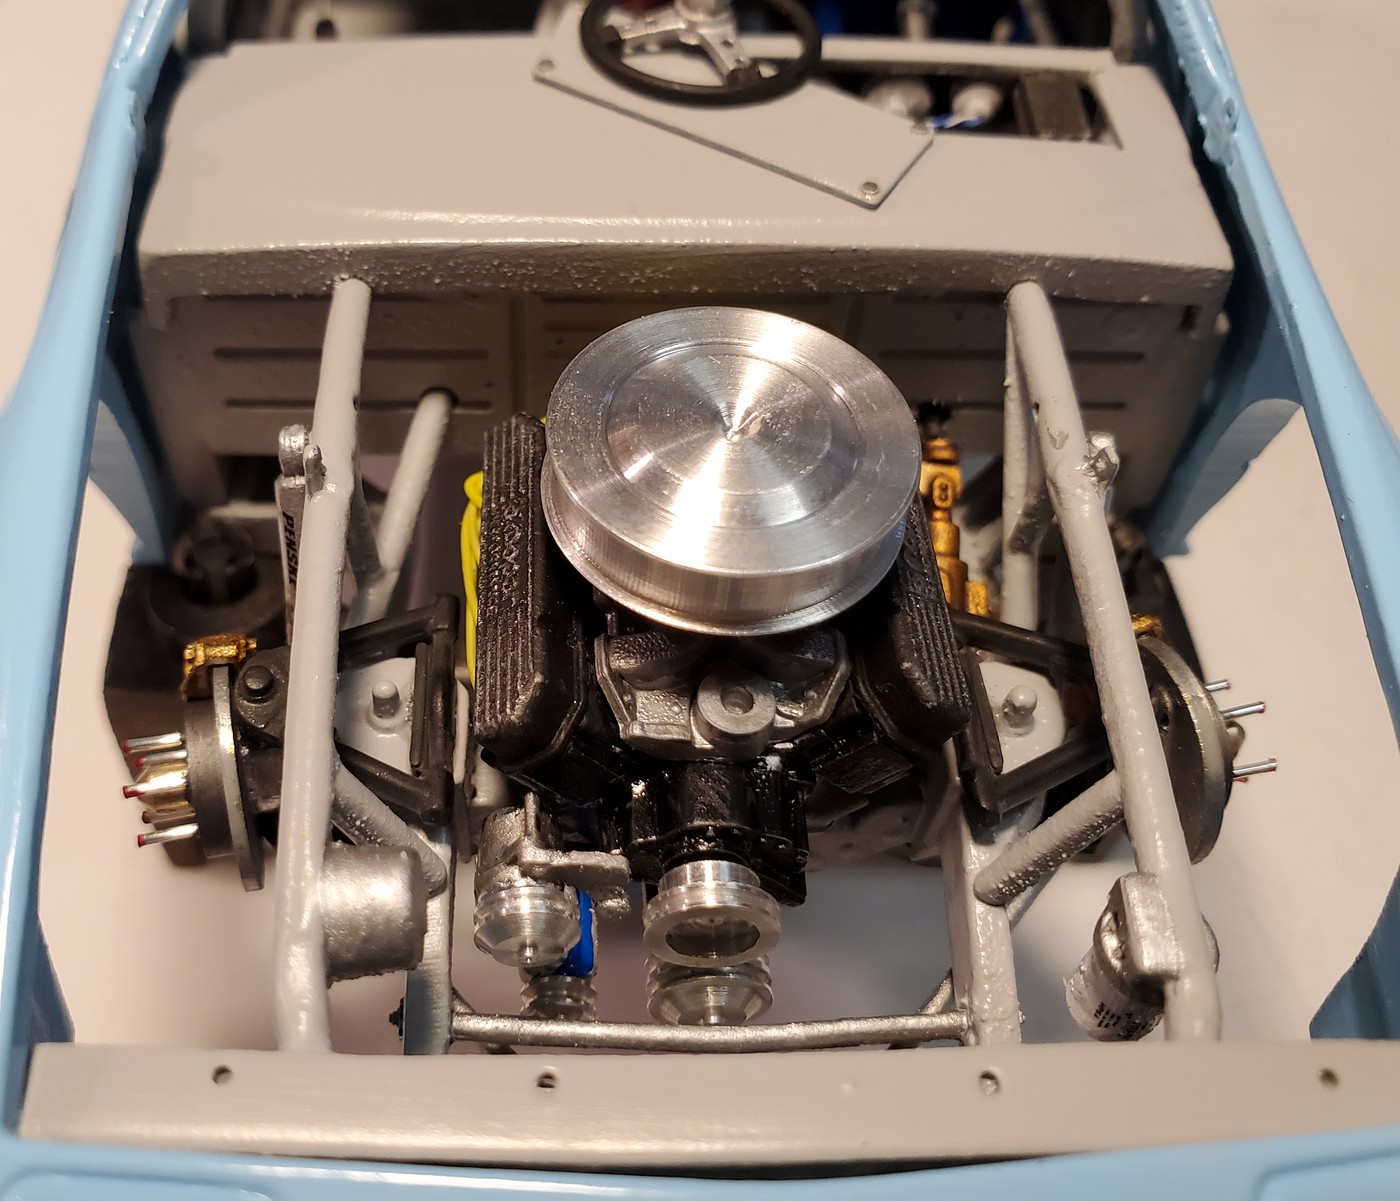
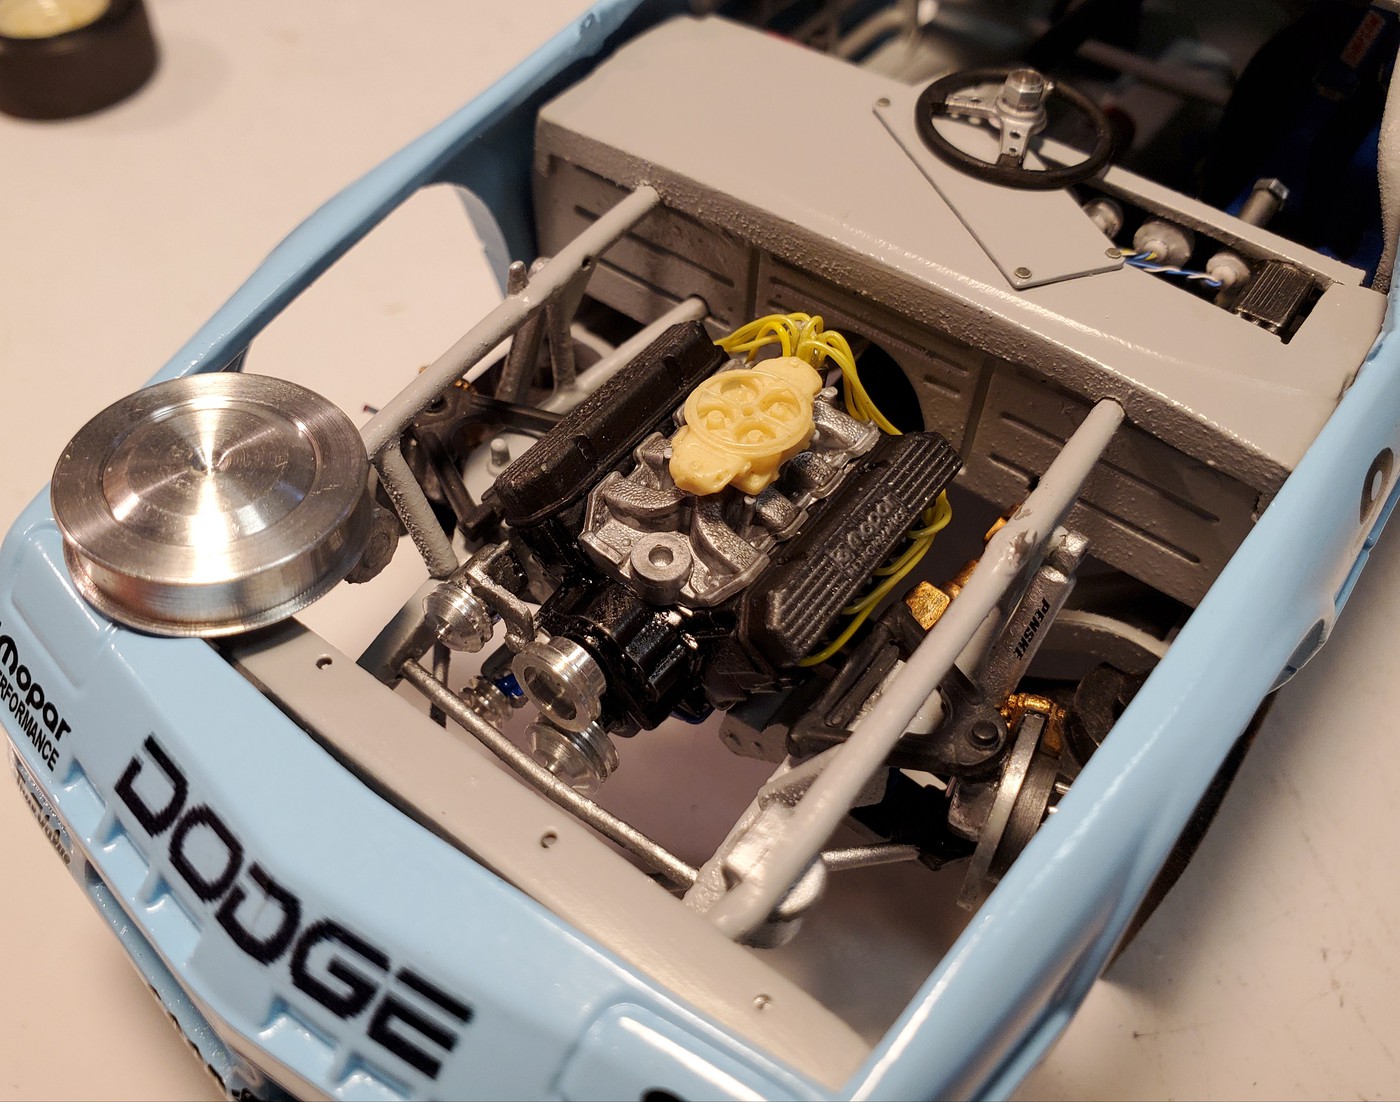
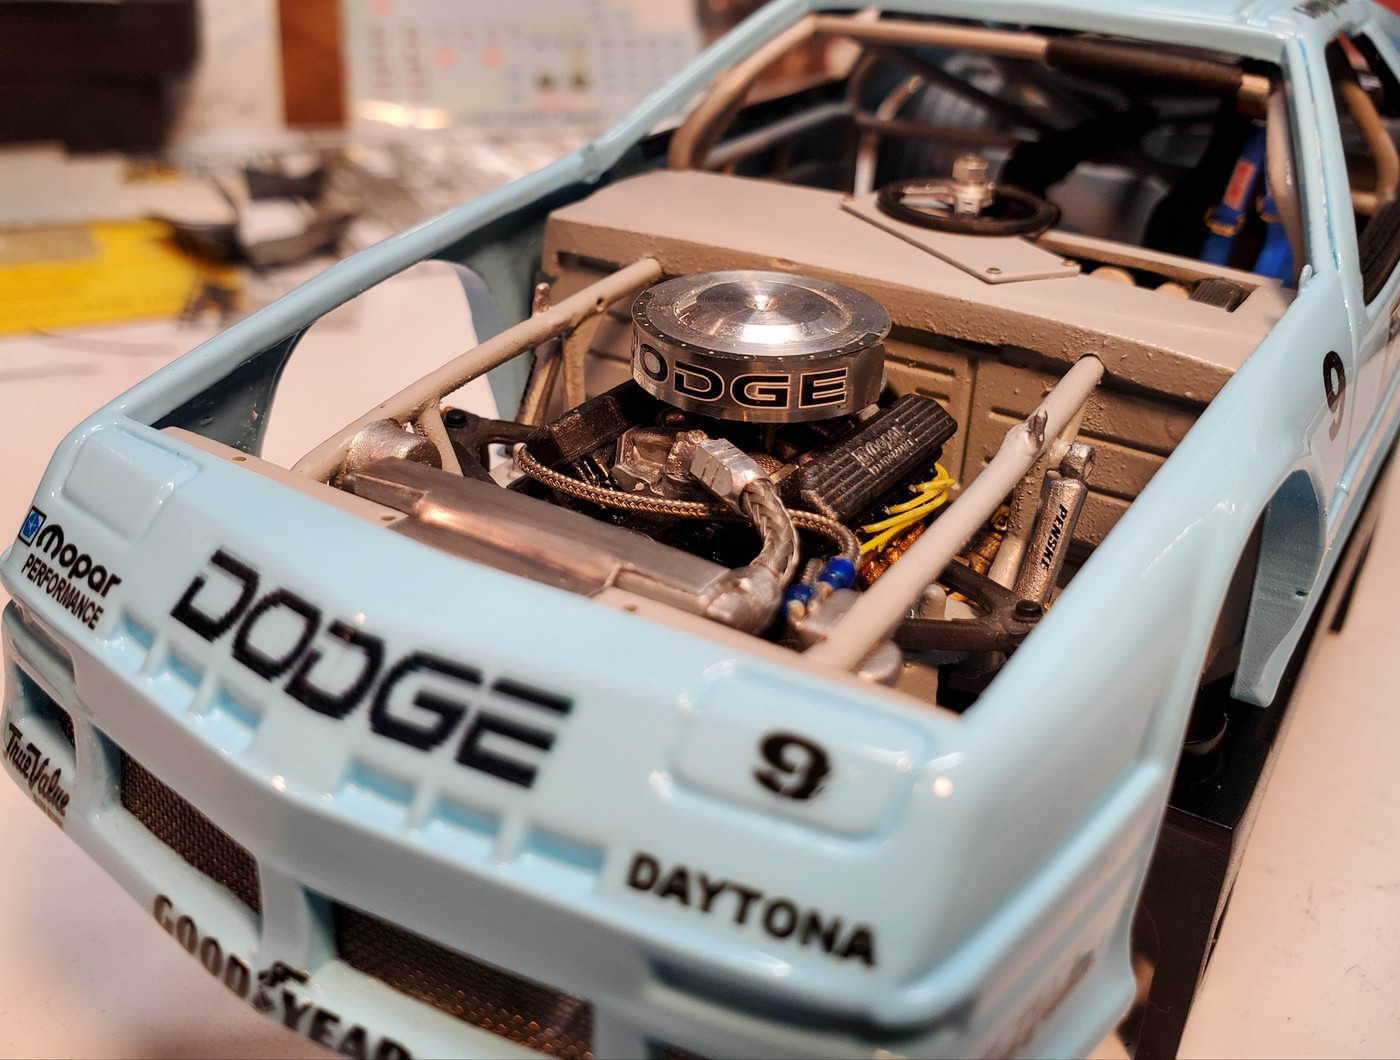
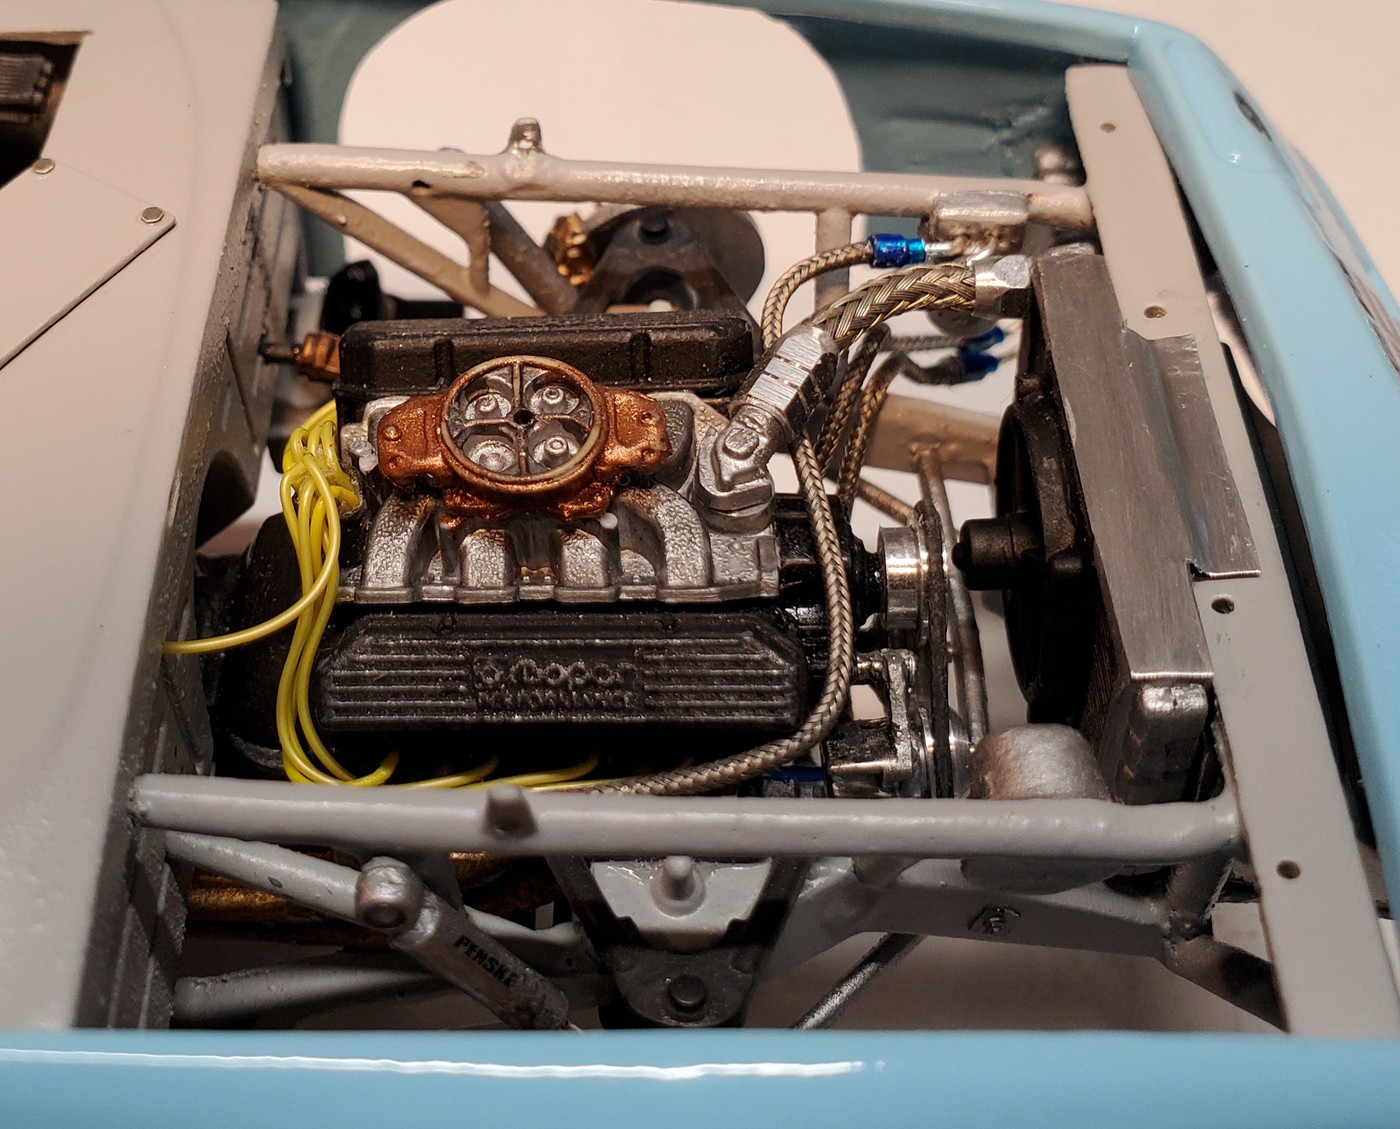
Started on the engine. Detail Master air cleaner (not finished), pulleys and 3D printed valve covers.
 |
|
| Back to top |
|
|
LarryMow
Joined: 15 Mar 2019
Posts: 24
|
| Posted: Sun Jul 05, 2020 9:56 pm Post subject: |
|
|
| Awesome build....Ive been wanting to build the IROC cars for my Earnhardt collection (Camaros, Daytonas, Trans Ams and ???Avengers???) Where did you find the decals? |
|
| Back to top |
|
|
1320wayne1
Joined: 06 Jul 2019
Posts: 79
|
|
| Back to top |
|
|
pettyblue
Joined: 09 Feb 2018
Posts: 11
|
| Posted: Sun Jul 12, 2020 11:58 am Post subject: Dodge Daytona IROC |
|
|
| Excellent example of the power of tidy paint detailing. I always thought the Dodge Daytona IROC cars were very cool. Thanks for posting |
|
| Back to top |
|
|
LarryMow
Joined: 15 Mar 2019
Posts: 24
|
| Posted: Sun Jul 12, 2020 1:50 pm Post subject: |
|
|
| thanks!!!! I shall start a hunt for them in just a few minutes!!!! |
|
| Back to top |
|
|
1320wayne1
Joined: 06 Jul 2019
Posts: 79
|
| Posted: Mon Jul 13, 2020 2:00 pm Post subject: |
|
|
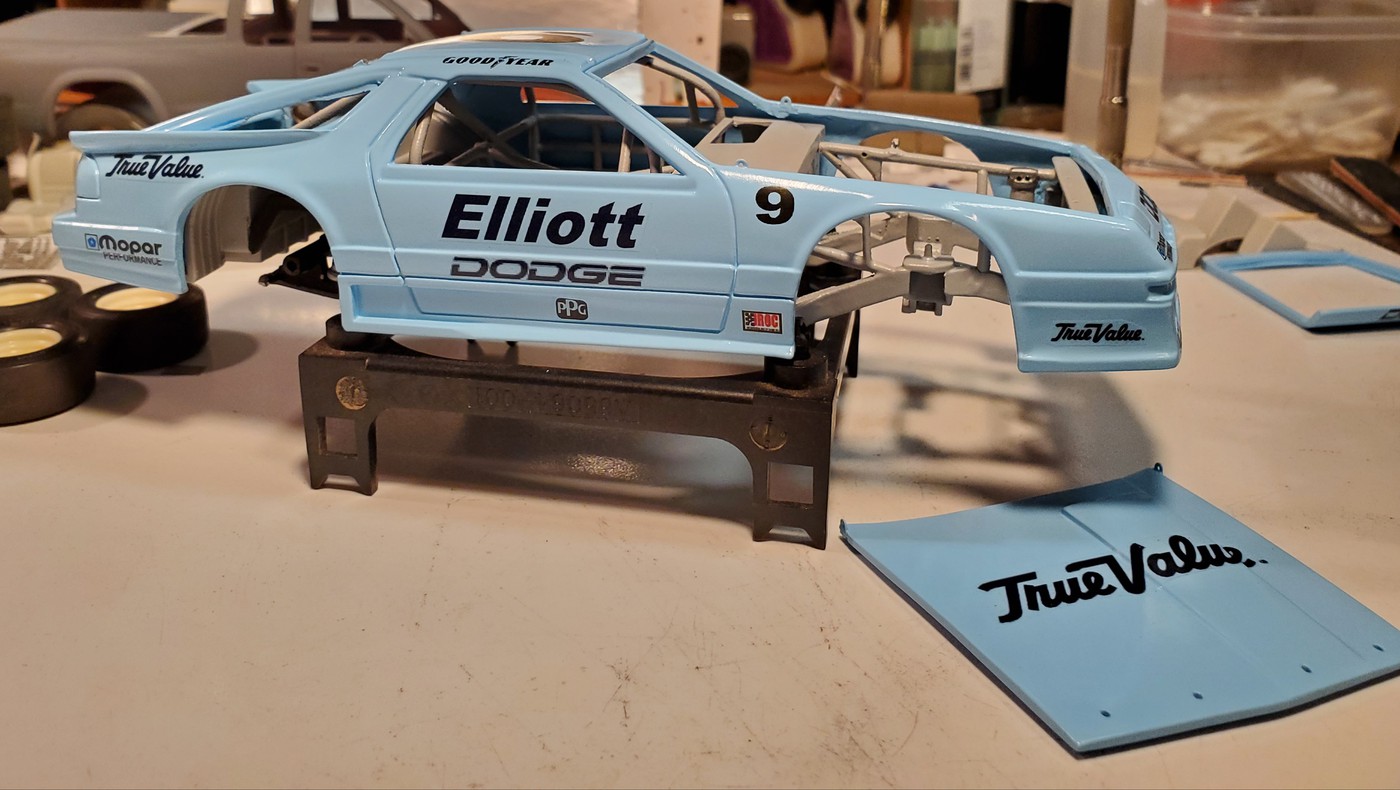
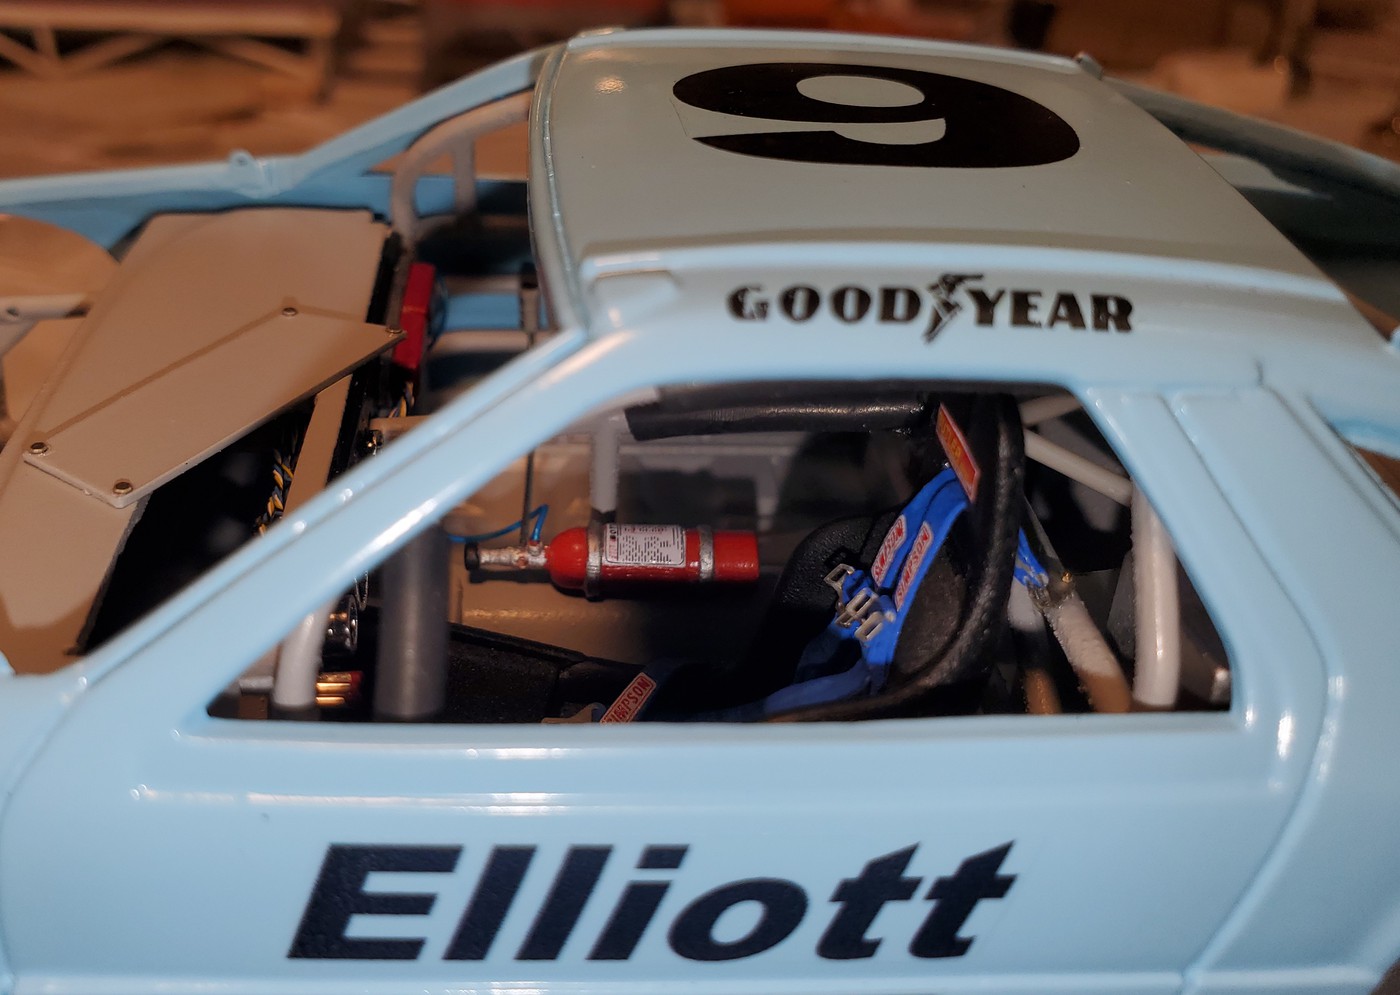
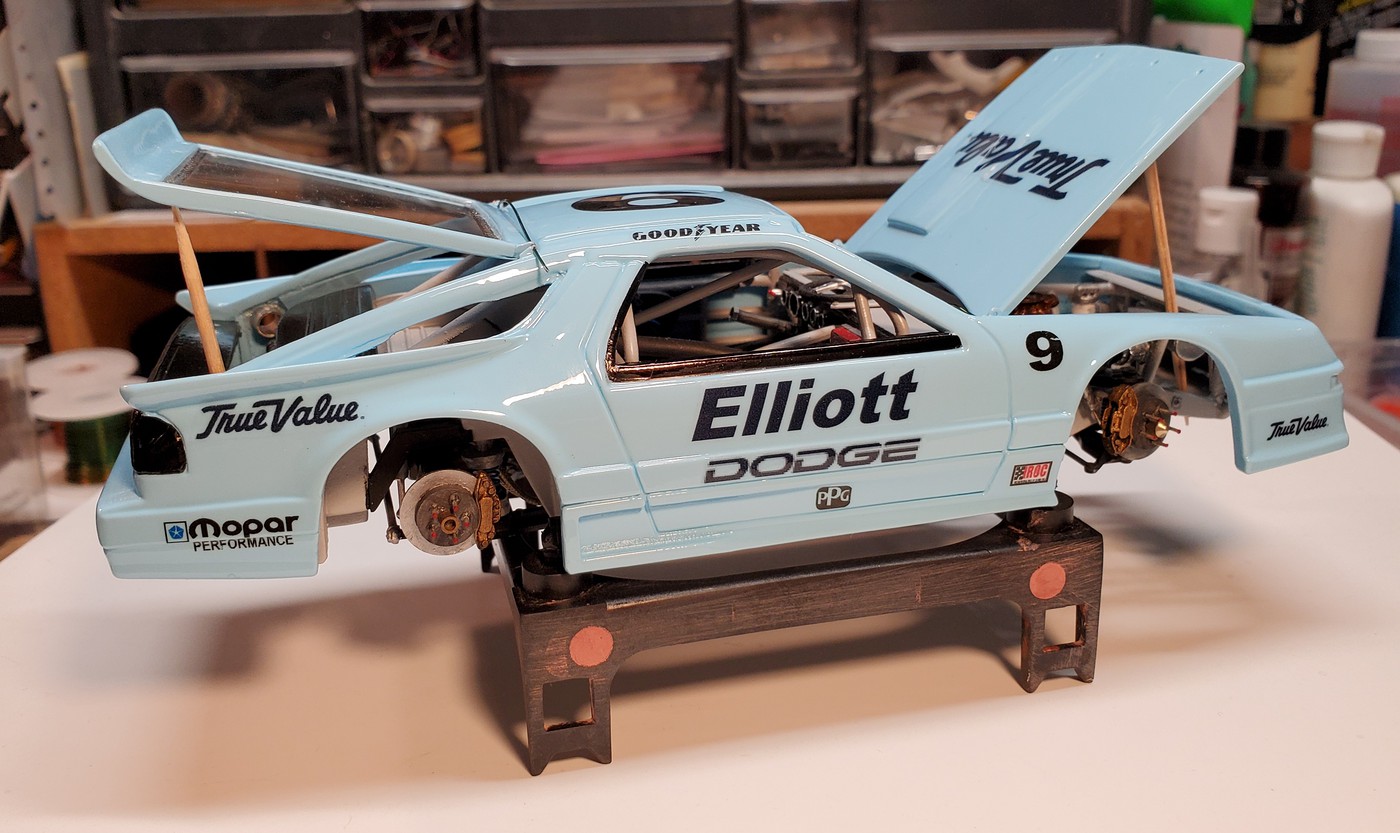
Clear coat is done.
 |
|
| Back to top |
|
|
1320wayne1
Joined: 06 Jul 2019
Posts: 79
|
| Posted: Wed Jul 15, 2020 10:12 am Post subject: |
|
|
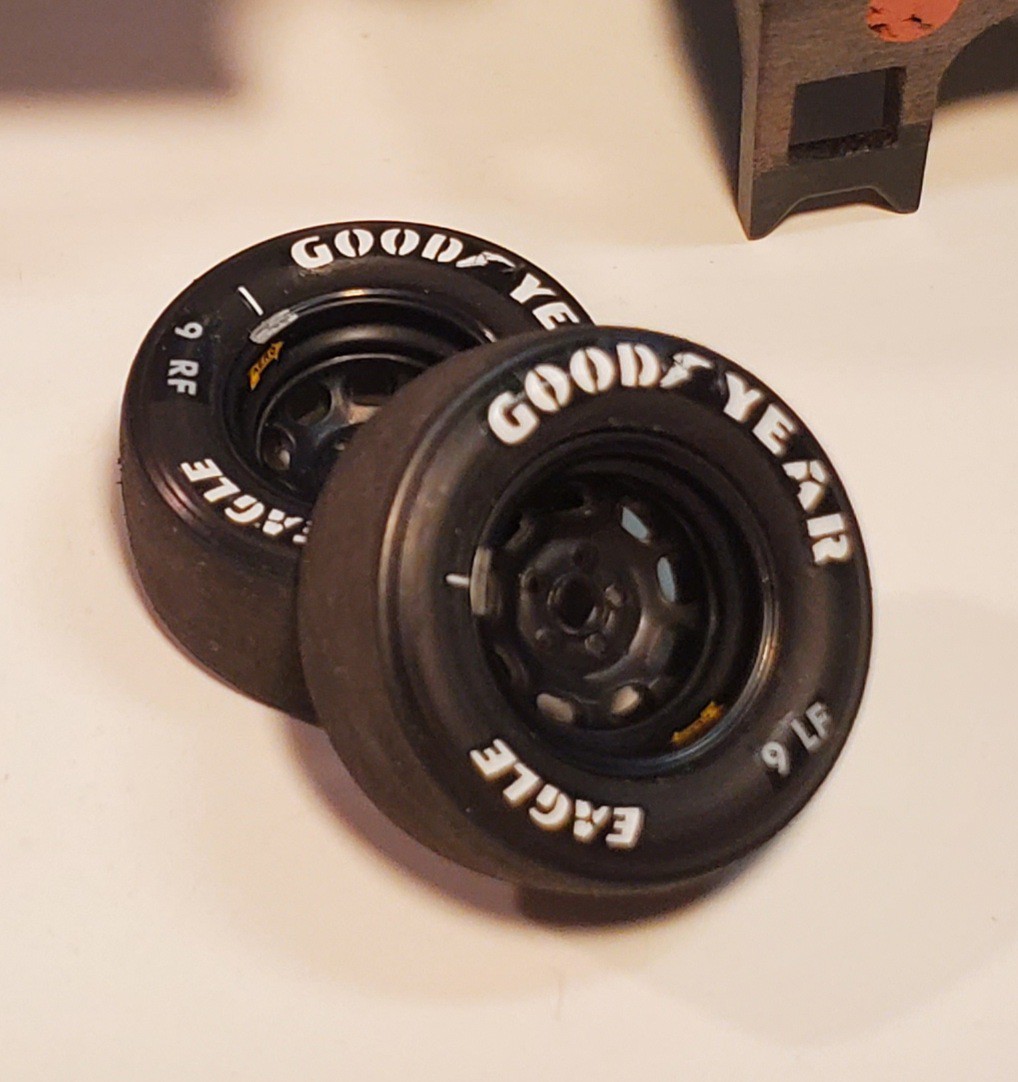
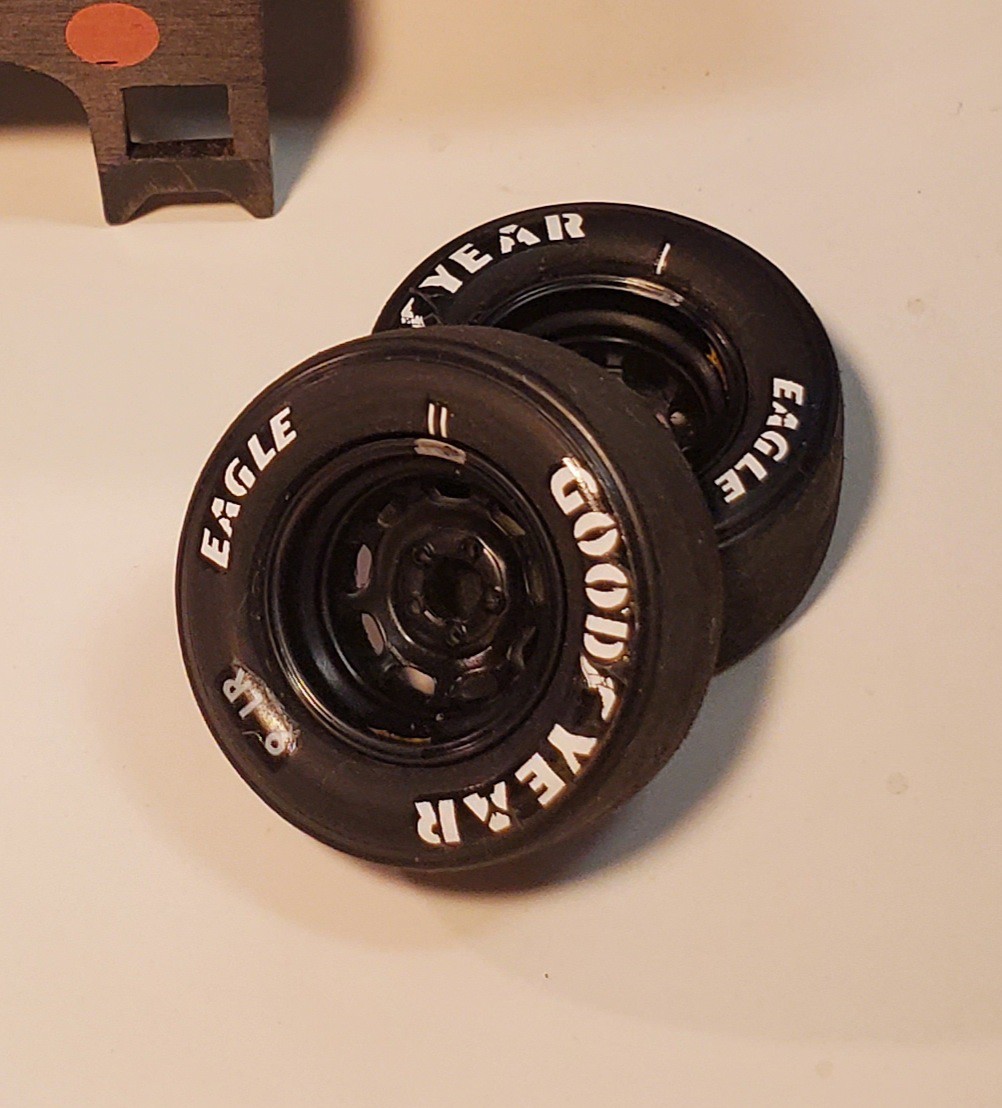
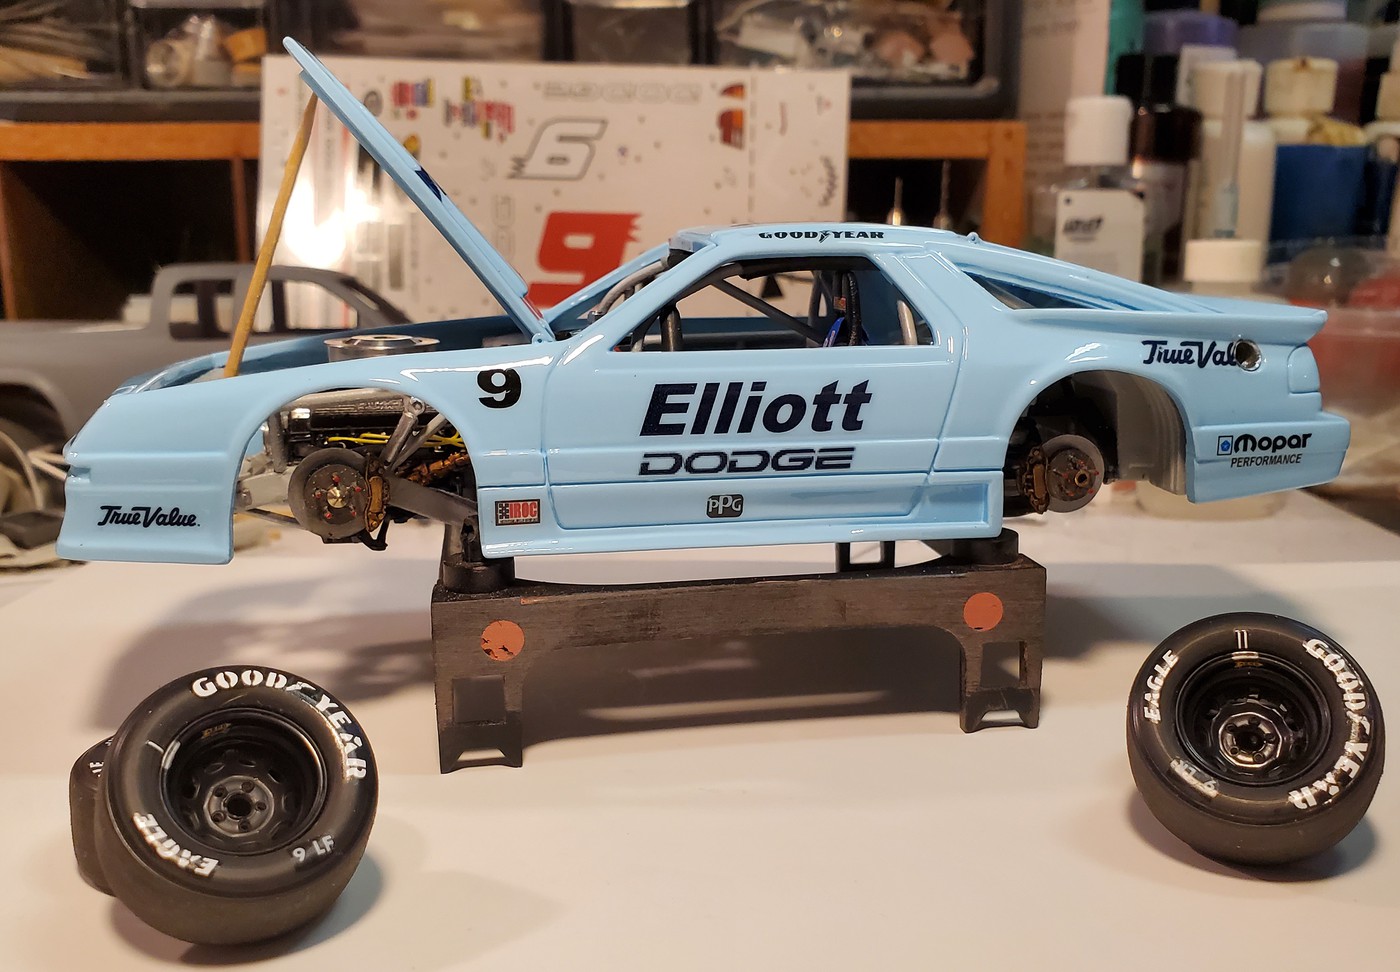
Tires and wheels are done. Just need to add dullcote.


 |
|
| Back to top |
|
|
Brandon Miller
Joined: 06 Jan 2020
Posts: 105
|
| Posted: Wed Jul 15, 2020 11:34 am Post subject: |
|
|
| Looks great. What are you using for your stand? |
|
| Back to top |
|
|
1320wayne1
Joined: 06 Jul 2019
Posts: 79
|
| Posted: Thu Jul 16, 2020 11:02 am Post subject: |
|
|
| Brandon Miller wrote: | | Looks great. What are you using for your stand? |
This came out of an old computer. I always tear them apart before tossing because there's so many hidden treasures to be found. I don't know which segment of the computer it came from but the four tabs that stick up at the corners fit this chassis perfectly for display. Eventually I will finish smoothing it and shoot it with some semi gloss black. |
|
| Back to top |
|
|
Dan Belcher
Joined: 10 Feb 2020
Posts: 194
|
| Posted: Thu Jul 16, 2020 2:11 pm Post subject: |
|
|
| Really loving this build, so much good detail work really all adds up. Quick question, where did you get the Butler seat decal and the Simpson seatbelt decals? I've looked on Mikesdecals but I always struggle to find which particular sheets have those kinds of things on them. |
|
| Back to top |
|
|
bmartin359
Joined: 10 Feb 2018
Posts: 59
|
| Posted: Thu Jul 16, 2020 11:37 pm Post subject: |
|
|
| 1320wayne1 wrote: | | Brandon Miller wrote: | | Looks great. What are you using for your stand? |
This came out of an old computer. I always tear them apart before tossing because there's so many hidden treasures to be found. I don't know which segment of the computer it came from but the four tabs that stick up at the corners fit this chassis perfectly for display. Eventually I will finish smoothing it and shoot it with some semi gloss black. |
That looks like a CPU cooler mount that you are using for the stand. I have seen one or two back in the day. Wait did I just let my nerd card show.  |
|
| Back to top |
|
|
1320wayne1
Joined: 06 Jul 2019
Posts: 79
|
| Posted: Fri Jul 17, 2020 5:00 pm Post subject: |
|
|
| Dan Belcher wrote: | | Really loving this build, so much good detail work really all adds up. Quick question, where did you get the Butler seat decal and the Simpson seatbelt decals? I've looked on Mikesdecals but I always struggle to find which particular sheets have those kinds of things on them. |
Thanks. I have a stockpile of Slixx goodies sheets from the 90's. These decals were plentiful on them. |
|
| Back to top |
|
|
1320wayne1
Joined: 06 Jul 2019
Posts: 79
|
| Posted: Fri Jul 17, 2020 5:02 pm Post subject: |
|
|
| bmartin359 wrote: | | 1320wayne1 wrote: | | Brandon Miller wrote: | | Looks great. What are you using for your stand? |
This came out of an old computer. I always tear them apart before tossing because there's so many hidden treasures to be found. I don't know which segment of the computer it came from but the four tabs that stick up at the corners fit this chassis perfectly for display. Eventually I will finish smoothing it and shoot it with some semi gloss black. |
That looks like a CPU cooler mount that you are using for the stand. I have seen one or two back in the day. Wait did I just let my nerd card show. |
Yeah, I'm not sure what it is/was. I have no nerd card to play. All that I know is that when I tear down an old piece of electronics I save anything that looks like it could be of some use at a later time. |
|
| Back to top |
|
|
1320wayne1
Joined: 06 Jul 2019
Posts: 79
|
| Posted: Wed Sep 30, 2020 12:17 pm Post subject: |
|
|
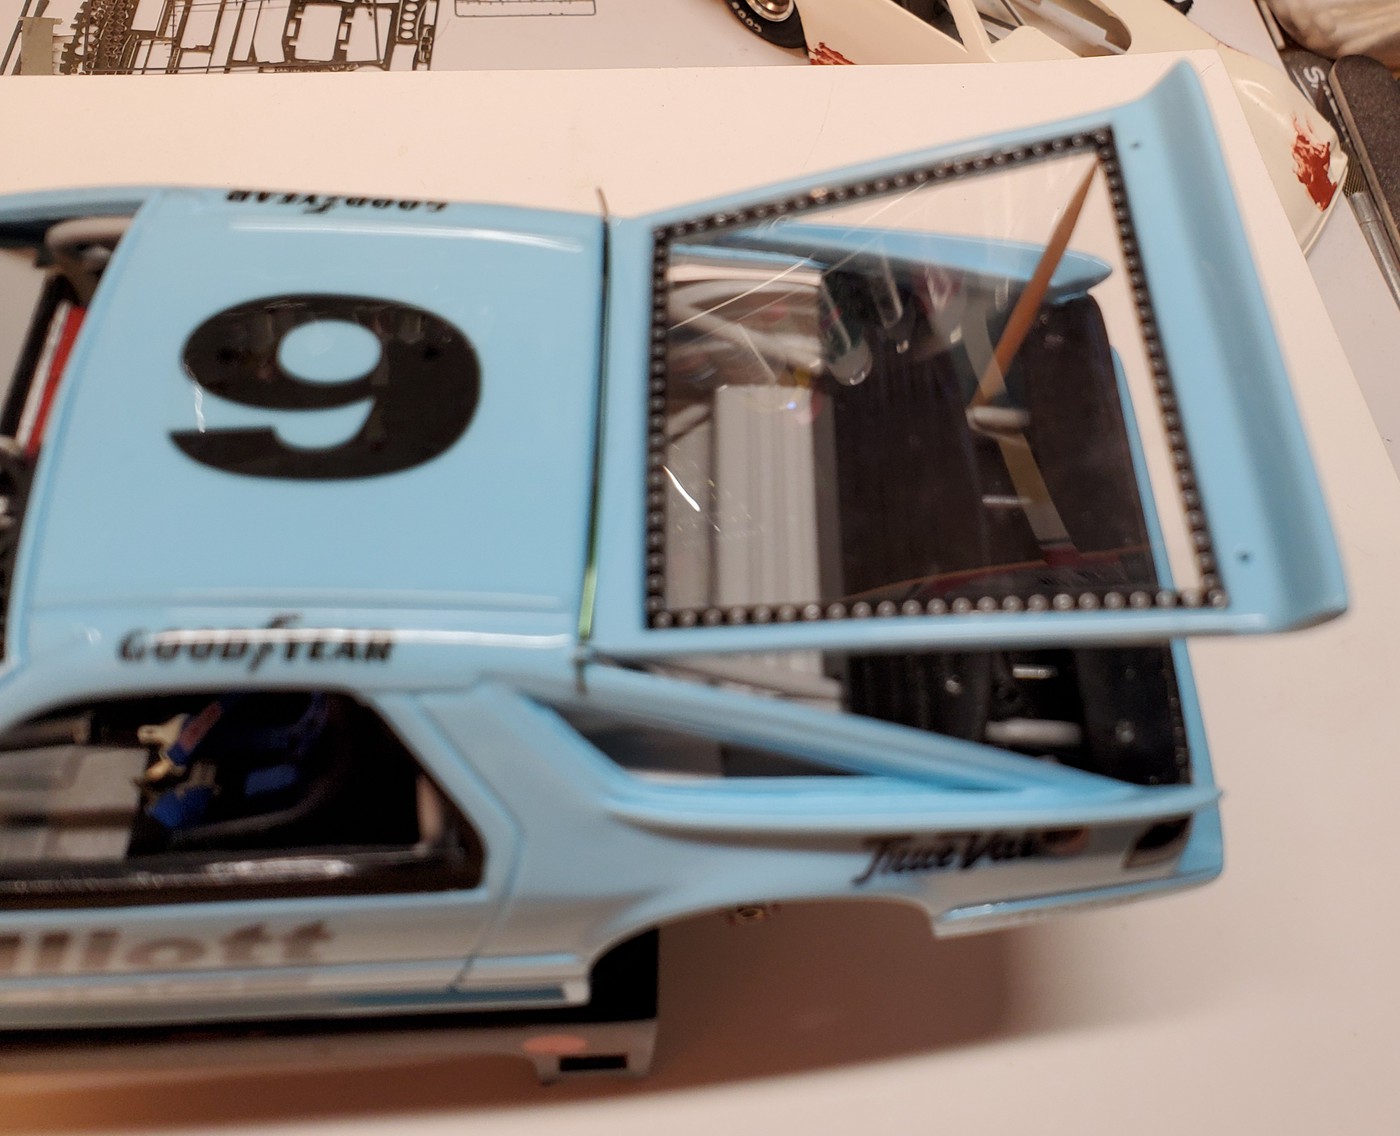
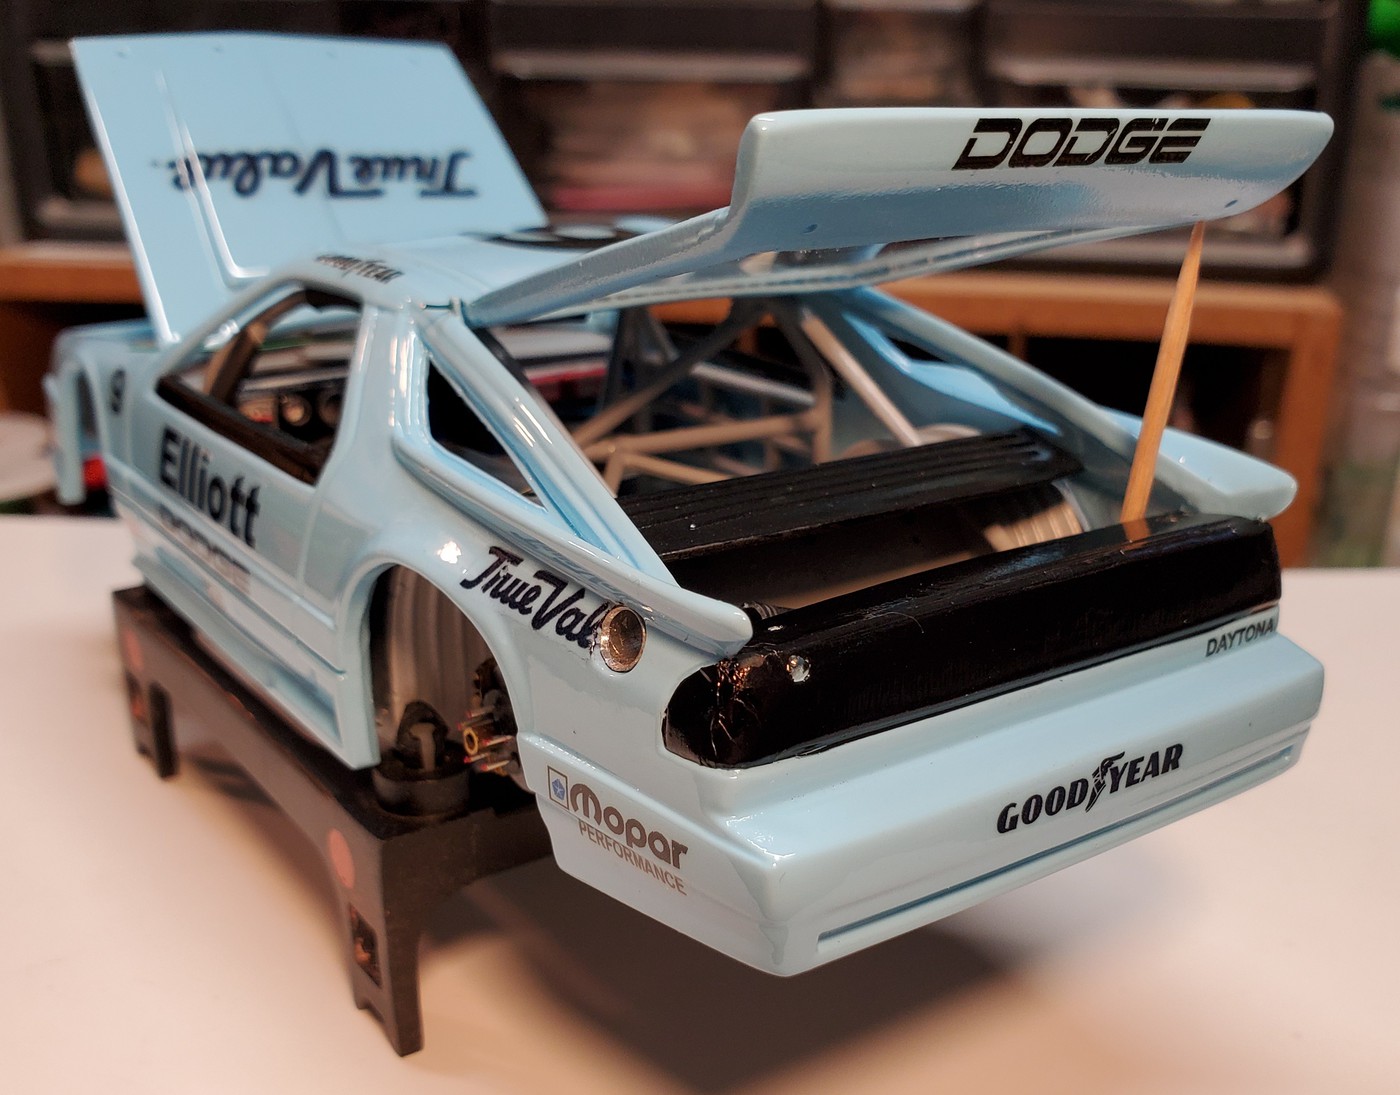
Back to work on this. Rear glass is installed along with riveted decal framework. I also added the taillight blackout along with the window trim using black BMF.
 |
|
| Back to top |
|
|
FallsCity48
Joined: 02 Feb 2018
Posts: 59
|
| Posted: Thu Oct 01, 2020 12:19 am Post subject: |
|
|
1320wayne1, Where did you get the valve covers for the engine??
Great job!! |
|
| Back to top |
|
|
1320wayne1
Joined: 06 Jul 2019
Posts: 79
|
| Posted: Thu Oct 01, 2020 10:04 am Post subject: |
|
|
| FallsCity48 wrote: | 1320wayne1, Where did you get the valve covers for the engine??
Great job!! |
3D printed from seller Ron Olson. |
|
| Back to top |
|
|
1320wayne1
Joined: 06 Jul 2019
Posts: 79
|
| Posted: Mon Oct 05, 2020 8:50 pm Post subject: |
|
|
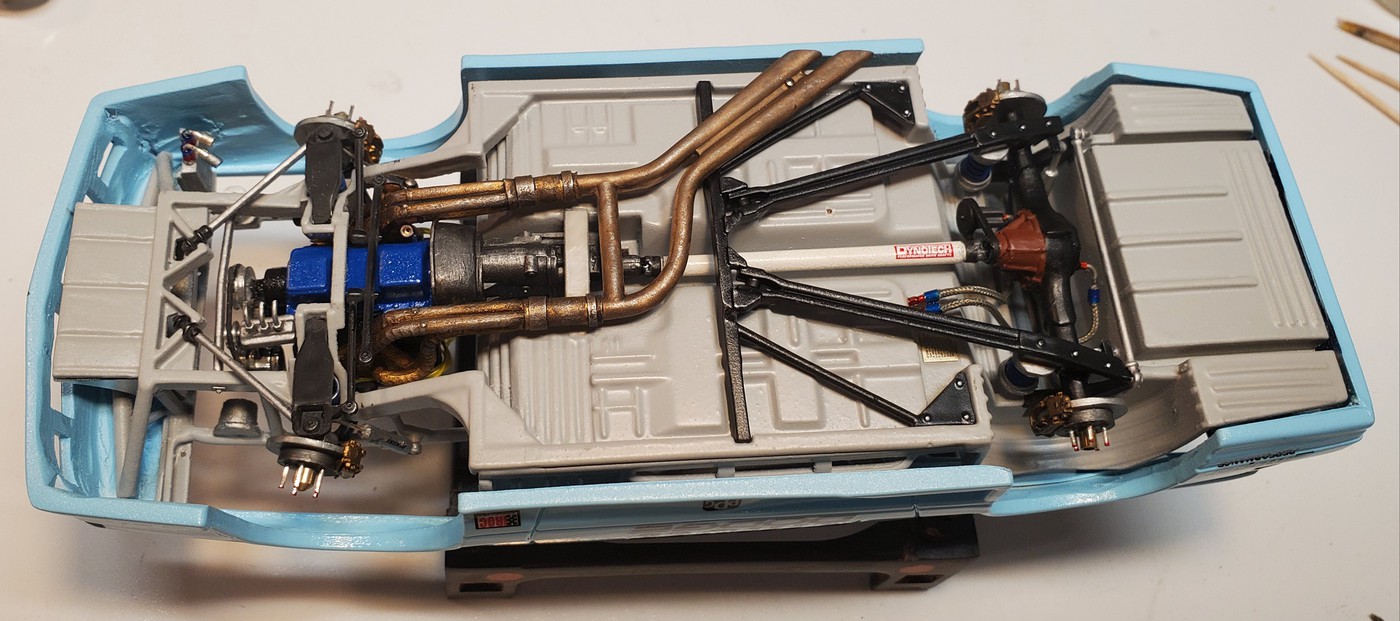
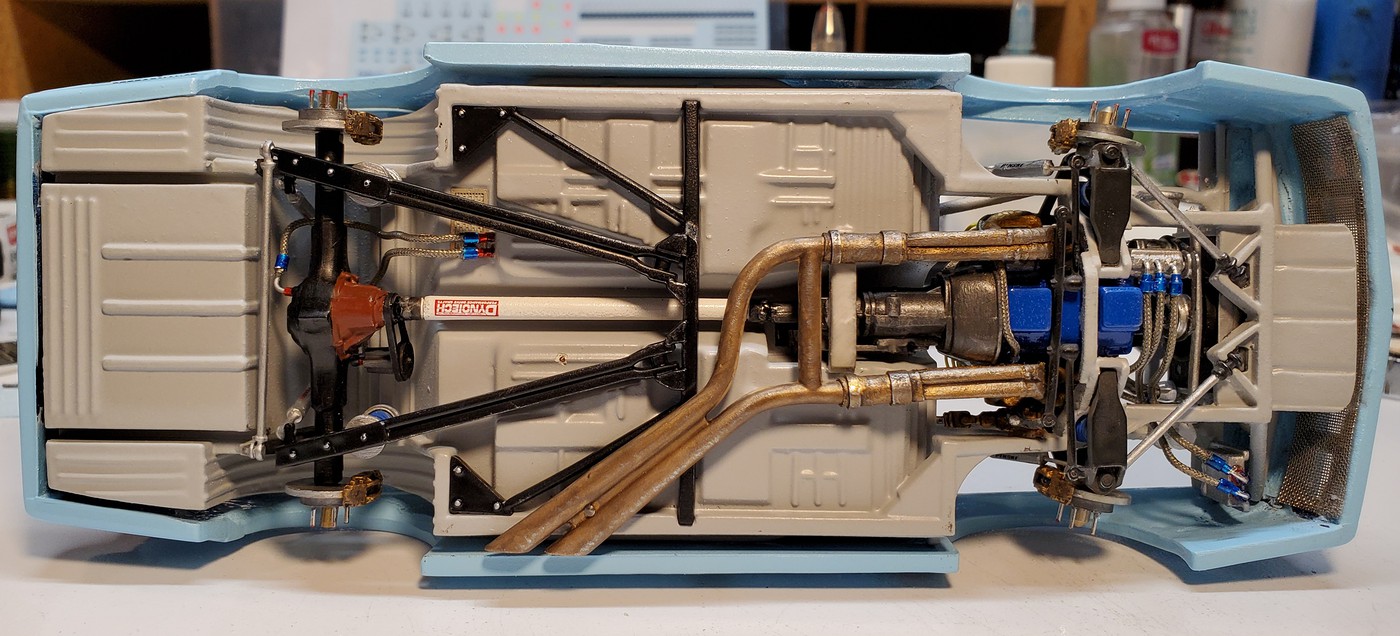
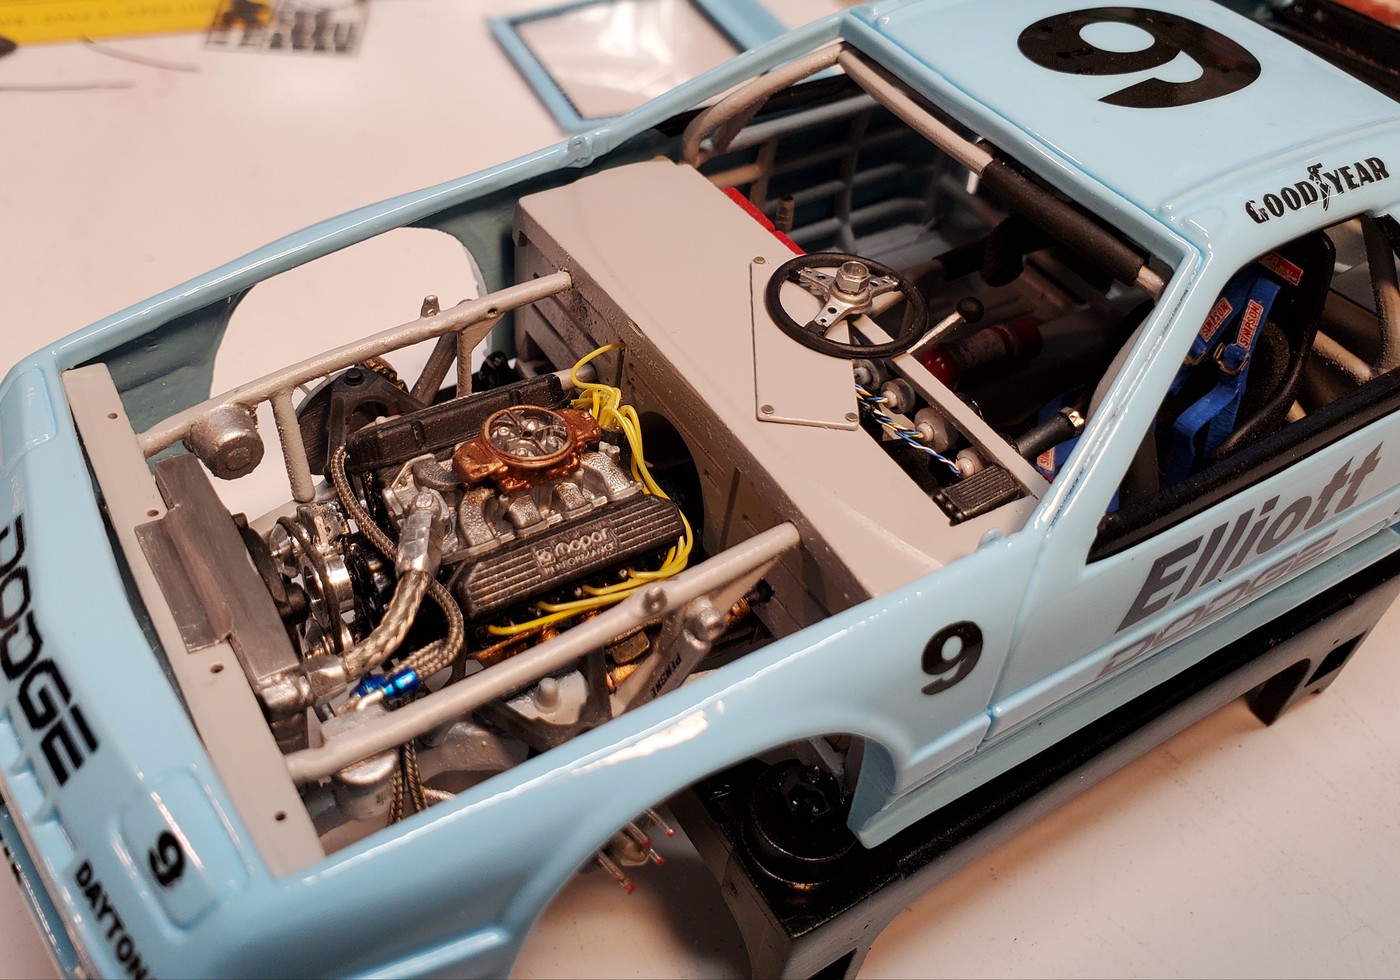
Engine is installed and the exhaust is done.
 |
|
| Back to top |
|
|
1320wayne1
Joined: 06 Jul 2019
Posts: 79
|
| Posted: Sun Oct 11, 2020 6:27 pm Post subject: |
|
|
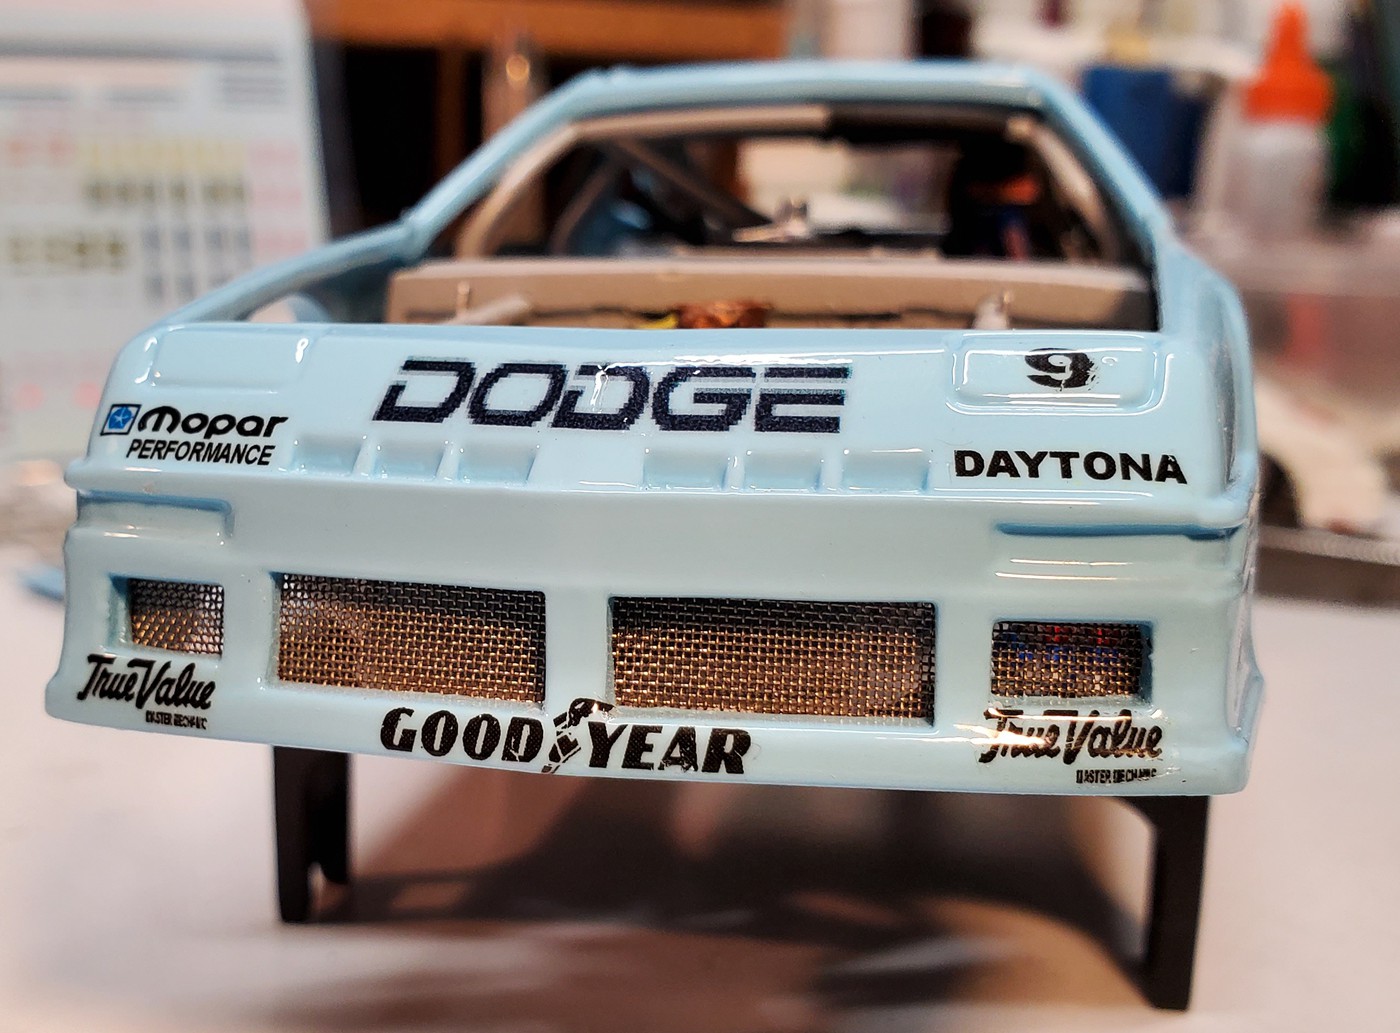
More engine bay details. Radiator installed and added plumbing. And, the grill screen installed. I also discovered that I made a huge mistake that has to be fixed. With limited research when I started the build I never realized that these cars didn't use a fuel break. They filled the tanks by lifting the rear hatch. So now I have to see if I can create a plug for the side of the body where I created the fuel break without ruining the body.

 |
|
| Back to top |
|
|
|

