| View previous topic :: View next topic |
| Author |
Message |
BW
Joined: 01 Feb 2018
Posts: 218
Location: Lick Creek, Alabama
|
 Posted: Fri Jun 18, 2021 2:50 pm Post subject: Bobby Allison's 1970 Dodge Daytona Posted: Fri Jun 18, 2021 2:50 pm Post subject: Bobby Allison's 1970 Dodge Daytona |
 |
|
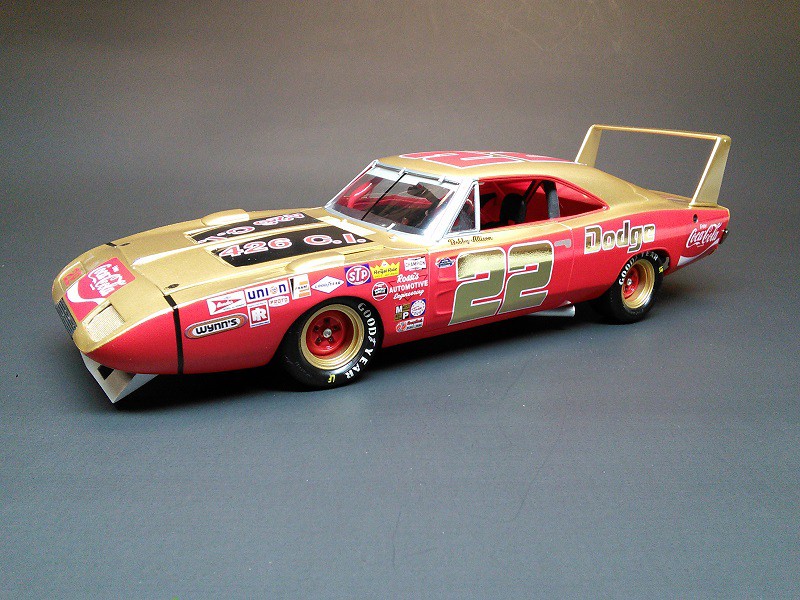
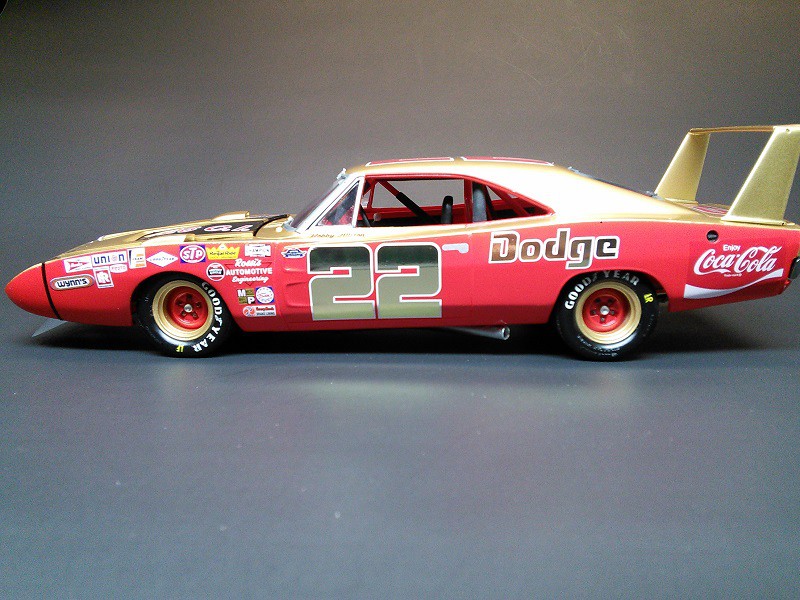
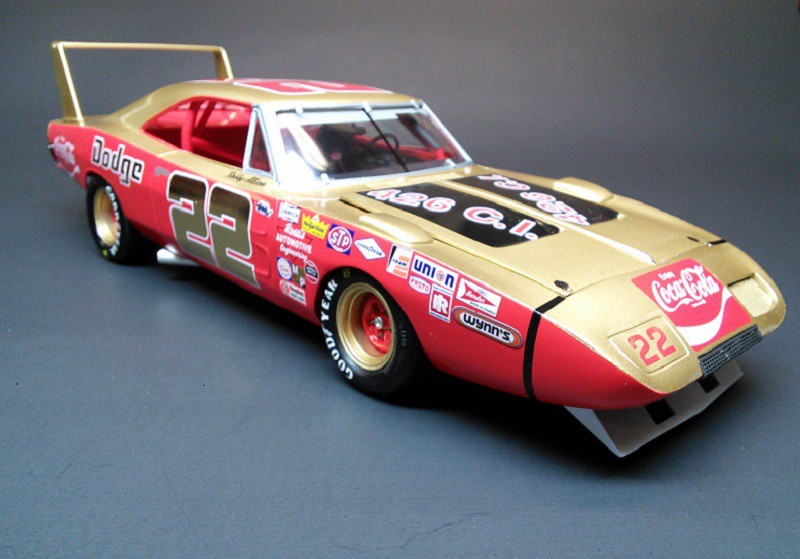
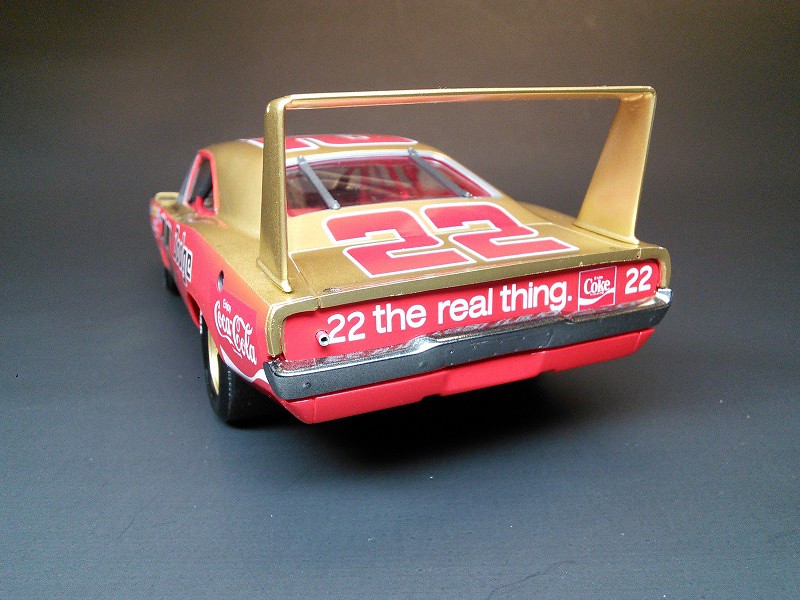
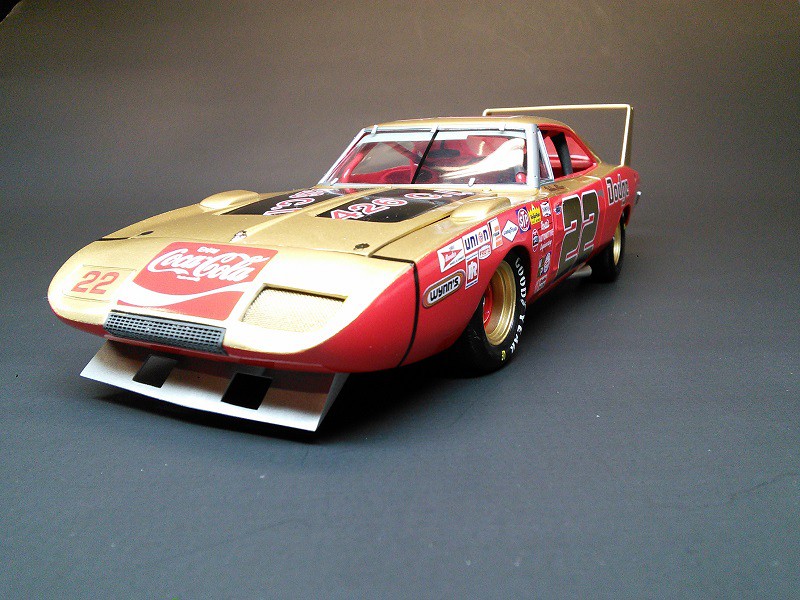
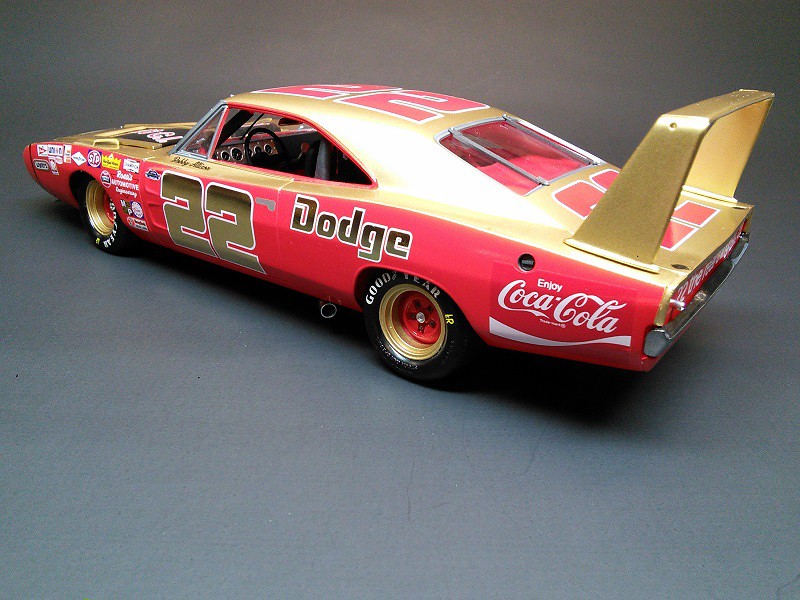
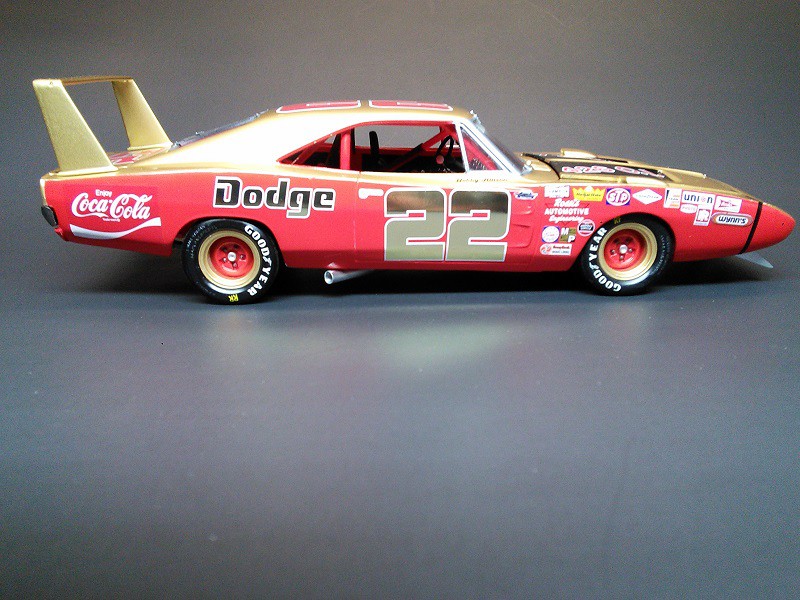
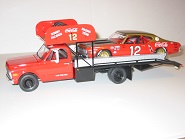
Bobby Allison's 1970 Dodge Daytona
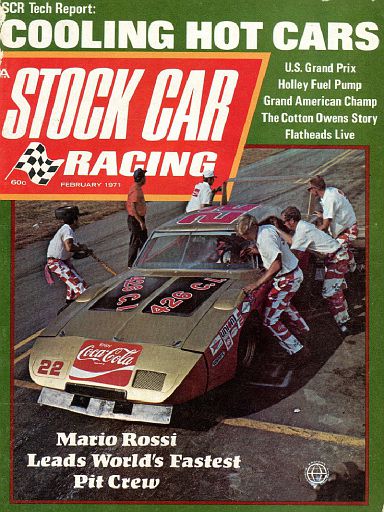
Just finished this build this week. Bobby's '70 Daytona with Coca-Cola sponsorship. I always liked the February 1971 Stock Car Racing Magazine with this car on the cover. The red and gold scheme is just iconic with Bobby Allison.
KIT: Revell ProModeler Daytona
PAINT: Tamiya TS-49 Bright Red and TS-21 Gold. Model Master Metallizer for the metal colored parts.
DECALS: Powerslide with only exception the Wynn's contingency which is from one of the Model King sheets.
TIRES AND WHEELS: PPP
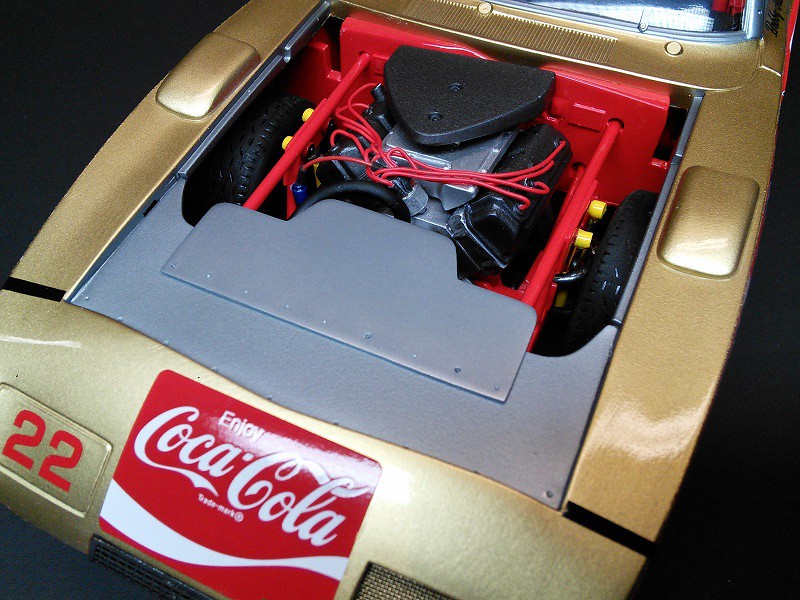
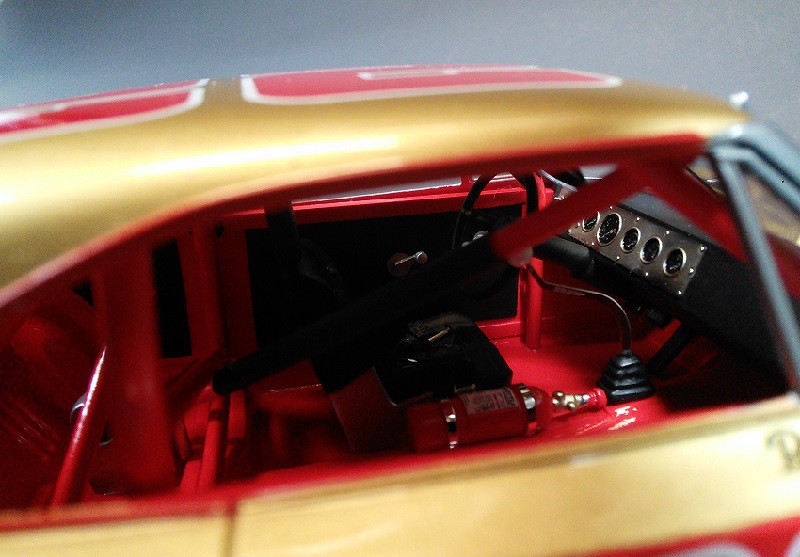
BUILD NOTES: Roll cage and front hoop scratch built using Evergreen plastic rod. Roll bar padding is heat shrink. Front suspension scratch built using Evergreen, and parts from my spares. Rear suspension 8 3/4 rear came from spare box. All shocks were scratch built using Evergreen tubing and paper clips. Inner door panels and window rollers were scratch built using Evergreen plastic. Detail Master Hurst Shifter. Aftermarket (Can't remember name) distributor and wiring. Cut out driver side headlight cover and replaced with screen. K&S 5/32" tubing for dump pipes. Scratch built front chin spoiler using Evergreen plastic. Front and rear window retaining clips were scratch built using Evergreen strips. Sanded off rear bumper guards, added licence tag cover plate and then stripped and re-chromed rear bumper using Alclad Chrome.
 [img] [img]
 [img] [img]
 [img][/img] [img][/img]
 [img] [img]
 [img] [img]
 [img] [img]
 [img] [img]
 [img] [img]
 [img] [img]
 [img][/img] [img][/img]
THE REAL THING AND MY INSPIRATION:
FINAL THOUGHTS: Using the Revell kit takes a lot of work but is not too difficult. Lots of test fitting was needed to get the stance correct. Scratch building roll cages also takes a LOT of test fitting. I started to use one of the new SalvinosJR '71 Chargers for the chassis but I just didn't want to bust up one of my new kits. I may do this on a future Daytona build as testing seems to indicate it would work just fine. This build adds another addition to my Bobby Allison collection. Thanks for looking. Comments are always welcome.
-Bobby |
|
| Back to top |
|
 |
DaveVan
Joined: 27 Jan 2018
Posts: 1578
|
| Posted: Fri Jun 18, 2021 3:34 pm Post subject: |
|
|
| Any info on fitting the rear tires into the Revell rear wells???? That was the area I had a hard time with. Great work and stance. |
|
| Back to top |
|
|
Lionpride
Joined: 28 Jan 2018
Posts: 247
|
| Posted: Fri Jun 18, 2021 4:10 pm Post subject: |
|
|
Knocked another one out of the park! Clean, clean, clean.
How many BA cars in your collection now?
Thanks for posting all the pics. |
|
| Back to top |
|
|
catpack68

Joined: 22 Jan 2020
Posts: 117
|
| Posted: Fri Jun 18, 2021 4:29 pm Post subject: |
|
|
| Killer work as always Bobby!🙌 |
|
| Back to top |
|
|
gks1964
Joined: 01 Feb 2020
Posts: 263
|
| Posted: Fri Jun 18, 2021 6:31 pm Post subject: |
|
|
| Very very nice build!! |
|
| Back to top |
|
|
BW
Joined: 01 Feb 2018
Posts: 218
Location: Lick Creek, Alabama
|
| Posted: Fri Jun 18, 2021 8:21 pm Post subject: |
|
|
| DaveVan wrote: | | Any info on fitting the rear tires into the Revell rear wells???? That was the area I had a hard time with. Great work and stance. |
Hey Dave and thanks for the compliment. Yes, fitting the wheels and tires on this kit can be an issue. I first shaved almost all of the inner wheel hub off the PPP wheel backs. Next, I narrowed the rear axle housing about 1/8-3/16" on each of the ends. Doing this allowed enough clearance without having to do anything with the inner fender wells on the back. I also shaved off the inner hubs on the PPP wheel backs on the fronts and really did a LOT of test fitting and cutting on the upper and lower arms to ensure clearance on the front fenders. I completely scratch built the upper A-arms (or upper "D"-Arms) using Evergreen rod. I slowly heat the rod over a candle until I get the correct size. I guess building this kit several times gives you the experience to know how to fit the suspension. This makes the fourth Revell Daytona I've built.
Hope this helps and thanks again Dave!
-Bobby |
|
| Back to top |
|
|
BW
Joined: 01 Feb 2018
Posts: 218
Location: Lick Creek, Alabama
|
| Posted: Fri Jun 18, 2021 8:31 pm Post subject: |
|
|
| Lionpride wrote: | Knocked another one out of the park! Clean, clean, clean.
How many BA cars in your collection now?
Thanks for posting all the pics. |
Hey Lionpride! Thanks for the compliment! I counted the other day and I only have 7 more cars to build and I'll have every one of Bobby's Grand National/Winston Cup cars that he drove. I also have seven of his Late Model and Modified cars built and have several more of those I plan to build.
-Bobby |
|
| Back to top |
|
|
Henryjint

Joined: 28 Jan 2018
Posts: 1970
Location: NY State's Hudson Valley
|
| Posted: Sat Jun 19, 2021 7:38 am Post subject: |
|
|
VERY, Very nicely done!!!!!!
_________________
Forum member since 10/25/2010 |
|
| Back to top |
|
|
Dan Belcher
Joined: 10 Feb 2020
Posts: 194
|
| Posted: Sat Jun 19, 2021 8:12 am Post subject: |
|
|
| Beautiful! Those colors are so eye catching, bet it looks great in person. |
|
| Back to top |
|
|
afx

Joined: 28 Jan 2018
Posts: 270
|
| Posted: Sat Jun 19, 2021 8:44 am Post subject: |
|
|
| Another great build Bobby. |
|
| Back to top |
|
|
sentsat71
Joined: 03 Feb 2018
Posts: 1237
Location: Fenton, IA
|
| Posted: Sat Jun 19, 2021 8:50 am Post subject: |
|
|
WOW!!!!!
FANTASTIC JOB ON THIS BUILD!!!!!!


I had that issue of SCR....don't know if I still have it or not, after 19 moves between March 1972 to July 2016...and from Iowa to SoCal to Florida to NM to IA...
_________________
Ed. K |
|
| Back to top |
|
|
Pierre Rivard
Joined: 25 Feb 2021
Posts: 378
Location: Montreal, Canada
|
| Posted: Sat Jun 19, 2021 9:39 am Post subject: |
|
|
It is always a delight to watch one of your builds sir!
I have built and displayed Tiny Lund's car using the same kit and found it to be quite a challenge.
Your build shows how it should be done should I find the courage to try again.
Simply spectacular in every way with all your mods, detailing and finishing.
Congratulations and looking forward to your next build!
_________________
"When you arrive at a fork in the road, take it" - Yogi Berra |
|
| Back to top |
|
|
Lionpride
Joined: 28 Jan 2018
Posts: 247
|
| Posted: Sat Jun 19, 2021 2:01 pm Post subject: |
|
|
| BW, have you done the Nova yet? |
|
| Back to top |
|
|
BW
Joined: 01 Feb 2018
Posts: 218
Location: Lick Creek, Alabama
|
| Posted: Sun Jun 20, 2021 11:00 am Post subject: |
|
|
| Lionpride wrote: | | BW, have you done the Nova yet? |
Not yet lionpride but it is on the "To Do" list. Love the Nova body style. I think it made one of the best looking race cars. I owned two Novas myself. A '66 Chevy II Nova I had in HS and a '72 Nova I drove through college. Wish I had both back!
-Bobby |
|
| Back to top |
|
|
AndyS
Joined: 30 Jan 2019
Posts: 61
|
| Posted: Sun Jun 20, 2021 11:36 am Post subject: |
|
|
Hi Bobby,
Beautiful build, I always enjoy seeing your work! This is my favorite winged aero car of them all.
I remember that issue of SCR also.
I want to get back into building and do some BA builds like this one.
I have a couple of basic questions:
- for the two-tone paint with Tamiya sprays, did you put the gold down first and then mask and do the red?
Any issues with color bleed thru? Did you clearcoat in-between the two colors?
- How did you get such a clean masking line between the two colors onthe wheels?
- Did you clearcoat over the decals? If so, any issues with clearcoating over the foil numbers? |
|
| Back to top |
|
|
BW
Joined: 01 Feb 2018
Posts: 218
Location: Lick Creek, Alabama
|
| Posted: Sun Jun 20, 2021 8:32 pm Post subject: |
|
|
| AndyS wrote: | Hi Bobby,
Beautiful build, I always enjoy seeing your work! This is my favorite winged aero car of them all.
I remember that issue of SCR also.
I want to get back into building and do some BA builds like this one.
I have a couple of basic questions:
- for the two-tone paint with Tamiya sprays, did you put the gold down first and then mask and do the red?
Any issues with color bleed thru? Did you clearcoat in-between the two colors?
- How did you get such a clean masking line between the two colors onthe wheels?
- Did you clearcoat over the decals? If so, any issues with clearcoating over the foil numbers? |
Thanks Andy for all the compliments. To answer each of your questions:
*After primering using Tamiya Fine White Primer, I sprayed the red first then after drying for a few days, I masked off the red and painted the gold. After the gold dried, I always clearcoat BEFORE decaling using Mr. Color UV Cut Clear Gloss GX-112. One important note; You really cannot mask over Tamiya Gold without clear coating. If you try to mask over gold without sealing with a clear coat, you'll pull off or mar the gold paint. So I always clear coat my gold. See photo:
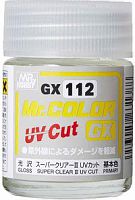 [img] This the best clear coat I've ever used. I thin it with Mr. Color Leveling thinner at about 70% thinner to 30% Clear Gloss. I apply with a airbrush with a couple light coats followed with a medium coat and lastly, a good wet coat. After drying a couple days, I apply the decals. [img] This the best clear coat I've ever used. I thin it with Mr. Color Leveling thinner at about 70% thinner to 30% Clear Gloss. I apply with a airbrush with a couple light coats followed with a medium coat and lastly, a good wet coat. After drying a couple days, I apply the decals.
*As far as masking, I always use Tamiya yellow masking tape. The Tamiya tape is high quality and I rarely get any bleed through. On the wheels, I first painted them gold and then clear coated using the same Mr. Color UV Cut Clear Gloss. After drying, I masked with the Tamiya tape around the outside perimeter using thin cut strips. This is probably one of the most difficult masking jobs you can do. I just do small, maybe 1/4" strips at a time then finish the masking around the outside leaving only the center of the wheel. I then airbrush the red with a couple light dusting coats, then a medium coat, and lastly a wet coat.
*I don't usually clear coat over my decals, and I did not on this build,but if and when I do, I use the same Mr. Color UV Cut GX-112 Gloss Clear. Again, a couple of light coats followed by a medium coat, and lastly a good smooth wet coat. I would NOT attempt to clear coat over foil decals. I would clear coat everything else and THEN apply any foil decals. I know some people have successfully clear coated over foil decals, but I would not attempt it.
Hope this helps and good luck with your builds!
Happy Modeling,
-Bobby |
|
| Back to top |
|
|
AndyS
Joined: 30 Jan 2019
Posts: 61
|
| Posted: Sun Jun 20, 2021 10:25 pm Post subject: |
|
|
Hi Bobby,
Thanks for taking the time to respond with so many useful details!
This is very helpful and will no doubt save me some frustration down the road.
Thanks again and look forward to more of your posts!
-Andy |
|
| Back to top |
|
|
RacerRon13
Joined: 12 May 2021
Posts: 29
|
| Posted: Sun Jun 20, 2021 11:08 pm Post subject: |
|
|
| Sweet looking build! |
|
| Back to top |
|
|
Wakefan77
Joined: 22 Apr 2020
Posts: 140
Location: North Carolina
|
| Posted: Mon Jun 21, 2021 1:29 pm Post subject: |
|
|
What a great looking build. Very clean and detailed.
_________________
<a><img></a> |
|
| Back to top |
|
|
nolansims1
Joined: 14 Apr 2021
Posts: 14
|
| Posted: Tue Jun 22, 2021 5:31 am Post subject: |
|
|
| looks great! |
|
| Back to top |
|
|
Propboy40
Joined: 21 Feb 2021
Posts: 24
|
| Posted: Thu Jun 24, 2021 8:15 am Post subject: |
|
|
| Wow... gorgeous. I would love to get a pair of those pit crew pants! |
|
| Back to top |
|
|
MarkJ
Joined: 29 Jan 2018
Posts: 1303
|
| Posted: Thu Jun 24, 2021 8:37 am Post subject: |
|
|
| Perfect as always, Bobby. Paint, cleanliness of build ,details and decal work all top notch. A joy to look at. That alclad work you did on the rear bumper is amazing. |
|
| Back to top |
|
|
R.J.
Joined: 28 Jan 2018
Posts: 383
|
| Posted: Sat Jun 26, 2021 6:52 pm Post subject: |
|
|
Excellent BA build as always.
_________________
Roanoke, VA. |
|
| Back to top |
|
|
J.R. Rodriquez
Joined: 14 Aug 2020
Posts: 66
|
| Posted: Mon Jun 28, 2021 6:58 pm Post subject: |
|
|
| Simply beautiful! |
|
| Back to top |
|
|
arca guy
Joined: 31 Jan 2018
Posts: 96
|
| Posted: Wed Jun 30, 2021 11:27 am Post subject: |
|
|
| Sweet! |
|
| Back to top |
|
|
Gary Davis
Joined: 02 Feb 2018
Posts: 242
Location: Tacoma,Washington
|
| Posted: Wed Jun 30, 2021 3:36 pm Post subject: |
|
|
A great job on a very cool Daytona...Bobby. B. Allison is one my favorite Drivers of that ERA.
_________________
Short Track racing....Ya gotta love it.
I've been a member since 2006 |
|
| Back to top |
|
|
steveracer
Joined: 11 Oct 2020
Posts: 47
|
| Posted: Mon Jul 26, 2021 11:34 am Post subject: |
|
|
This model looks fantastic.
You faithfully built a scale model of the real thing. Get it, the real thing...
LOL
Excellent job! |
|
| Back to top |
|
|
odcics2
Joined: 09 Feb 2018
Posts: 283
|
| Posted: Sat Jul 31, 2021 7:44 am Post subject: |
|
|
Bobby - If you send me your email, I'll send details of the front spoiler design.
Greg |
|
| Back to top |
|
|
|

