| View previous topic :: View next topic |
| Author |
Message |
nengelman
Joined: 14 Jul 2018
Posts: 47
|
 Posted: Wed Nov 02, 2022 9:21 pm Post subject: Fireball Roberts 61 Pontiac-Club Challenge Build Posted: Wed Nov 02, 2022 9:21 pm Post subject: Fireball Roberts 61 Pontiac-Club Challenge Build |
 |
|
Hi, I have been a long-time member, who occasionally posts to the site, but it's been many years since I have uploaded any WIP photos, and this is the first picture of a completed build that I have submitted. This is my Fireball Roberts Moebius Catalina that was built for an upcoming RPM (Minneapolis) Club build, completed for our NNL held this past May. The photo was taken by Fine Scale Modeler magazine. It was completed primarily OOB with Powerslide decals and MCW paints (my first attempt at airbrushing) and was also my first attempt at weathering; used on the chassis, interior and engine. Hardly perfect but I was mostly happy with the results. Thanks for looking and comments, critical or otherwise, are always appreciated! Hope I'm remembering how to post photos!

Last edited by nengelman on Thu Nov 03, 2022 11:50 am; edited 5 times in total |
|
| Back to top |
|
 |
Crime Dog
Joined: 27 Jan 2018
Posts: 340
|
| Posted: Thu Nov 03, 2022 8:09 am Post subject: |
|
|
Thats gorgeous!
Hard to not like the iconic black and gold scheme! |
|
| Back to top |
|
|
Henryjint

Joined: 28 Jan 2018
Posts: 1983
Location: NY State's Hudson Valley
|
| Posted: Thu Nov 03, 2022 8:17 am Post subject: |
|
|
Very nicely done!!!
_________________
Forum member since 10/25/2010 |
|
| Back to top |
|
|
nengelman
Joined: 14 Jul 2018
Posts: 47
|
| Posted: Fri Nov 04, 2022 3:21 pm Post subject: |
|
|
Thank you for the positive comments. Much appreciated!
I really like this kit and it was a lot of fun to build. I would like to do another one, with added detail, including the addition of double shocks all around to add to the realism. |
|
| Back to top |
|
|
Wood Brothers Junkie
Joined: 26 Apr 2018
Posts: 67
|
| Posted: Sun Nov 06, 2022 7:31 pm Post subject: |
|
|
| Looks great Neal. I wish I was smart enough to know how to but up a photo. Sure would like to show off my 53 Wood Brothers Ford I built using decals from Dave Vann |
|
| Back to top |
|
|
nengelman
Joined: 14 Jul 2018
Posts: 47
|
| Posted: Mon Nov 07, 2022 3:15 pm Post subject: |
|
|
Thanks Chris! If I've learned anything, it's that if I'm smart enough to figure out how to post photos, anybody can. If you're interested in learning more and talking it through, send me a note.
I'm sure there are a lot of people on this forum who would be interested in seeing photos of your Wood Brothers model collection!
Neal |
|
| Back to top |
|
|
elcejay
Joined: 24 Sep 2021
Posts: 97
Location: Brisbane, Australia
|
| Posted: Tue Nov 08, 2022 8:50 am Post subject: |
|
|
| Neal, that is just gorgeous. Do you have more photos somewhere? I would love to see more of it. Nice to hear that the kit is a good build - that's one to move up the stash build list a bit now! |
|
| Back to top |
|
|
nengelman
Joined: 14 Jul 2018
Posts: 47
|
| Posted: Wed Nov 09, 2022 12:07 pm Post subject: |
|
|
| Thanks for your interest! I do not have any WIP photos. The completed build photo was taken by someone else, and I had difficulty posting it using Flickr. I will try to take some additional photos and post them. If nothing else perhaps I could make arrangements to send you some via email if you're comfortable sharing your email address? |
|
| Back to top |
|
|
nengelman
Joined: 14 Jul 2018
Posts: 47
|
| Posted: Fri Nov 11, 2022 5:03 pm Post subject: |
|
|
Elcejay,
You asked about additional photos. I've added a few for your review. Please let me know if I can answer any questions for you about the build.
I apologize for the picture quality and the too large size. Posting pictures is a "work in progress" for me!
Neal
[img]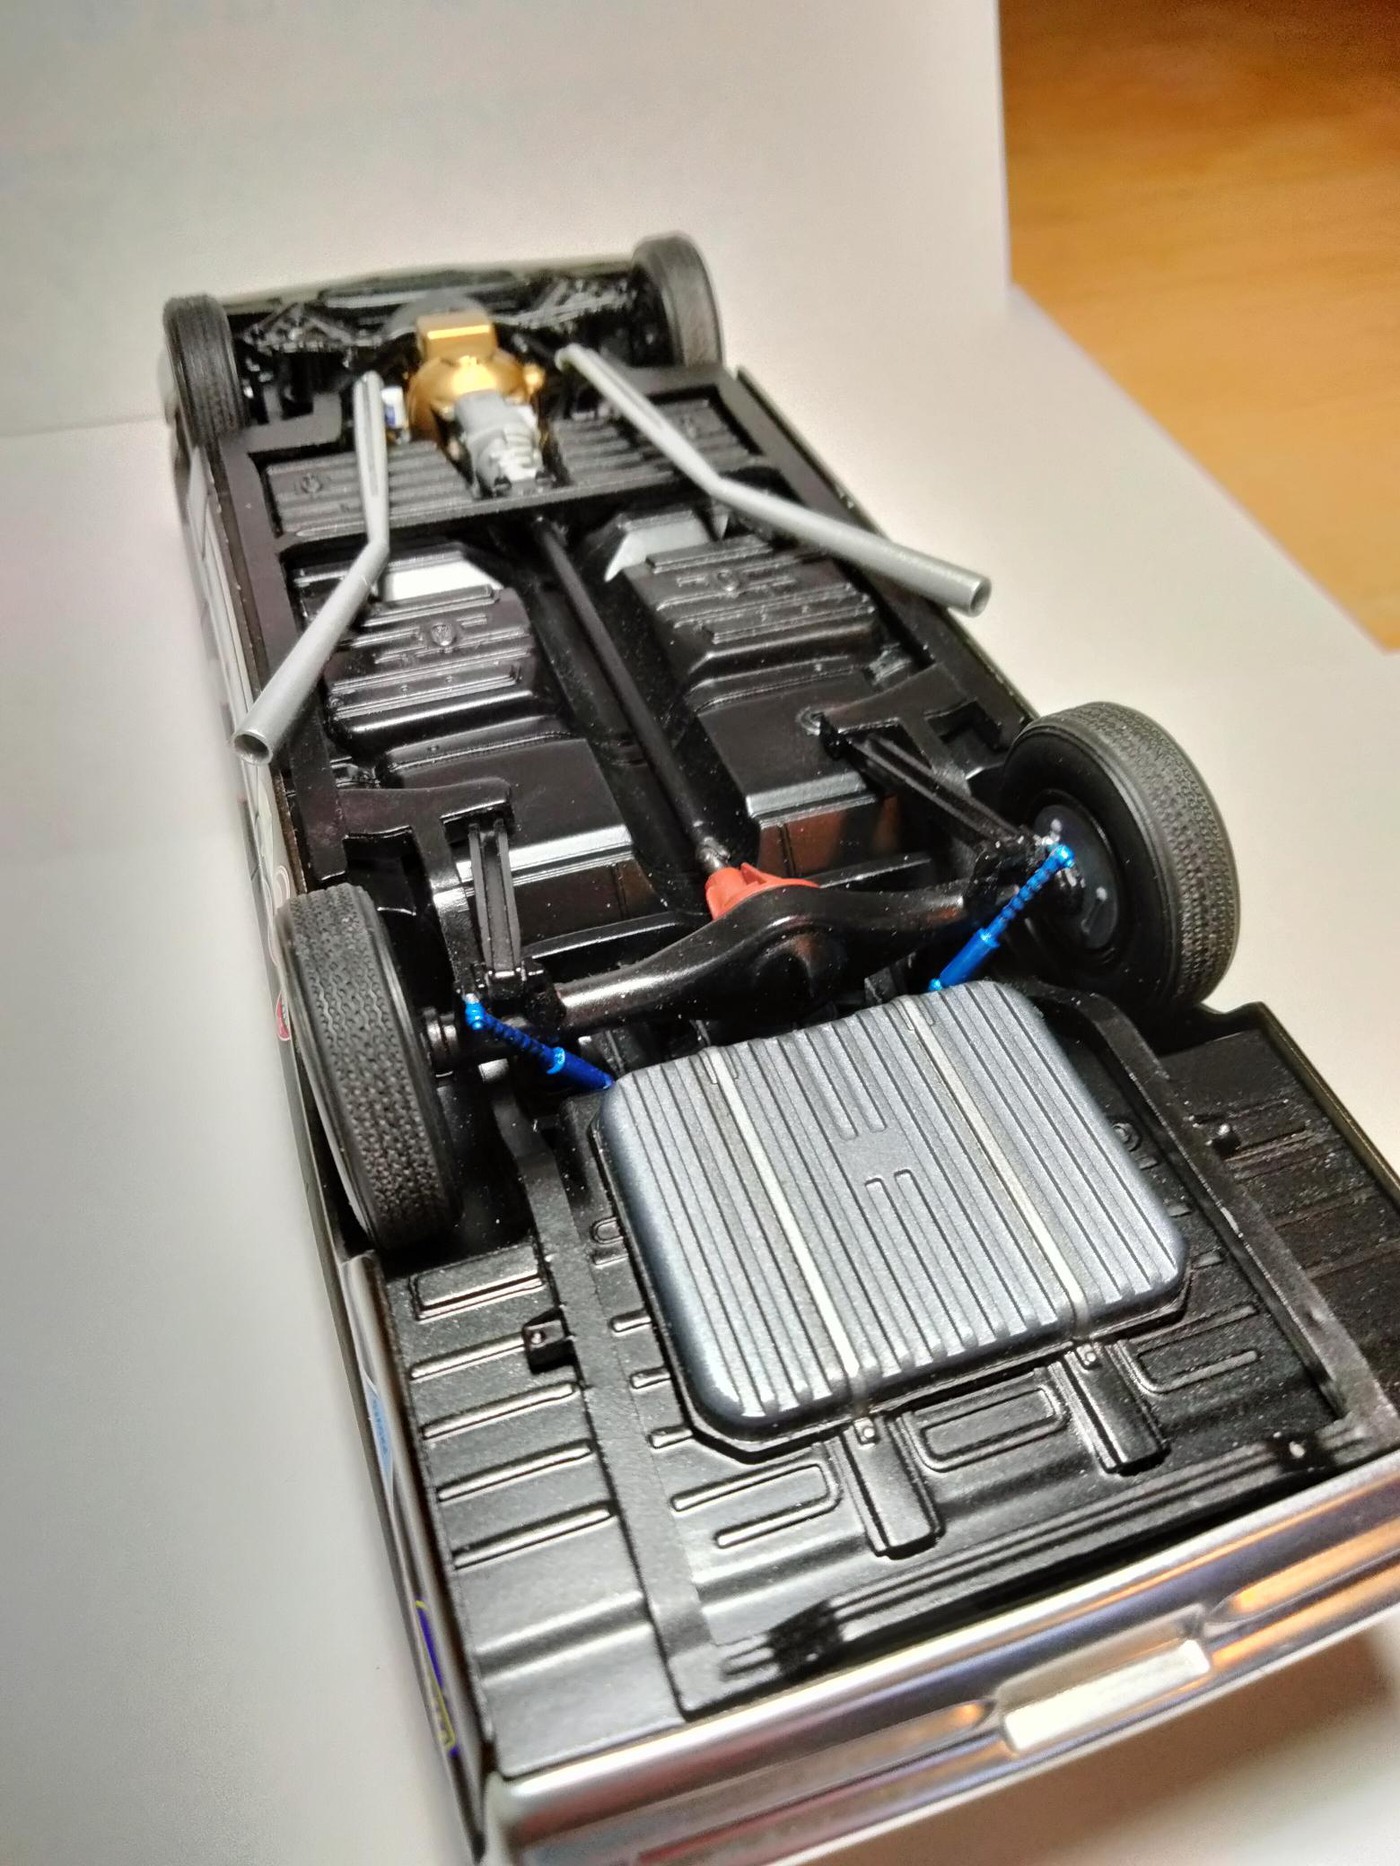 [/img] [/img]
[img][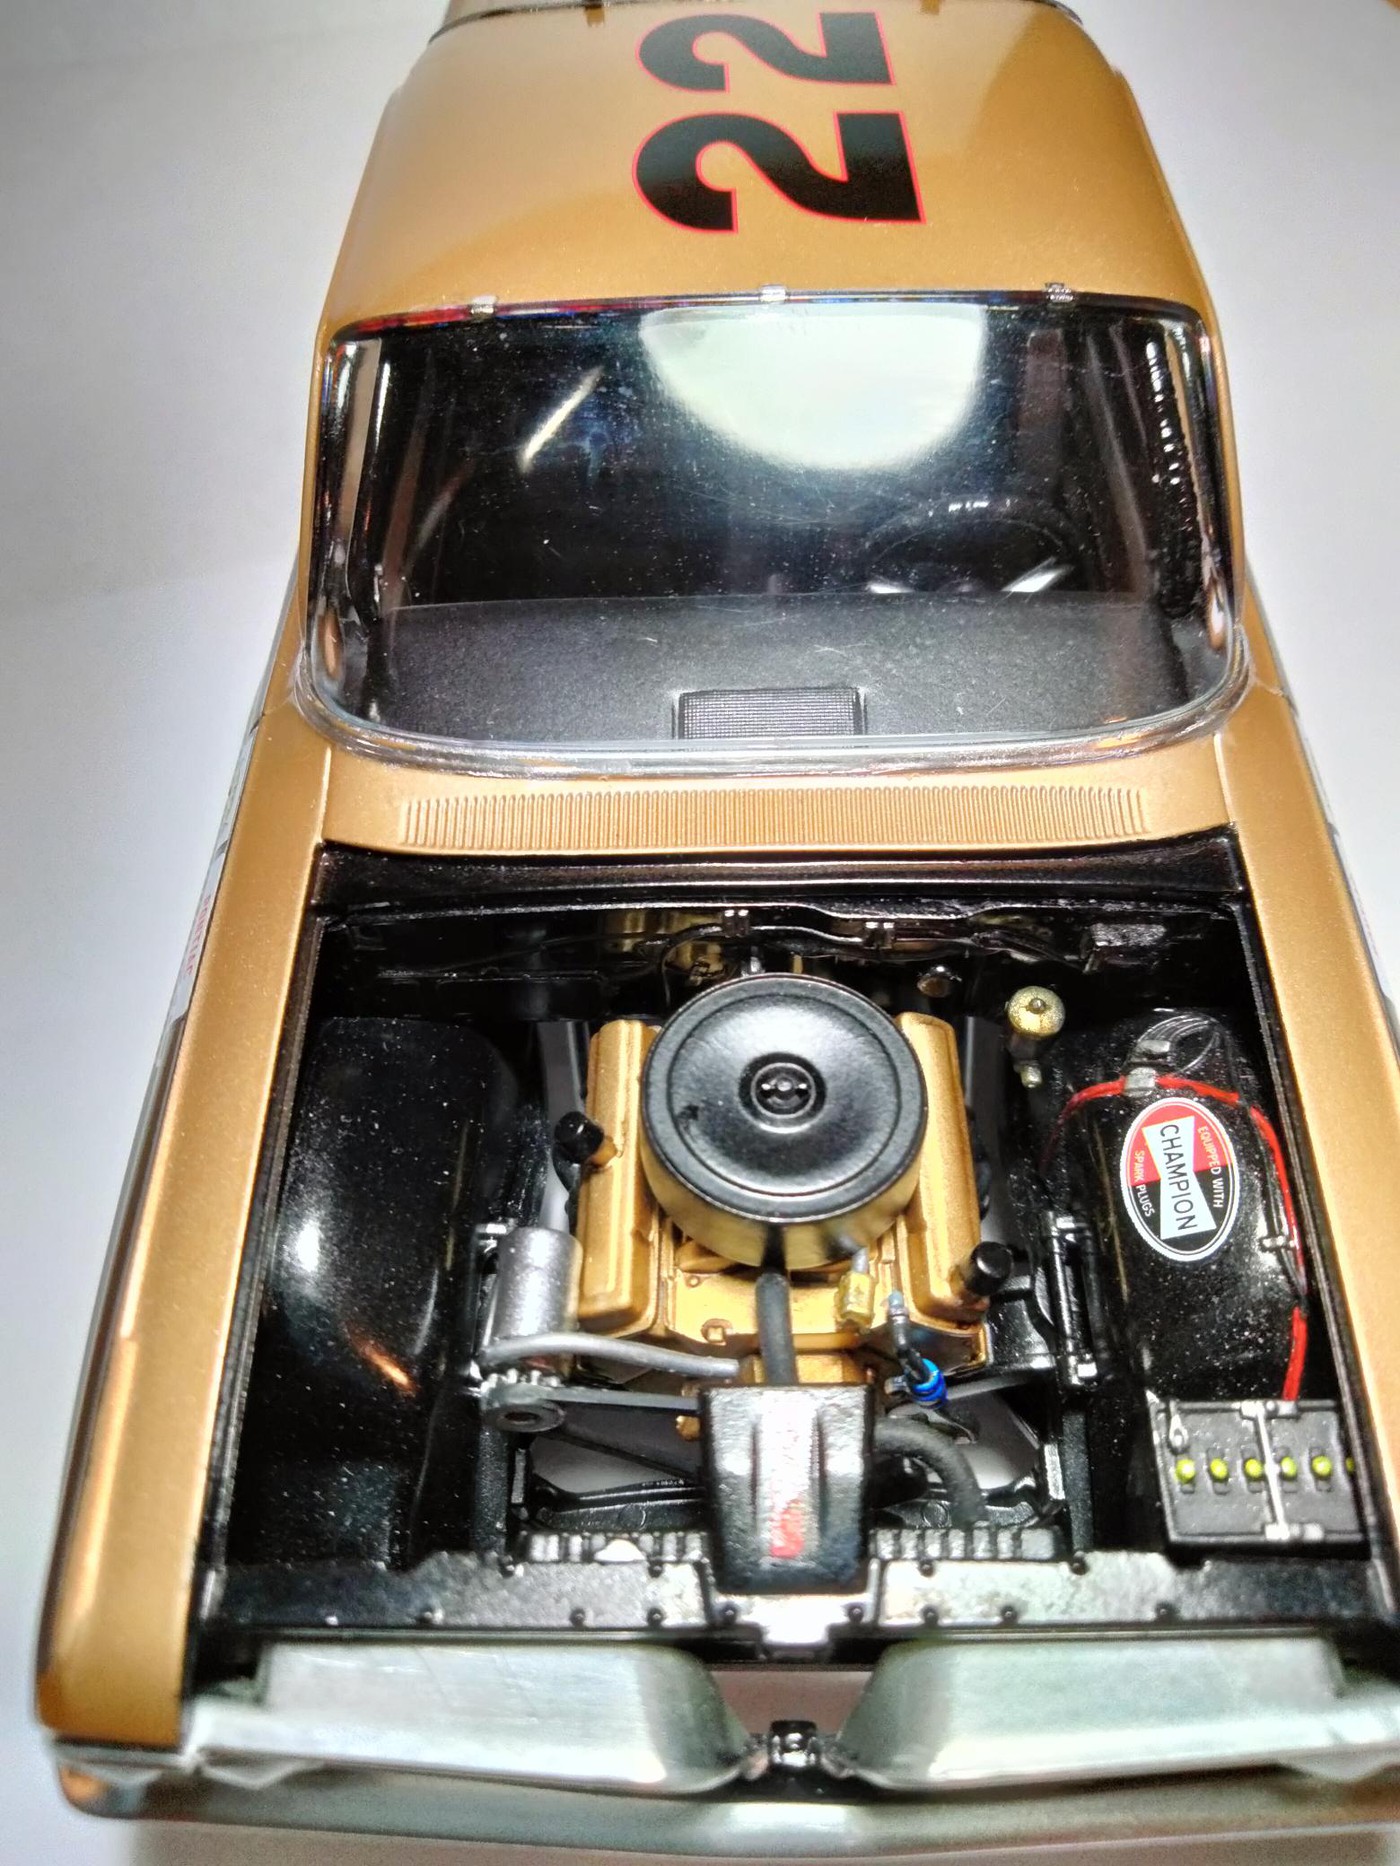 /img] /img]
[img]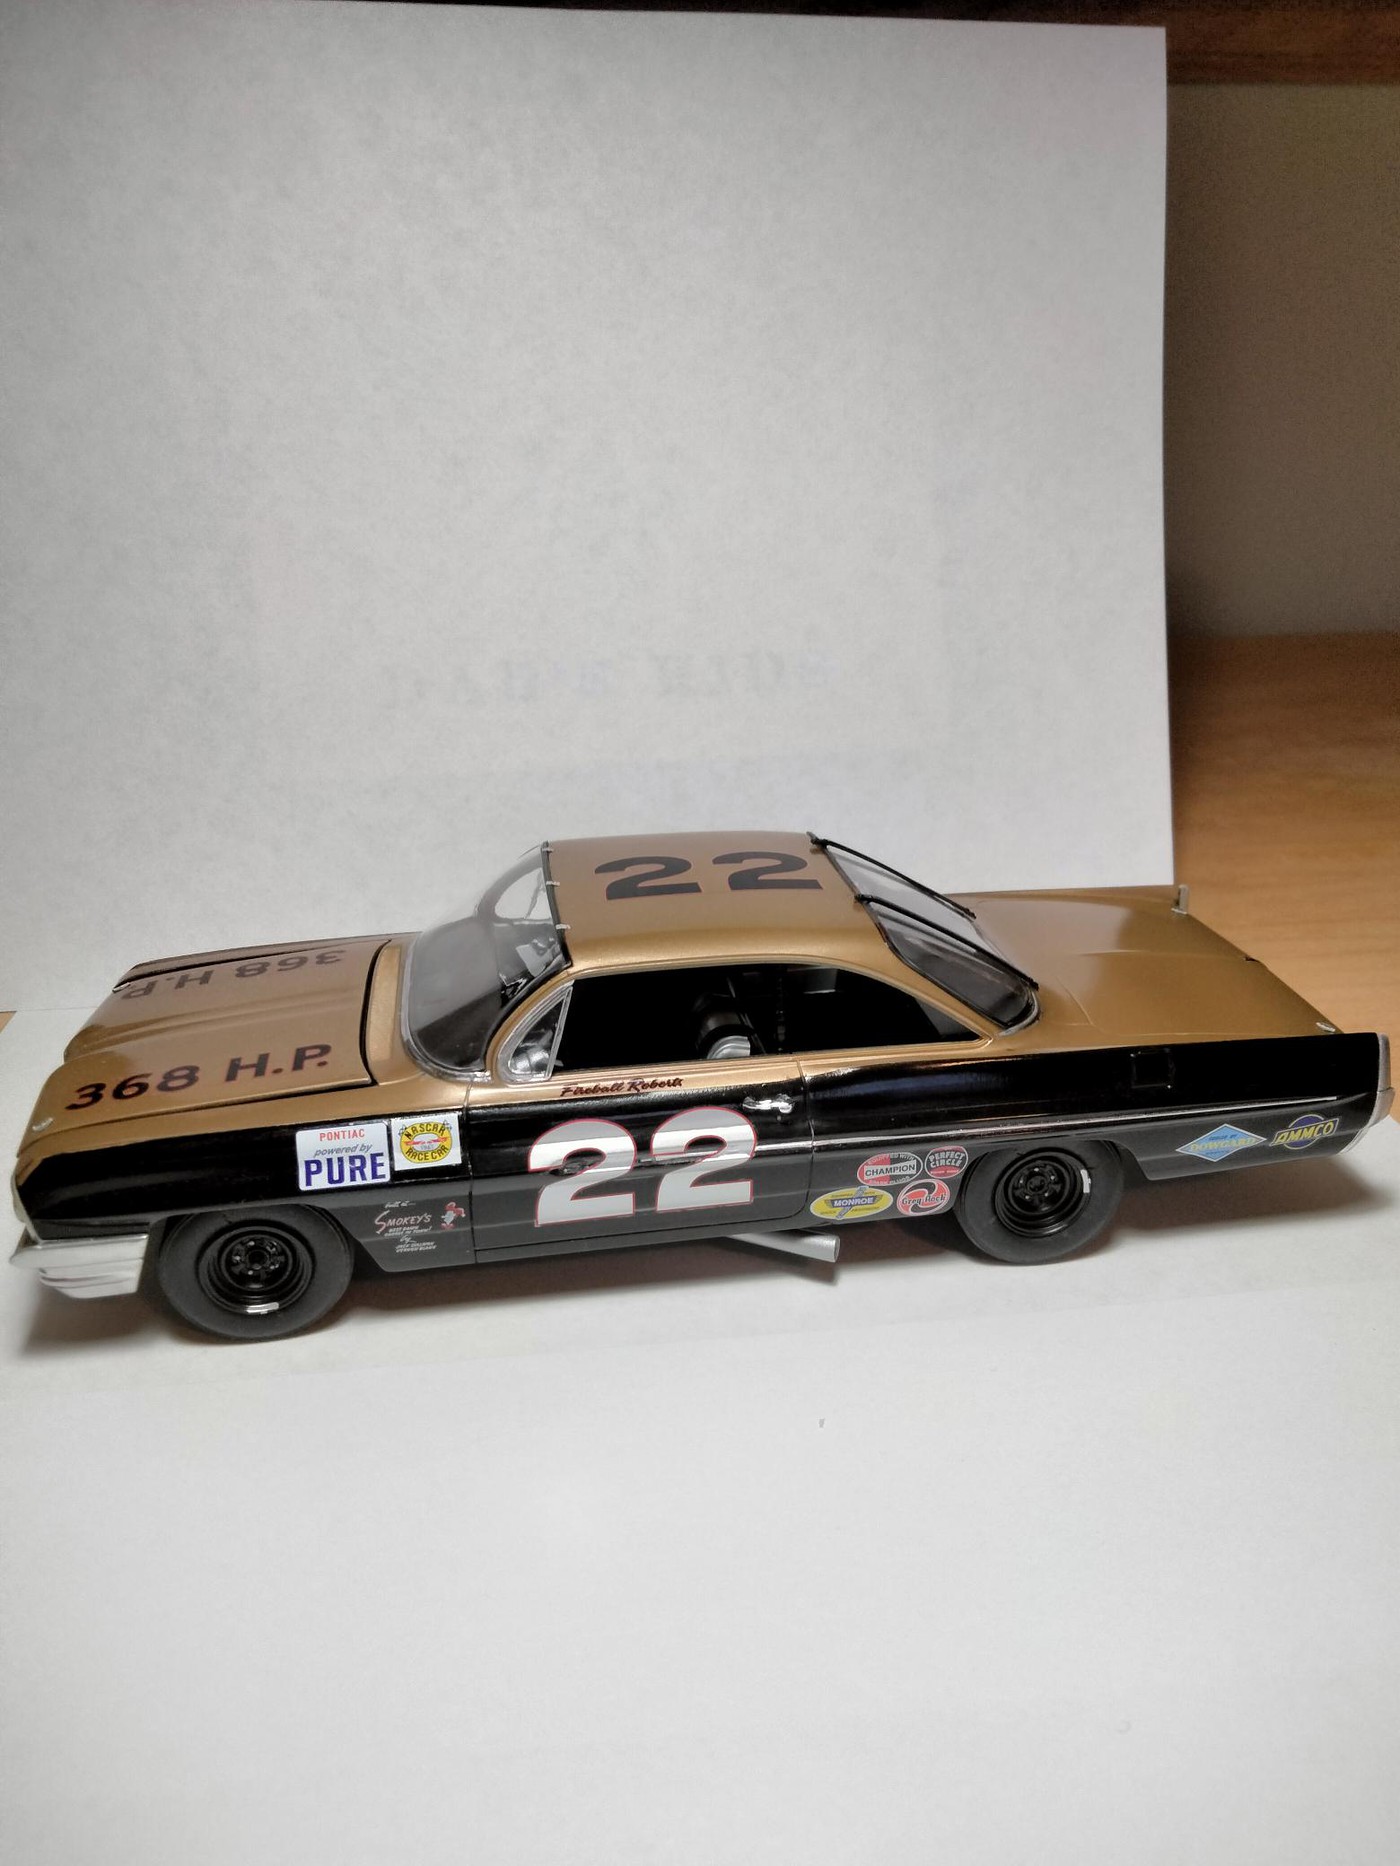 [/img] [/img]
[img]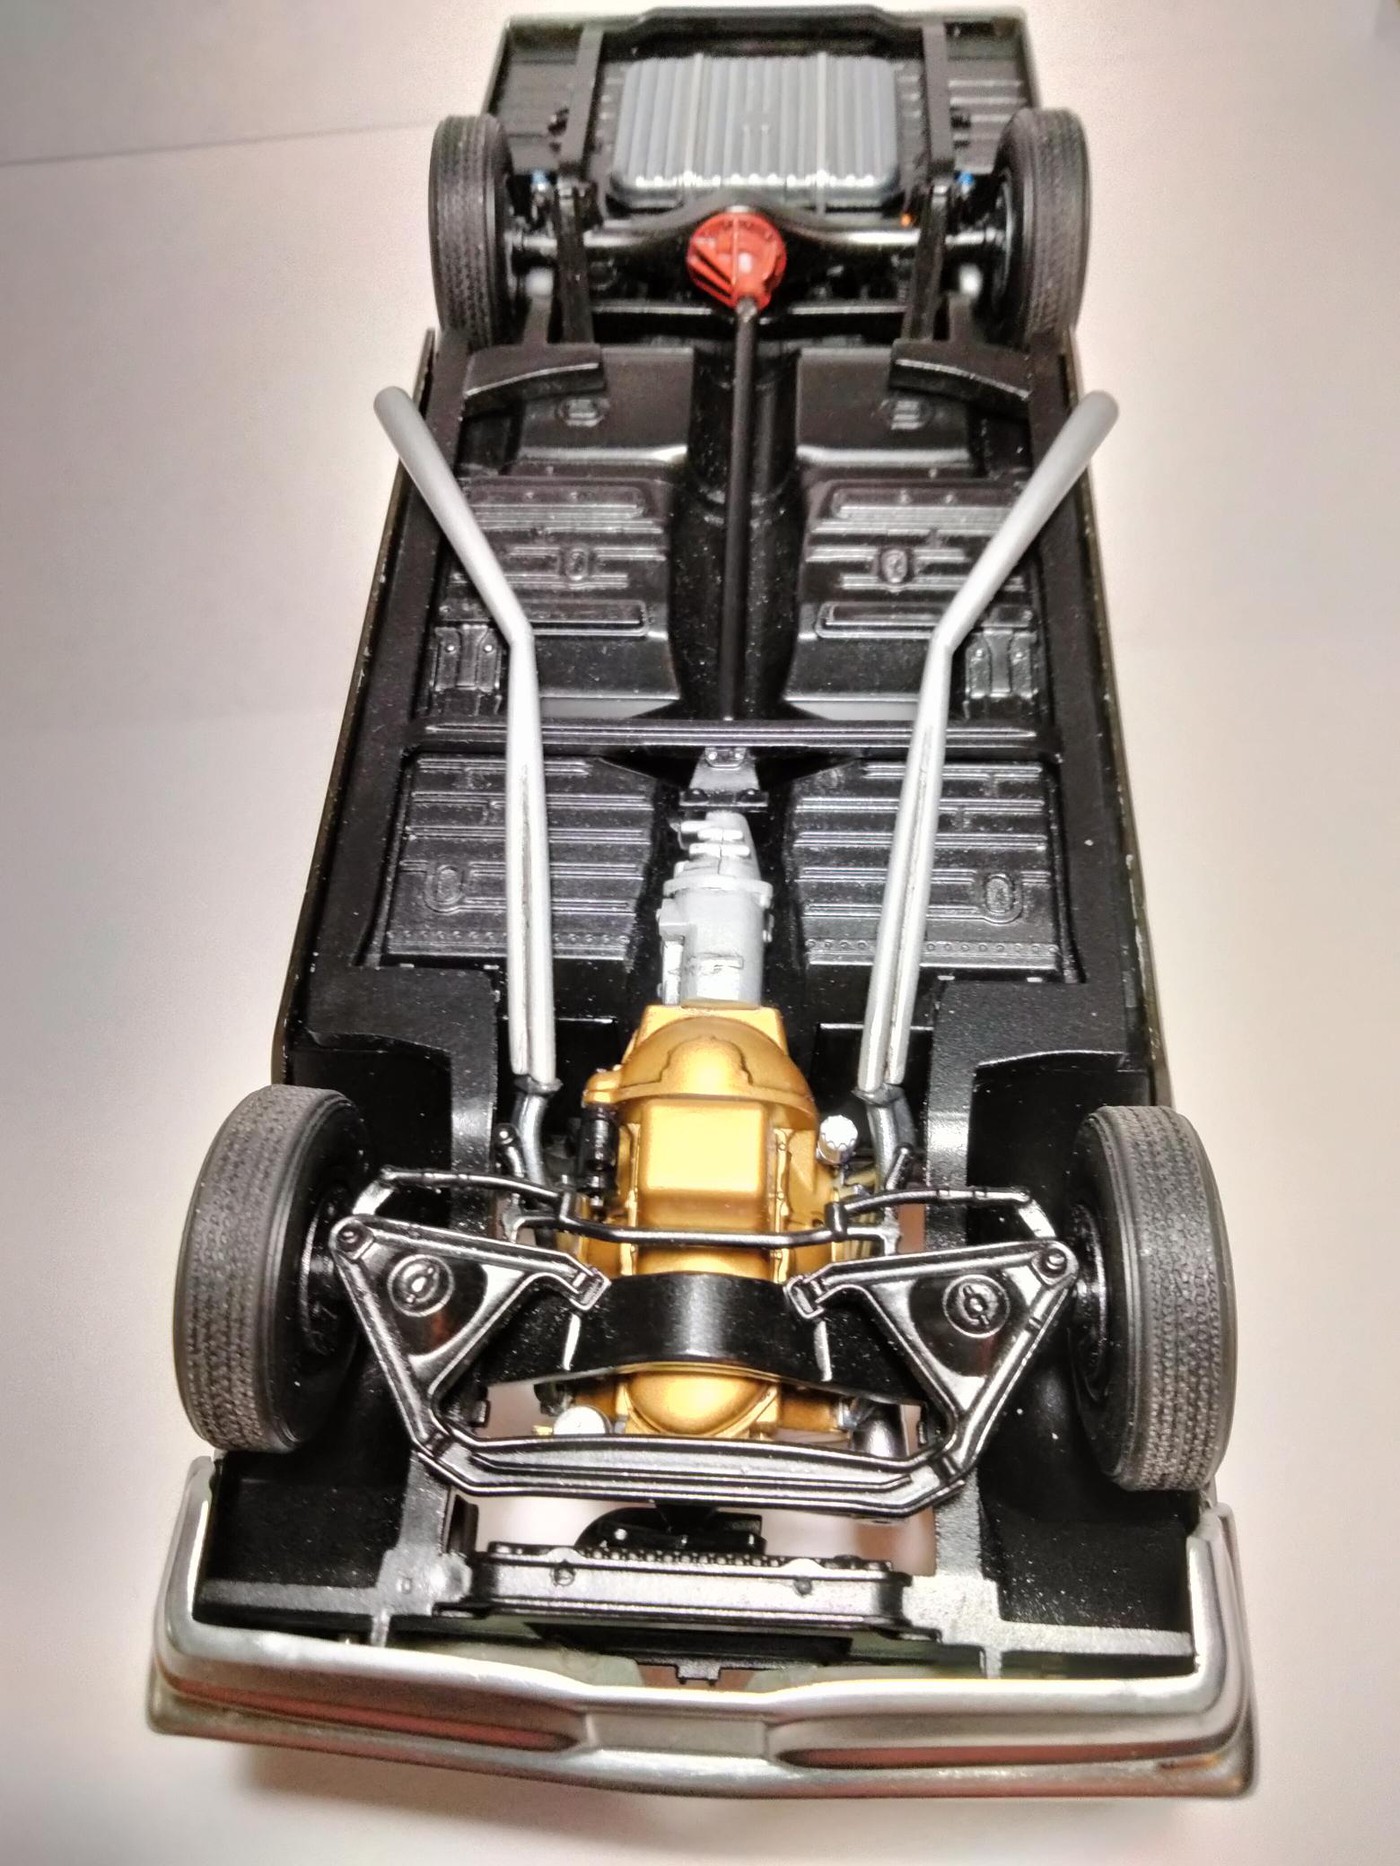 [/img] [/img] |
|
| Back to top |
|
|
elcejay
Joined: 24 Sep 2021
Posts: 97
Location: Brisbane, Australia
|
| Posted: Mon Nov 28, 2022 12:01 pm Post subject: |
|
|
| Thank you Neal. It looks even better in close-up. Love it! |
|
| Back to top |
|
|
elcejay
Joined: 24 Sep 2021
Posts: 97
Location: Brisbane, Australia
|
| Posted: Mon Nov 28, 2022 12:08 pm Post subject: |
|
|
I have to ask...
You have given us some high resolution photos there, Neal. Warts and all. A gorgeous bit of airbrushing. I cannot see any outline on the Powerslide decals at all. Did you use a clear coat over the top of them, or do you have a technique for decal application that you could share? It looks superb. |
|
| Back to top |
|
|
Firefly

Joined: 28 Jan 2018
Posts: 814
Location: New Jersey
|
| Posted: Tue Nov 29, 2022 9:00 pm Post subject: |
|
|
Super clean build! 
_________________
Bill Jobson is my real name. |
|
| Back to top |
|
|
nengelman
Joined: 14 Jul 2018
Posts: 47
|
| Posted: Sat Dec 03, 2022 4:46 pm Post subject: |
|
|
Elcejay,
I prefer not to clear coat after applying decals. I don't think a super high gloss finish is quite as accurate for this era. I did use some decal setting solution, sparingly, on several of the decals to help them set, especially the door numbers, to get them to snuggle into the concave door, (the most challenging part of the build)!
I really like this kit and learned a lot that I would do differently on the next build. All of the issues I ran into were on my part and not the fault of the kit. You'll notice that the wheels are not aligned properly-too much camber  The model sits on all four wheels, but in the process, I let the epoxy dry before realizing that the wheels were not aligned properly-very embarrassing but thankfully not really noticeable as the model sits. The model sits on all four wheels, but in the process, I let the epoxy dry before realizing that the wheels were not aligned properly-very embarrassing but thankfully not really noticeable as the model sits.
I used a black Sharpie for outlining the front and back window. It worked well, but when I used Fantastic for cleaning up the decals after they dried, some got too close to the windows and seeped underneath, removing the black "ink", (where it appears 'reddish") which you can clearly see in the photos. I learned my lesson.
Besides airbrushing the body, it was the first time I ever stripped chrome from the bumpers and sanded off the mold lines, then resprayed with Green Stuff World chrome finish, and was pleased with the results. I also used Tamiya black panel line accent to add some depth to the engine, rear differential carrier and other parts and felt that turned out well also. Lastly, I used Tamiya weathering masters to add some dry brushing effects to the interior, chassis and engine compartment. It looks a little strange in the photos, but I like how it looks on the model.
I'm glad I stepped out and tried some new things. Looking forward to trying these techniques on my next build with what I hope will be improved results. Thanks for your interest! |
|
| Back to top |
|
|
|

