| View previous topic :: View next topic |
| Author |
Message |
JWVD5953
Joined: 06 Nov 2018
Posts: 365
Location: Florida
|
 Posted: Tue Nov 06, 2018 11:47 pm Post subject: Fireball Roberts '57 Ford---Revell kit Posted: Tue Nov 06, 2018 11:47 pm Post subject: Fireball Roberts '57 Ford---Revell kit |
 |
|
Been a few years, I re-registered, forgot my old PW anyways. I believe I used John53 but wasn't sure so I am JWVD5953. Is Bill from N.C. still around? Mongo? He use to help me on dark side builds. Anyways I am starting the Revell kit of Fireball Roberts, pretty much OOB but I am going to
run the exhausts through the trunk and out the tail lights. I know it's not a totally accurate kit but it'll get me back into the swing of things. So far the engine is built. Here is what I have done.---John


 |
|
| Back to top |
|
 |
JWVD5953
Joined: 06 Nov 2018
Posts: 365
Location: Florida
|
| Posted: Tue Nov 06, 2018 11:51 pm Post subject: |
|
|
More engine pics.---John


 |
|
| Back to top |
|
|
JWVD5953
Joined: 06 Nov 2018
Posts: 365
Location: Florida
|
| Posted: Wed Nov 07, 2018 10:08 am Post subject: |
|
|
More work done. I have the engine on the frame and exhausts cut where they will enter the trunk. What color is the floor pan-trunk area on the undersides, black or red?---John


_________________
I hear the voices and obey |
|
| Back to top |
|
|
Shunter

Joined: 27 Jan 2018
Posts: 461
|
| Posted: Wed Nov 07, 2018 2:14 pm Post subject: |
|
|
| Great start, yet to get this kit and this build helps me think its a must have |
|
| Back to top |
|
|
Firefly

Joined: 28 Jan 2018
Posts: 813
Location: New Jersey
|
| Posted: Thu Nov 08, 2018 10:44 pm Post subject: |
|
|
Now I want one of these, too!
_________________
Bill Jobson is my real name. |
|
| Back to top |
|
|
TG
Guest
|
| Posted: Thu Nov 08, 2018 11:33 pm Post subject: |
|
|
| I think that's one of the best, if not the best kit Revell ever did. Definitely a must. |
|
| Back to top |
|
|
JWVD5953
Joined: 06 Nov 2018
Posts: 365
Location: Florida
|
| Posted: Wed Nov 14, 2018 9:33 pm Post subject: |
|
|
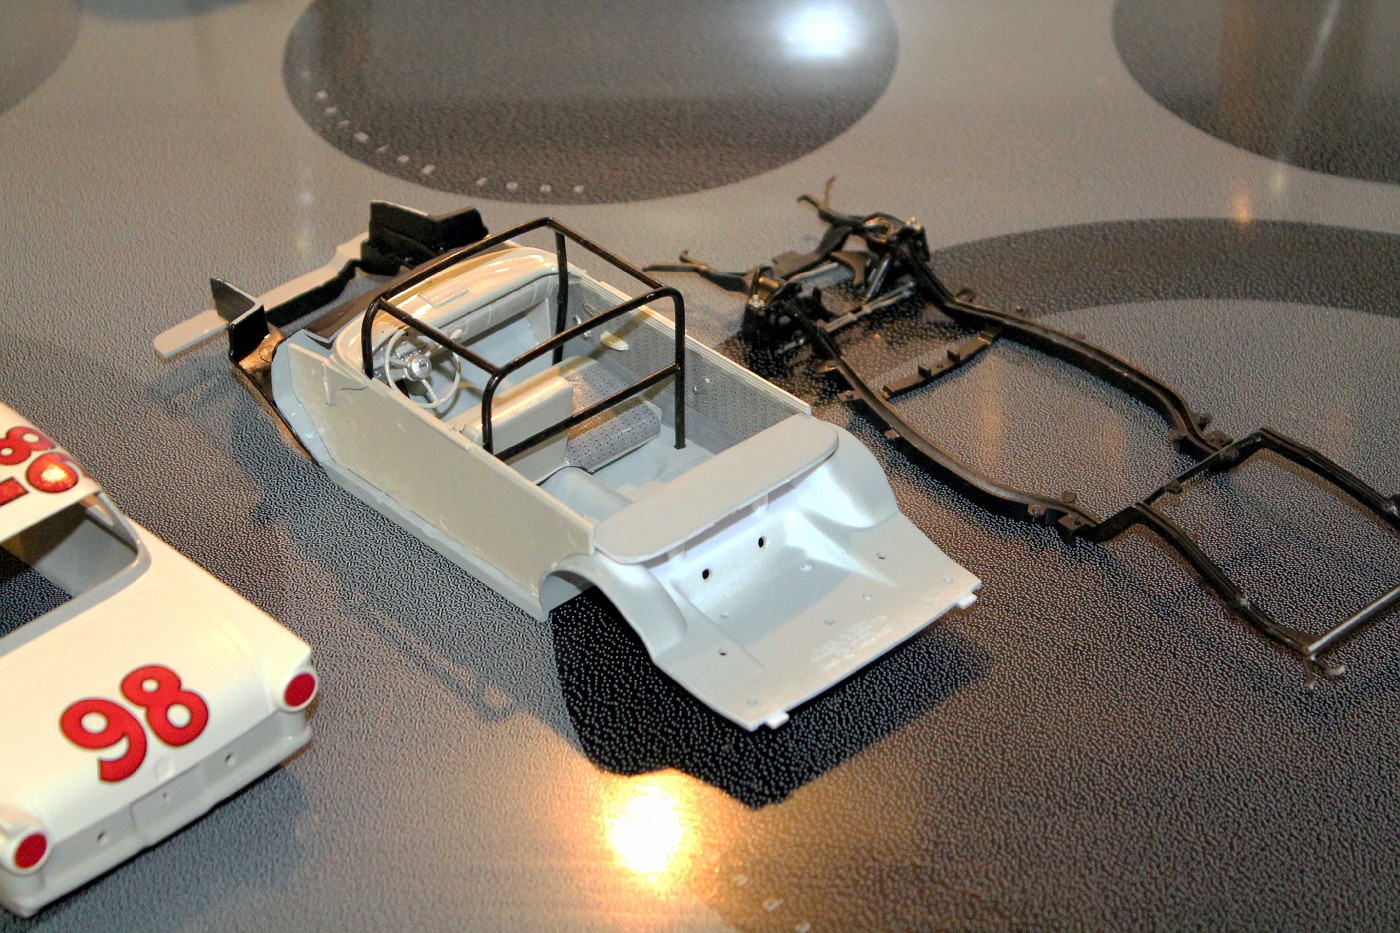
Chassis all glued up and drying.---John

_________________
I hear the voices and obey |
|
| Back to top |
|
|
JWVD5953
Joined: 06 Nov 2018
Posts: 365
Location: Florida
|
| Posted: Thu Nov 15, 2018 11:16 am Post subject: |
|
|
I reattached the exhausts and they are cut off to enter the trunk. Now to make the stubs coming out the tail lights' bezels.---John


_________________
I hear the voices and obey |
|
| Back to top |
|
|
JWVD5953
Joined: 06 Nov 2018
Posts: 365
Location: Florida
|
| Posted: Sat Nov 17, 2018 12:29 pm Post subject: |
|
|
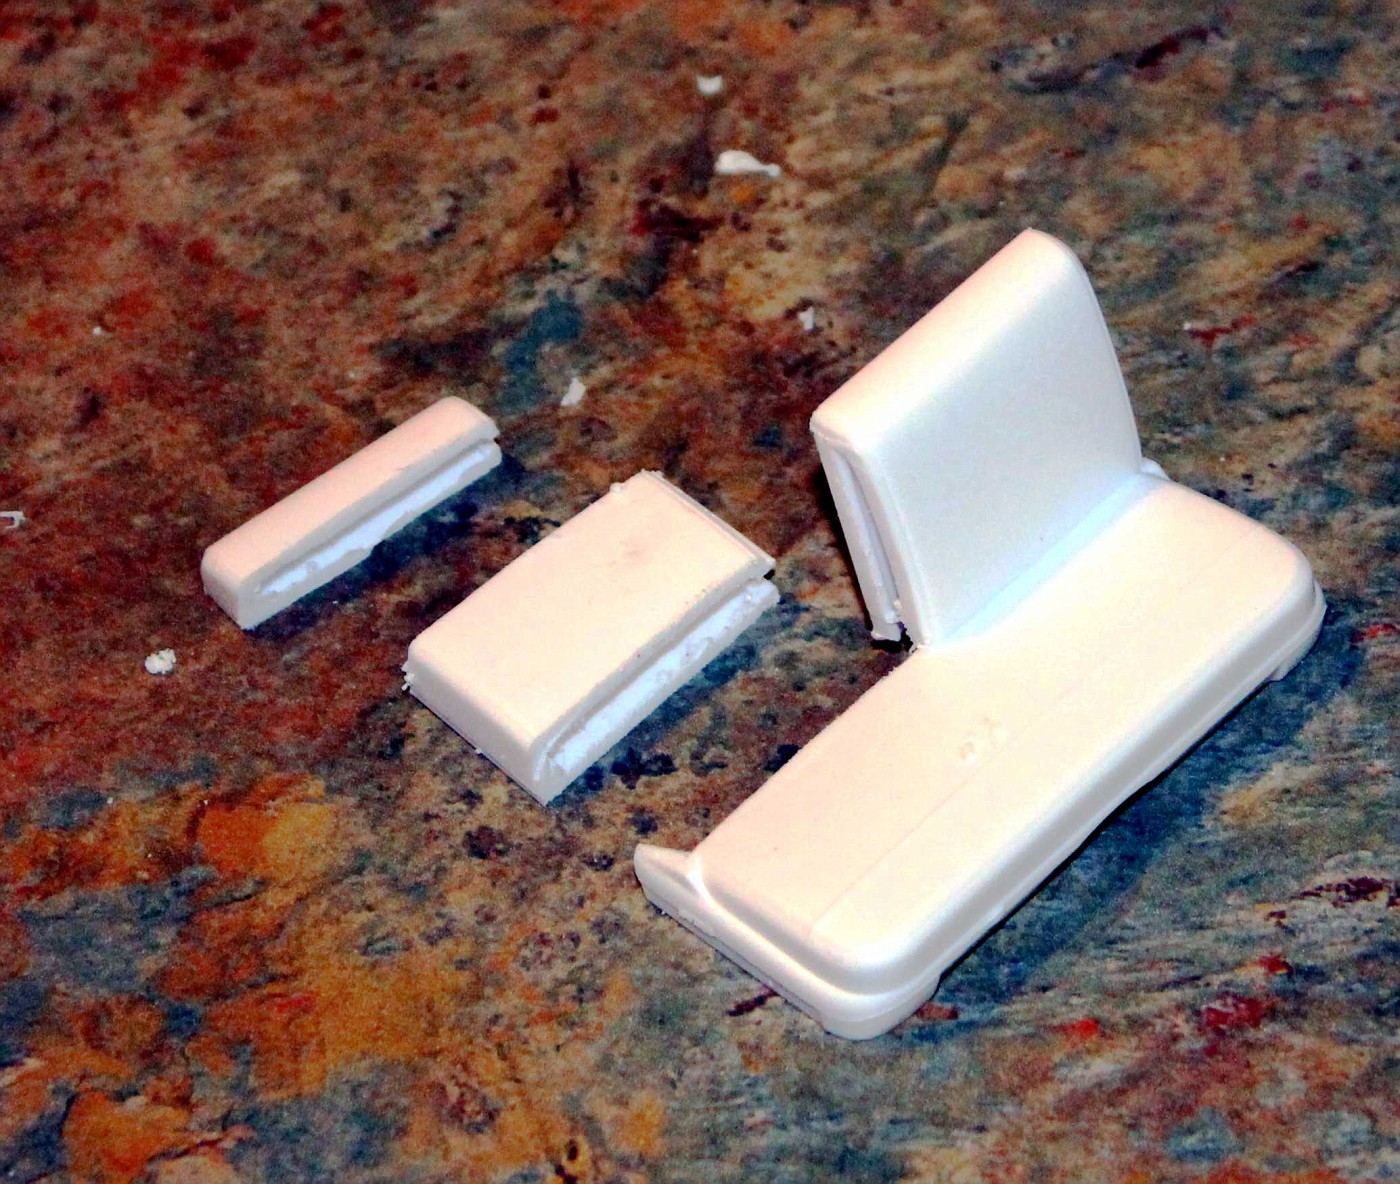
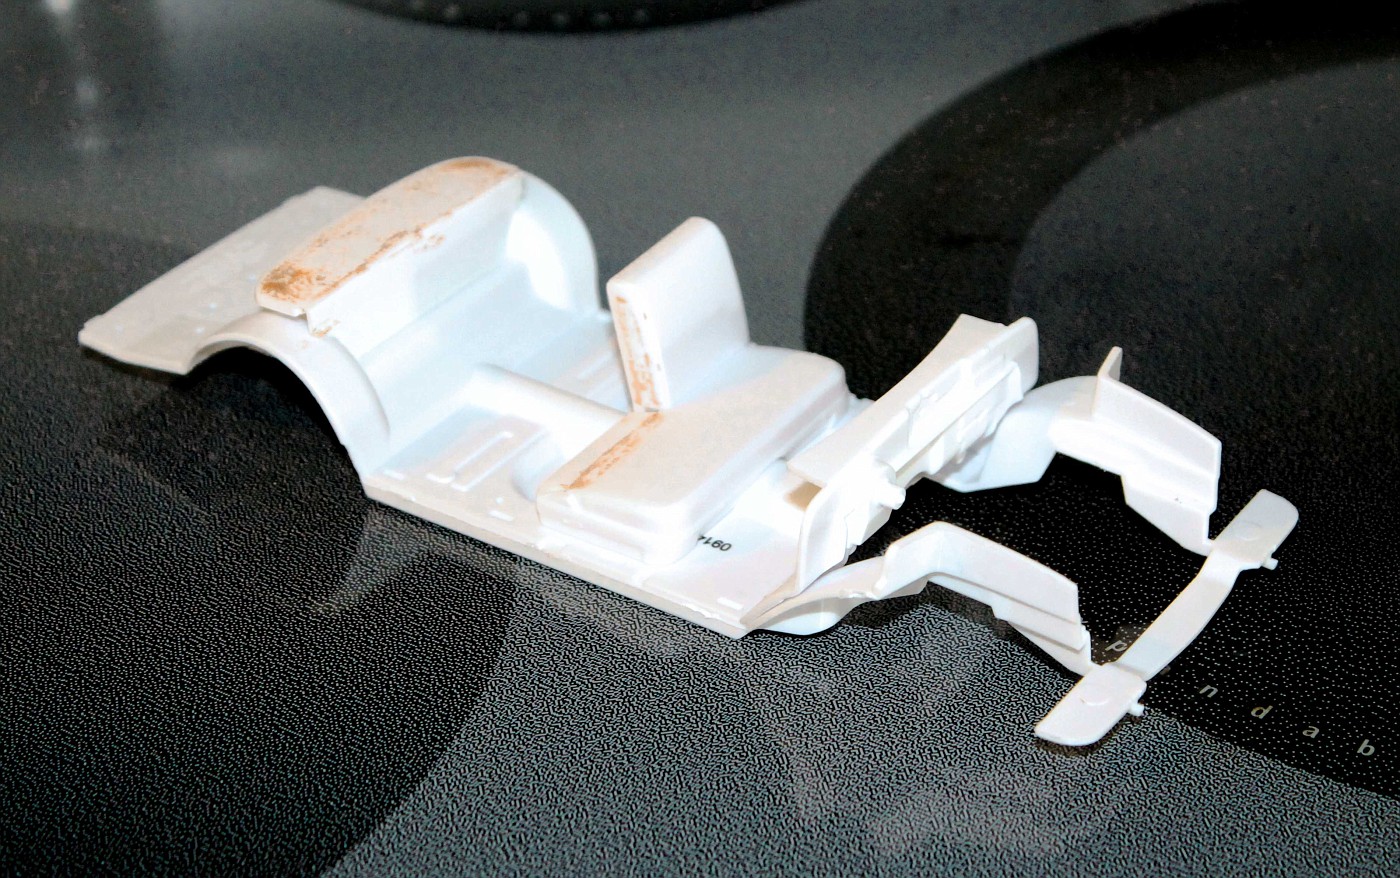
I started the interior. I'm not sure how accurate this is
but I really don't have time to investigate it thoroughly.
So it is what it is. I have the seat built and decaled plus
the door panels painted and decaled.---John

_________________
I hear the voices and obey |
|
| Back to top |
|
|
JWVD5953
Joined: 06 Nov 2018
Posts: 365
Location: Florida
|
| Posted: Sat Nov 17, 2018 12:34 pm Post subject: |
|
|
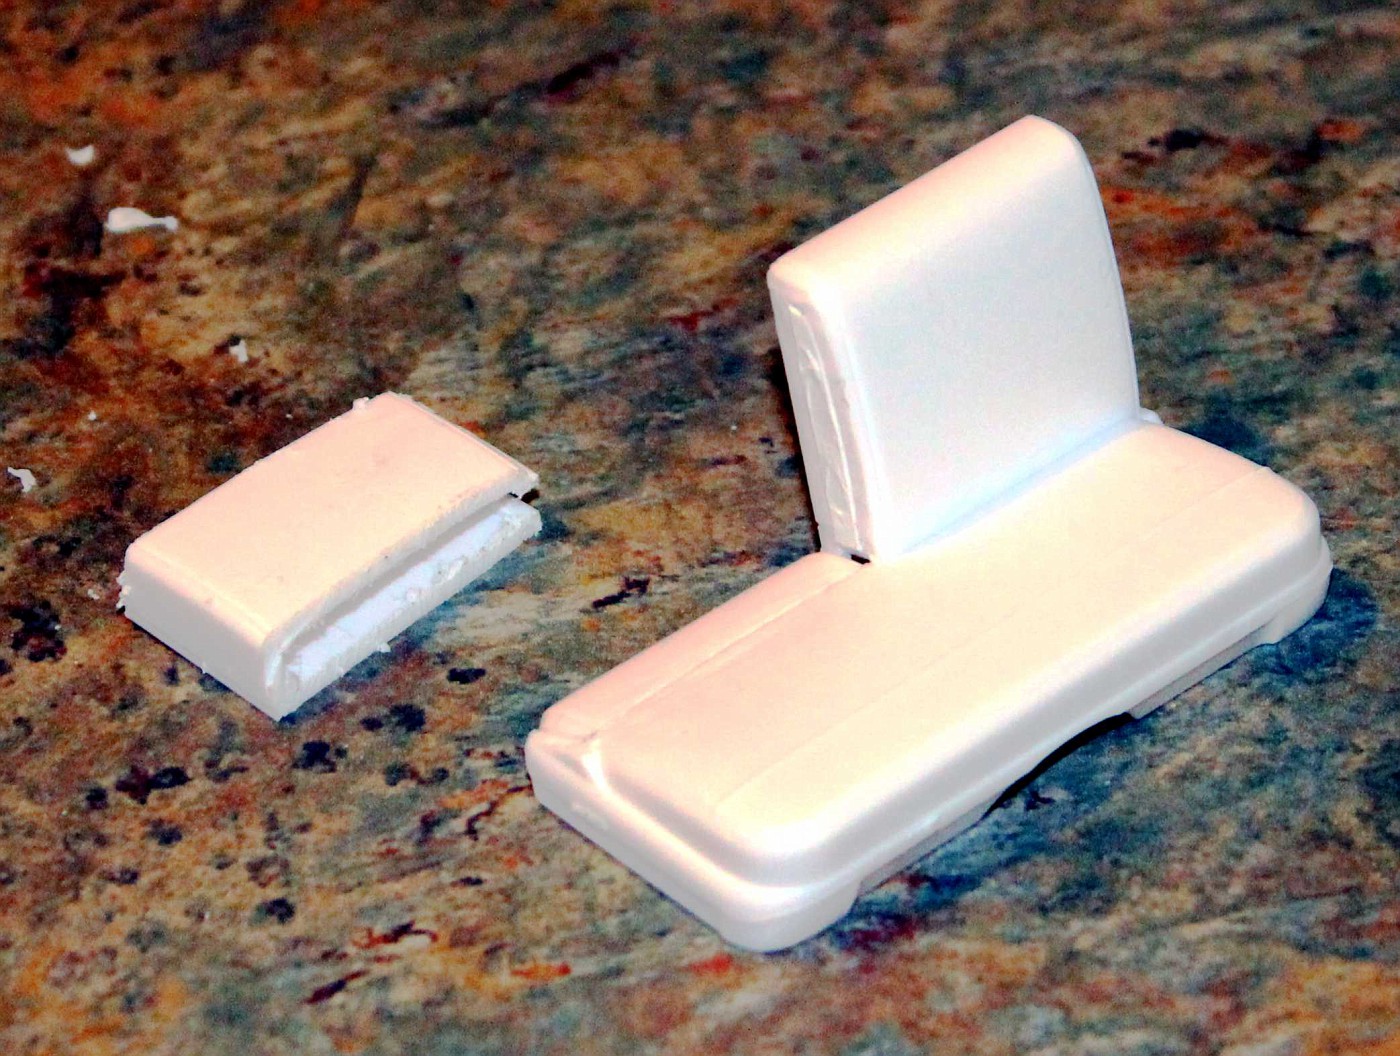
I am very suspicious of the colors. Revell calls out for the
interior as semi gloss black, the box top shows it red. I
have a strange feeling it was red, but have no real proof.---John
_________________
I hear the voices and obey |
|
| Back to top |
|
|
octopusmotor

Joined: 19 Mar 2018
Posts: 111
|
| Posted: Sat Nov 17, 2018 2:17 pm Post subject: |
|
|
I contribute this with the necessary warning that this is a latter-day replica of the real car. However, I post it because I can't find any decent color sources for the real one, and the guy appears to have done some homework:
https://www.hotrod.com/articles/ctrp-0711-fireball-grand-national/
Click on "View All 18 Photos" for detailed images. He interpreted the dashboard as red, the seats as white or cream (with the gray patterned inserts), and the floorboard as black.
Jodie Peeler |
|
| Back to top |
|
|
JWVD5953
Joined: 06 Nov 2018
Posts: 365
Location: Florida
|
| Posted: Sat Nov 17, 2018 2:35 pm Post subject: |
|
|
Thanks, been there. What bothers me is his exhaust is wrong!
The original went through the trunk and exited through the tail
light bezels. On the old board here someone explained it to me.
They had images of another '57 done that same way.---John
_________________
I hear the voices and obey |
|
| Back to top |
|
|
JWVD5953
Joined: 06 Nov 2018
Posts: 365
Location: Florida
|
| Posted: Sat Nov 17, 2018 2:44 pm Post subject: |
|
|
Like this. The rest of his replica looks believable.---John

_________________
I hear the voices and obey |
|
| Back to top |
|
|
Bill J

Joined: 28 Jan 2018
Posts: 393
|
| Posted: Sat Nov 17, 2018 3:54 pm Post subject: |
|
|
The Revell Ford is a great kit, even with a few errors. I think they based the kit on that replica that was in the Hot Rod article. Which would be why the car model has mufflers and the wrong exhaust outlets.
All that is fixable. The one thing I did not at all like about the kit is the seat. They made the seat to look like one half of the seat back is removed. The thing is, the seat back was OVER the seat, not behind it, so taking half the seat back off would result in the actual seat still being the same width as the other side, if that makes sense.
Adding Mike's decals really helps this car and gives some other driver options as well. |
|
| Back to top |
|
|
JWVD5953
Joined: 06 Nov 2018
Posts: 365
Location: Florida
|
| Posted: Sat Nov 17, 2018 5:22 pm Post subject: |
|
|
Thanks. I knew of most of the errors and can live with them. I do remember it mentioned about the mufflers, luckily this won't be a contest car, pretty much a "curb model" close enough for me. I have way too many other half completed models and not a lot of time to do them. I still want to do his purple car, Bill was helping me with that but it got side tracked years ago.Thanks again.---John
_________________
I hear the voices and obey |
|
| Back to top |
|
|
JWVD5953
Joined: 06 Nov 2018
Posts: 365
Location: Florida
|
| Posted: Sun Nov 18, 2018 11:52 am Post subject: |
|
|
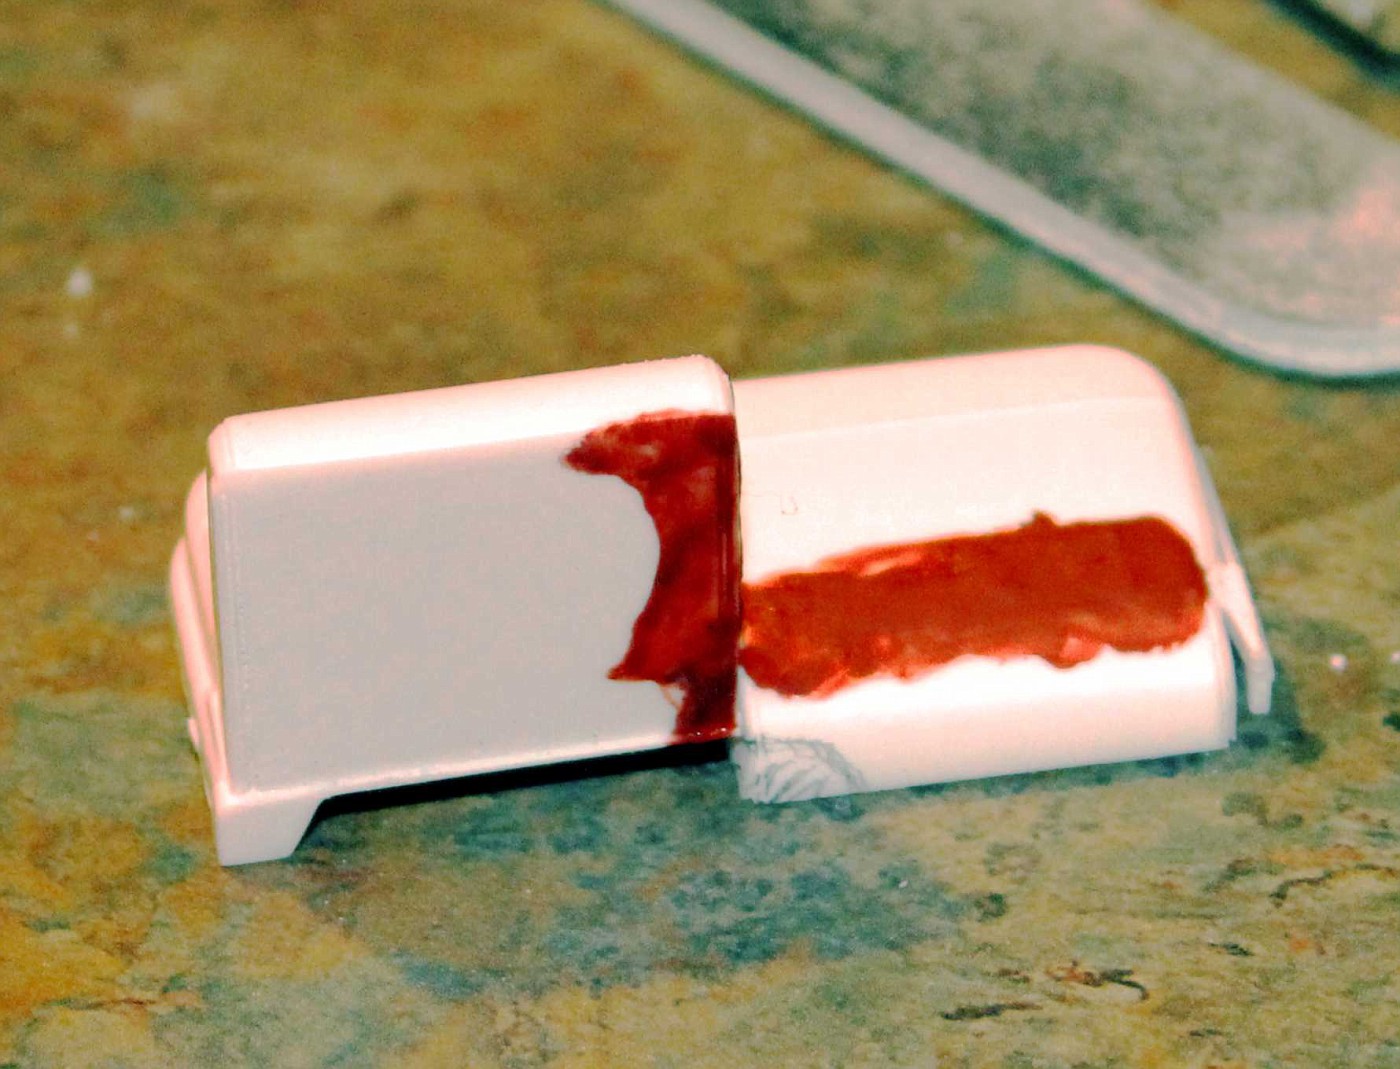
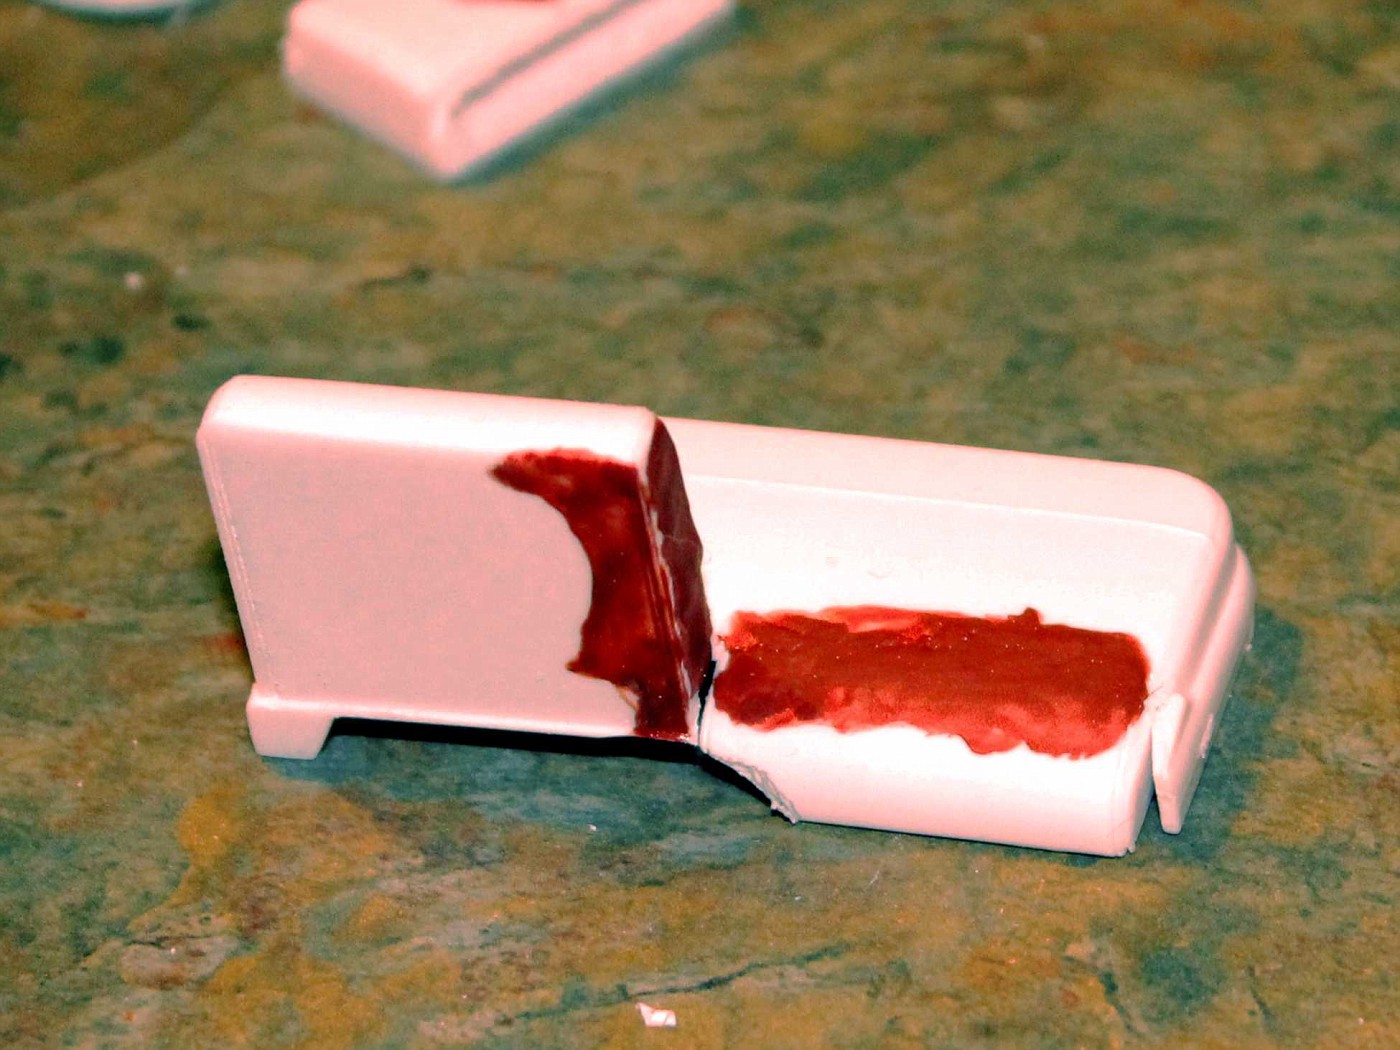
Tub mostly done, just need to add the dash. I think my red color is
too orange. I need to change it to a more red and darker one at that.---John

_________________
I hear the voices and obey |
|
| Back to top |
|
|
Tom M.
Board Moderator
Joined: 01 Feb 2018
Posts: 606
|
| Posted: Sun Nov 18, 2018 1:28 pm Post subject: |
|
|
| Bill J wrote: | ...The one thing I did not at all like about the kit is the seat. They made the seat to look like one half of the seat back is removed. The thing is, the seat back was OVER the seat, not behind it, so taking half the seat back off would result in the actual seat still being the same width as the other side, if that makes sense.
Adding Mike's decals really helps this car and gives some other driver options as well. |
I built my first one from the stock kit and I modified it just that way. I was disappointed that the race version missed that obvious detail. It was pretty simple, I cut off the passenger seatback then cut the top of the seatback off to extend the seat bottom. You also have to add the clearance for the driveshaft tunnel in the part that is added to the seat bottom. I used extra seat upholstery decals for the passenger seat back to extend the seat bottom upholstery.
 |
|
| Back to top |
|
|
Bill J
Joined: 28 Jan 2018
Posts: 393
|
| Posted: Sun Nov 18, 2018 3:47 pm Post subject: |
|
|
That came out nice Tom. I did the same on my 55 Chrysler and my 57 Chevy Black Widow.
I did build one showroom stock 57 Ford and was pleased with the kit. I painted it the grey and white like your racer. I was shooting for the simple transportation look  |
|
| Back to top |
|
|
JWVD5953
Joined: 06 Nov 2018
Posts: 365
Location: Florida
|
| Posted: Sun Nov 18, 2018 8:39 pm Post subject: |
|
|
Thanks for the info and pictures. Is that roll cage what Revell
should have in their kit? The kit one looks awful skimpy.---John
_________________
I hear the voices and obey |
|
| Back to top |
|
|
Dennis O
Board Moderator
Joined: 28 Jan 2018
Posts: 882
Location: Louisville, Ky.
|
| Posted: Mon Nov 19, 2018 11:32 am Post subject: |
|
|
It builds out to a reasonably good local bullring car from the 60's.....I like the kit.

_________________
Dennis
Artificial Intelligence is no match for Natural Stupidity....... |
|
| Back to top |
|
|
JWVD5953
Joined: 06 Nov 2018
Posts: 365
Location: Florida
|
| Posted: Tue Nov 20, 2018 1:51 pm Post subject: |
|
|
The chassis and engine are done. On to the body.---John

_________________
I hear the voices and obey |
|
| Back to top |
|
|
JWVD5953
Joined: 06 Nov 2018
Posts: 365
Location: Florida
|
| Posted: Sat Dec 01, 2018 3:29 pm Post subject: |
|
|
All masked up for the white.---John

_________________
I hear the voices and obey |
|
| Back to top |
|
|
JWVD5953
Joined: 06 Nov 2018
Posts: 365
Location: Florida
|
| Posted: Sat Dec 01, 2018 4:25 pm Post subject: |
|
|
The white's all done, looks like a snowball in a blizzard! Red next.---John

_________________
I hear the voices and obey |
|
| Back to top |
|
|
JWVD5953
Joined: 06 Nov 2018
Posts: 365
Location: Florida
|
| Posted: Sat Jan 12, 2019 3:43 pm Post subject: |
|
|
I have the red done.The masks screwed up the white paint on the trunk
so I have to wait till this dries then remask and fix a spot on the trunk.
I won't use Model Masters Custom Lacquer spray again, I'm very unhappy
with the way it went on, I coudn't find the right red in Tamiya spray. I'll
live with it. I also need to do the chrome trim, looks ragged after the masks
came off.---John

_________________
I hear the voices and obey |
|
| Back to top |
|
|
Shunter
Joined: 27 Jan 2018
Posts: 461
|
| Posted: Sat Jan 12, 2019 4:42 pm Post subject: |
|
|
| Looking greT, very nice work. |
|
| Back to top |
|
|
JWVD5953
Joined: 06 Nov 2018
Posts: 365
Location: Florida
|
| Posted: Mon Jan 14, 2019 9:42 pm Post subject: |
|
|
I still have to do the chrome trim and fix the bad spot on the
trunk lid. The kit gives you 2 metal exhaust tips for the exhaust
where it exits the rear under the bumper. I ran the exhaust through
the trunk as in the real deal so I drilled out the tail light bezels and
super glued the metal exhaust tips as per my reference photos. In
the picture you can see the bad spot, right above where the FORD logo
will go on the trunk, the trim around the rear window needs fixing
also as well as the chrome trim done.---John

_________________
I hear the voices and obey |
|
| Back to top |
|
|
dawgvet
Joined: 29 Dec 2018
Posts: 45
|
| Posted: Wed Jan 16, 2019 4:45 pm Post subject: |
|
|
LOVE watching this build! I keep meaning to pick up one of these soon. Keep
em coming! |
|
| Back to top |
|
|
JWVD5953
Joined: 06 Nov 2018
Posts: 365
Location: Florida
|
| Posted: Wed Jan 16, 2019 5:57 pm Post subject: |
|
|
Thanks, I haven't gotten crap done in a week. The
weather here in sunny Gulf Coast south central Florida
has been bone chilling! Barely made it to 60 today, went
for a bike ride and wind chill was 50ish!!!!! The good news
is the next couple days will be 70s so I can sand the trunk
and repaint. I did get the wheels on.---John


_________________
I hear the voices and obey |
|
| Back to top |
|
|
JWVD5953
Joined: 06 Nov 2018
Posts: 365
Location: Florida
|
| Posted: Fri Feb 01, 2019 3:42 pm Post subject: |
|
|
I just took the masks off the repaint of the trunk, looking good.
Now to do the trim then I can decal and gloss coat. I might start
my Kurt Bush or Mark Martin next. I have Mark's Folger car and
also a 2017 Fusion I am donating to my Kurt Bush Monster Energy
all black car. The last Kurt Bush car I did was 15 years ago.---John


_________________
I hear the voices and obey |
|
| Back to top |
|
|
JWVD5953
Joined: 06 Nov 2018
Posts: 365
Location: Florida
|
| Posted: Fri Feb 08, 2019 9:11 pm Post subject: |
|
|
The painting and chrome trim is done. Now to gloss coat
the body then decal it.---John

_________________
I hear the voices and obey |
|
| Back to top |
|
|
JWVD5953
Joined: 06 Nov 2018
Posts: 365
Location: Florida
|
| Posted: Sun Feb 10, 2019 7:41 pm Post subject: |
|
|
The gloss coat is dry and the decals are started. I'm using the
Revell kit decals, so far so good.---John

_________________
I hear the voices and obey |
|
| Back to top |
|
|
JWVD5953
Joined: 06 Nov 2018
Posts: 365
Location: Florida
|
| Posted: Mon Feb 11, 2019 11:44 am Post subject: |
|
|
The top side is all decaled.On to the sides.---John

_________________
I hear the voices and obey |
|
| Back to top |
|
|
GraphicGuy58
Joined: 12 Feb 2019
Posts: 2
|
| Posted: Tue Feb 12, 2019 9:03 pm Post subject: What color red? |
|
|
| I am gonna start this build soon. Thinking of doing the red with Krylon Cherry Red. Would this be too dark? |
|
| Back to top |
|
|
JWVD5953
Joined: 06 Nov 2018
Posts: 365
Location: Florida
|
| Posted: Wed Feb 13, 2019 12:55 pm Post subject: |
|
|
I'm not sure, do you have any pictures of Krylon Cherry Red?
The body is all decaled and ready for a gloss coat. I can then
finish it with the glass, bumpers, grill, door handles and ornaments.---John


_________________
I hear the voices and obey |
|
| Back to top |
|
|
JWVD5953
Joined: 06 Nov 2018
Posts: 365
Location: Florida
|
| Posted: Tue Feb 19, 2019 12:23 pm Post subject: |
|
|
The glass parts are done, next posting will be in The Showroom,
soon hopefully.---John


_________________
I hear the voices and obey |
|
| Back to top |
|
|
JWVD5953
Joined: 06 Nov 2018
Posts: 365
Location: Florida
|
| Posted: Tue Feb 19, 2019 8:44 pm Post subject: |
|
|
One more step before finishing, here's body to chassis.
Bumpers, door handles and ornaments will finish it.---John


_________________
I hear the voices and obey |
|
| Back to top |
|
|
JWVD5953
Joined: 06 Nov 2018
Posts: 365
Location: Florida
|
| Posted: Wed Feb 20, 2019 7:57 pm Post subject: |
|
|
It's all done. The pictures are in The Showroom.---John
_________________
I hear the voices and obey |
|
| Back to top |
|
|
|

