| View previous topic :: View next topic |
| Author |
Message |
18degrees

Joined: 01 Feb 2018
Posts: 1021
Location: metro STL area, ILLINois
|
 Posted: Fri Feb 08, 2019 9:02 pm Post subject: Bobby Allison MC questions Posted: Fri Feb 08, 2019 9:02 pm Post subject: Bobby Allison MC questions |
 |
|
Gonna embark on the reissue of the Bobby Allison Monte Carlo. Coupla questions...
Tamiya bright red and metallic gold? Or just plain ole Tamiya gold? Evidently there is a difference.
Anything i need to know about building the kit itself? Little nuances... building tips... so on.
Never built this kit before, looking for whatever help and guidance yall can offer.
Thanks!
_________________
ON DECK/IN THE WORKS: too many started to list...
 |
|
| Back to top |
|
 |
BW
Joined: 01 Feb 2018
Posts: 218
Location: Lick Creek, Alabama
|
| Posted: Fri Feb 08, 2019 11:36 pm Post subject: |
|
|
Hey 18degrees. I just used plain ol' Tamiya TS-21 Gold and TS-49 Bright Red. I always clear coat the gold with TS-13 Clear Gloss. The gold left alone cannot be polished and doesn't allow the decals to set properly (silvering) so I always clear the gold with the TS-13. The interior is semi-gloss black however, Bobby did have red interior on one car. The AMT kit chassis is pretty plain with hardly any front snout detail. There is no front suspension detail and the front metal axle runs through the engine. However, you could add detail to the front suspension by doing some kit-bashing. The rear suspension is correct with the truck short arm trailing arms. Again, you could do some detailing/kit-bashing depending on how much detail you want.
The roll cage to me is really bad. The bars are too thick and they set too low. The top halo bars hang down well below the roof line. Other than these couple of things, the kit is not bad. It's really one of my favorite kits! The body looks really accurate. The bumpers and grill look good as well. The decals in the re-issue look really accurate. However, I still use the Mike's Powerslide sheet. They are just a little bit more accurate and better quality decals. The only other things I can think of is that the rear-end sits a little low but the kit gives you spacers to adjust this. They do not put this in their instructions so you'll have to figure out how to use the spacers on your own. Some people have said the wheels are too wide. To me, they are ok but if you want better accuracy, then the PPP 5-Slot wheels are the way to go. I have used Monogram 1/24 scale nascar tire to give it a better stance but the kit tires are ok.
For me personally, the only thing I would really have to change is the roll cage. I simply take an AMT '90s era nascar cage and adapt it to fit. The lack of detail in the engine compartment doesn't bother me that much because I now build mostly shelf models and hardly ever raise the hood. In conclusion, this is one of my favorite kits because the body looks so good. This kit gives you the option of having a nice shelf model right out of the box or, if you want to go all out with kit-bashing etc., you can build a nicely detailed kit worthy of model show/contest quality. Or, anything in-between. Hope this helps and good luck with your build!
Bobby |
|
| Back to top |
|
|
AdamtheWayne
Joined: 09 Jul 2018
Posts: 1182
|
| Posted: Fri Feb 08, 2019 11:46 pm Post subject: |
|
|
18Degrees I agree with BW, especially where the gold is concerned. Additionally, If you wish to seal your decals with clear coat, start with a cured coat already on the car at least over the gold. This will help the decals adhere better (no matter how glossy you think the gold already is) and hide the edges. Metallics like gold and silver are inherently dull once cured which causes issues with decal carrier films. It will also protect against the adhesive discoloring against the gold. As always, don't ask how I know, just be happy the research has been done. 
_________________
"Dude, it's not Camelot... it's only a model." "Details man, I need details!!" |
|
| Back to top |
|
|
DaveVan
Joined: 27 Jan 2018
Posts: 1578
|
| Posted: Sat Feb 09, 2019 7:08 am Post subject: |
|
|
Correct on the colors....what I used.
On the cage...it is not great....but it was 1972 and done on the cheap by AMT.
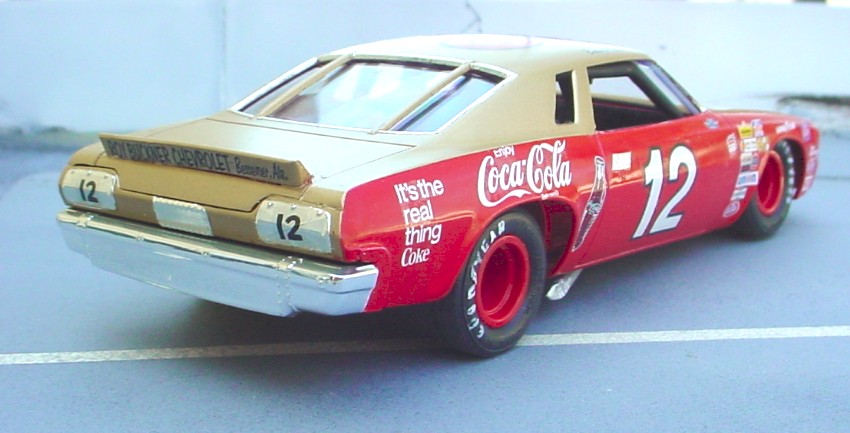
I do remove the front inner fenders, add a engine bay hoop and shocks. I keep it simple but get the 'look'. The Chevelle / Laguna is the same chassis and interior so here is my BA Laguna build....
 |
|
| Back to top |
|
|
18degrees
Joined: 01 Feb 2018
Posts: 1021
Location: metro STL area, ILLINois
|
| Posted: Sat Feb 09, 2019 9:24 pm Post subject: |
|
|
Thanks for the info and tips. I did get some PPP tires and 5 slot wheels and the Powerslide decals. Think i may end up just doing those mods, maybe not use the metal axles (replace with pieces of styrene rod) if i can make it work. Mostly because it will sit in a case on a shelf and almost all of the onlookers that visit my home dont know what the details are really supposed to look like. I havent really checked out the exhaust, may replace that with tube of some sort.
Again, thanks.
_________________
ON DECK/IN THE WORKS: too many started to list...
|
|
| Back to top |
|
|
TG
Guest
|
| Posted: Mon Feb 11, 2019 8:50 am Post subject: |
|
|
| I don't see anything in the kit that looks like spacers to raise the rear end....what do they look like? |
|
| Back to top |
|
|
DaveVan
Joined: 27 Jan 2018
Posts: 1578
|
| Posted: Mon Feb 11, 2019 9:24 am Post subject: |
|
|
| TG wrote: | | I don't see anything in the kit that looks like spacers to raise the rear end....what do they look like? |
I think what BW was talking about was old interior retainer rings that were left over from the showroom stock version of the Monte Carlo. My Chevelle, same chassis as Monte, has stock rear end setting....I lowered the front to get the right stance. |
|
| Back to top |
|
|
TG
Guest
|
| Posted: Mon Feb 11, 2019 9:54 am Post subject: |
|
|
| Okay, thanks Dave. |
|
| Back to top |
|
|
18degrees
Joined: 01 Feb 2018
Posts: 1021
Location: metro STL area, ILLINois
|
| Posted: Mon Feb 11, 2019 10:20 pm Post subject: |
|
|
I dug into this kit tonight.. man, there seems to be a lot of extra parts. and the parts trees don't have any numbers for the parts, and the instructions aren't any better, only giving you the order to put everything together.
_________________
ON DECK/IN THE WORKS: too many started to list...
|
|
| Back to top |
|
|
DaveVan
Joined: 27 Jan 2018
Posts: 1578
|
| Posted: Mon Feb 11, 2019 10:30 pm Post subject: |
|
|
| 18degrees wrote: | | I dug into this kit tonight.. man, there seems to be a lot of extra parts. and the parts trees don't have any numbers for the parts, and the instructions aren't any better, only giving you the order to put everything together. |
The AMT Monte Carlo kit was lost at one time. A mold was found that was part old NASCAR kit and part the showroom stock 71 Monte Carlo. The body and a few other parts were missing. I sent a mint Allison Monte Carlo body to China and they cloned it. I drew up the missing parts and they made them.
The Chinese did not know what was what so everything in the mold was opened up and you got odd things like the injector manifold!!
It's a pretty simple kit.....you'll not have a problem....your stuff is nice. |
|
| Back to top |
|
|
Mark C.
Joined: 16 Feb 2018
Posts: 182
|
| Posted: Tue Feb 12, 2019 12:02 am Post subject: |
|
|
| In that case I have to thank you, Dave. I was really happy to see this kit come back, so thanks for your contribution to the hobby!! |
|
| Back to top |
|
|
DaveVan
Joined: 27 Jan 2018
Posts: 1578
|
| Posted: Tue Feb 12, 2019 8:25 am Post subject: |
|
|
| Mark C. wrote: | | In that case I have to thank you, Dave. I was really happy to see this kit come back, so thanks for your contribution to the hobby!! |
I was privileged to work on the project. RC2 allowed us to so many projects back then. Model King funded the whole thing so the thanks goes to him. Other than some parts and labor I had zero $$ invested. |
|
| Back to top |
|
|
Mark C.
Joined: 16 Feb 2018
Posts: 182
|
| Posted: Tue Feb 12, 2019 10:54 am Post subject: |
|
|
| None of these projects happen by the efforts of one person alone, but you certainly had a big part in it! |
|
| Back to top |
|
|
Bobby The Cabdriver
Joined: 19 Oct 2018
Posts: 388
Location: " Keep Austin Weird?"ugh...
|
| Posted: Tue Feb 12, 2019 11:18 am Post subject: Bobby Allison's Monte Carlo |
|
|
For all of you Ford fans that build drag cars, for some strange reason known only to the people who designed the kit back in the day, one of the parts that 18 is talking about is a oversized Boss 429 style hood scoop just like the ones a lot of the Ford Pro Stock teams used in 1970.
_________________
"And on the 8th day God created the Hemi!" |
|
| Back to top |
|
|
darksidefan2
Joined: 10 Feb 2018
Posts: 11
|
| Posted: Wed Feb 13, 2019 3:58 pm Post subject: |
|
|
| Bobby, I'm glad you mentioned that.....I have the Model King version of the Monte and never looked at it that closely......I'll use that scoop on one of my drag builds! |
|
| Back to top |
|
|
Bobby The Cabdriver
Joined: 19 Oct 2018
Posts: 388
Location: " Keep Austin Weird?"ugh...
|
| Posted: Wed Feb 13, 2019 5:24 pm Post subject: Bobby Allison's Monte Carlo |
|
|
I could use one myself, I got a 69 Cougar, a cammer motor and some big slicks.... Any body make Fast Eddie Shartman decals?
_________________
"And on the 8th day God created the Hemi!" |
|
| Back to top |
|
|
joe b
Joined: 31 Jan 2018
Posts: 209
Location: New Jersey
|
| Posted: Tue Feb 19, 2019 8:53 am Post subject: |
|
|
| DaveVan wrote: | Correct on the colors....what I used.
On the cage...it is not great....but it was 1972 and done on the cheap by AMT.
I do remove the front inner fenders, add a engine bay hoop and shocks. I keep it simple but get the 'look'. The Chevelle / Laguna is the same chassis and interior so here is my BA Laguna build....
|
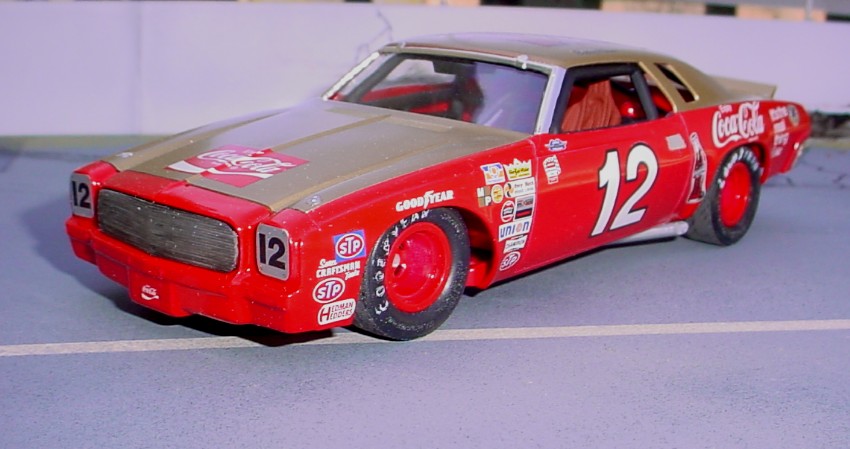
dave do you have a picture of the front of that car? i would like to see what the front bumper looks like.
thnks joe |
|
| Back to top |
|
|
DaveVan
Joined: 27 Jan 2018
Posts: 1578
|
| Posted: Tue Feb 19, 2019 9:55 am Post subject: |
|
|
a poor photo....only one I have on hand....thx
 |
|
| Back to top |
|
|
joe b
Joined: 31 Jan 2018
Posts: 209
Location: New Jersey
|
| Posted: Sat Feb 23, 2019 10:39 am Post subject: |
|
|
that's good dave, thanks. i just wanted to see what bumper you used. the kit has two but i think the other chrome bumper is intended to be used with the earlier 73 body. it probably was never omitted from the sprue when they re made the tools for the 74'
joe |
|
| Back to top |
|
|
Tom M.
Board Moderator
Joined: 01 Feb 2018
Posts: 602
|
| Posted: Sat Feb 23, 2019 10:48 am Post subject: |
|
|
| joe b wrote: | that's good dave, thanks. i just wanted to see what bumper you used. the kit has two but i think the other chrome bumper is intended to be used with the earlier 73 body. it probably was never omitted from the sprue when they re made the tools for the 74'
joe |
The chrome bumper and grille in the kit is the tall '74 Malibu version, AMT issued both chrome bumper versions and Laguna versions of both the '73 and '74 Chevelles. Chrome front and rear bumpers are different between '73 and '74, the Laguna nose is the same for both years. In the 1:1 world the urethane portion of the nose was the same for both years but the grille insert was different, the '73 had round parking lights in the grille and the '74 had square parking lights in the same location. |
|
| Back to top |
|
|
DaveVan
Joined: 27 Jan 2018
Posts: 1578
|
| Posted: Sat Feb 23, 2019 5:36 pm Post subject: |
|
|
| Both options are correct for 1974. thx |
|
| Back to top |
|
|
|

